The porch had its balustrade replaced with wrought iron. We had an old picture to guide us in making a new one. I made a full-scale mockup to show what it should look like. The project was too big for me so the owner gave my mockup to a woodworker to make. He did a […]
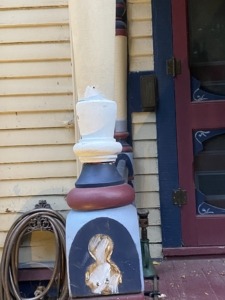
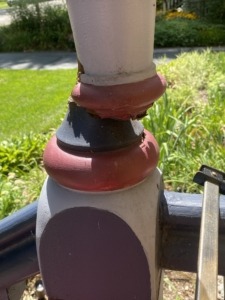
A contractor friend of mine was hired to rebuild an old house porch. One of the column bases was rotten, so he asked me to duplicate it. I can easily make round column bases on my lathe. The new column bases are shown at right.
He also asked me to make two similar ones, only smaller, for the bases of the newel posts. And he asked me to turn a little round finials for the top of the newels as seen below.


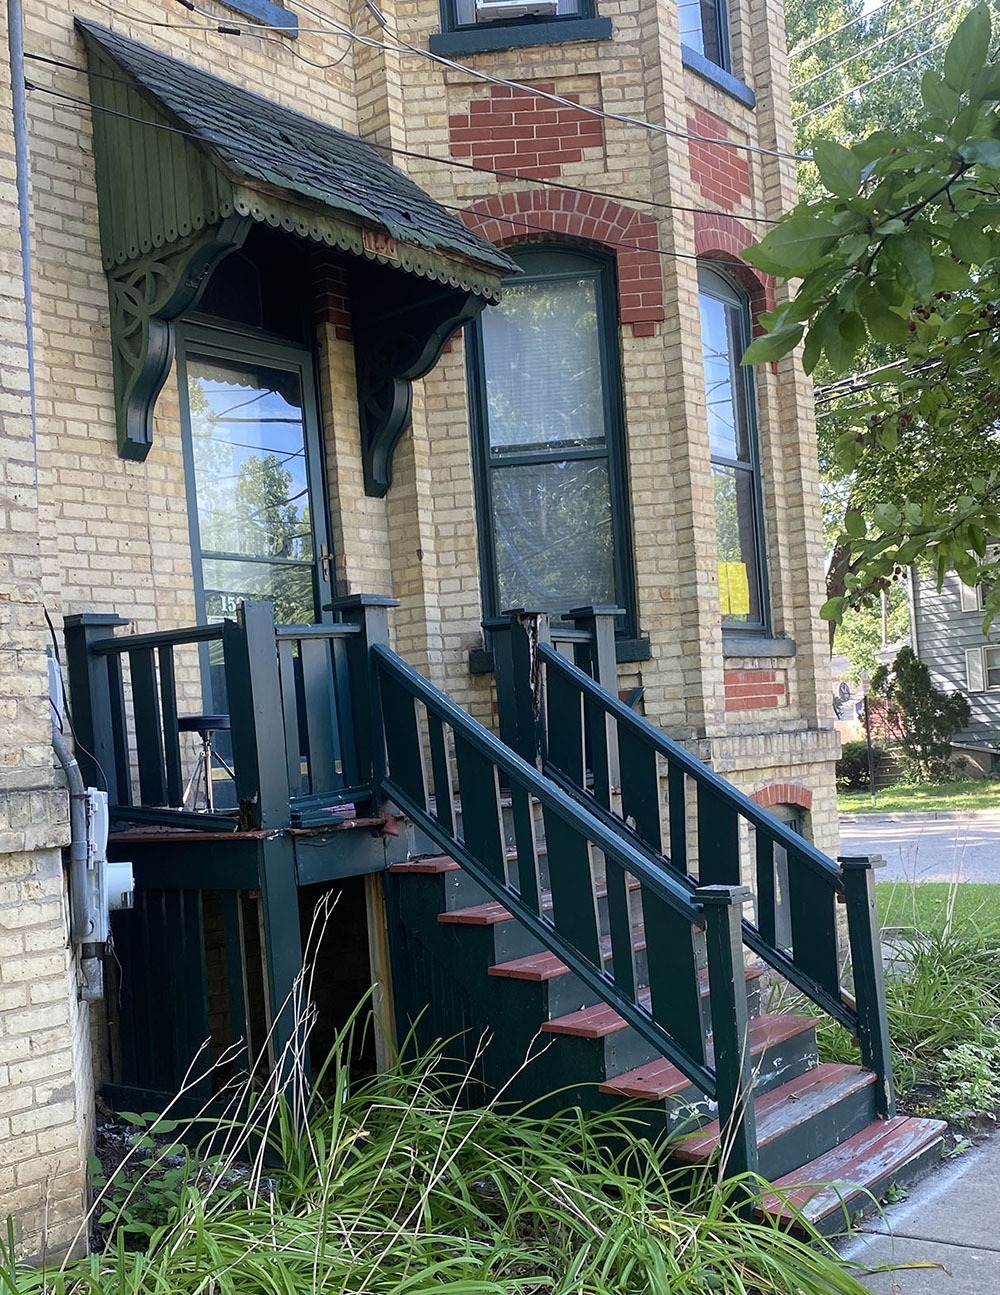
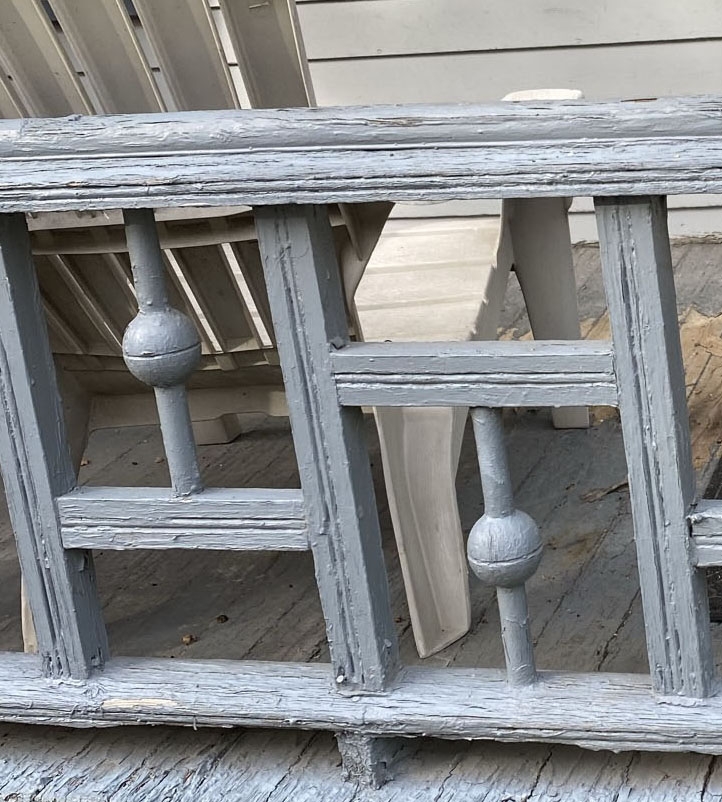
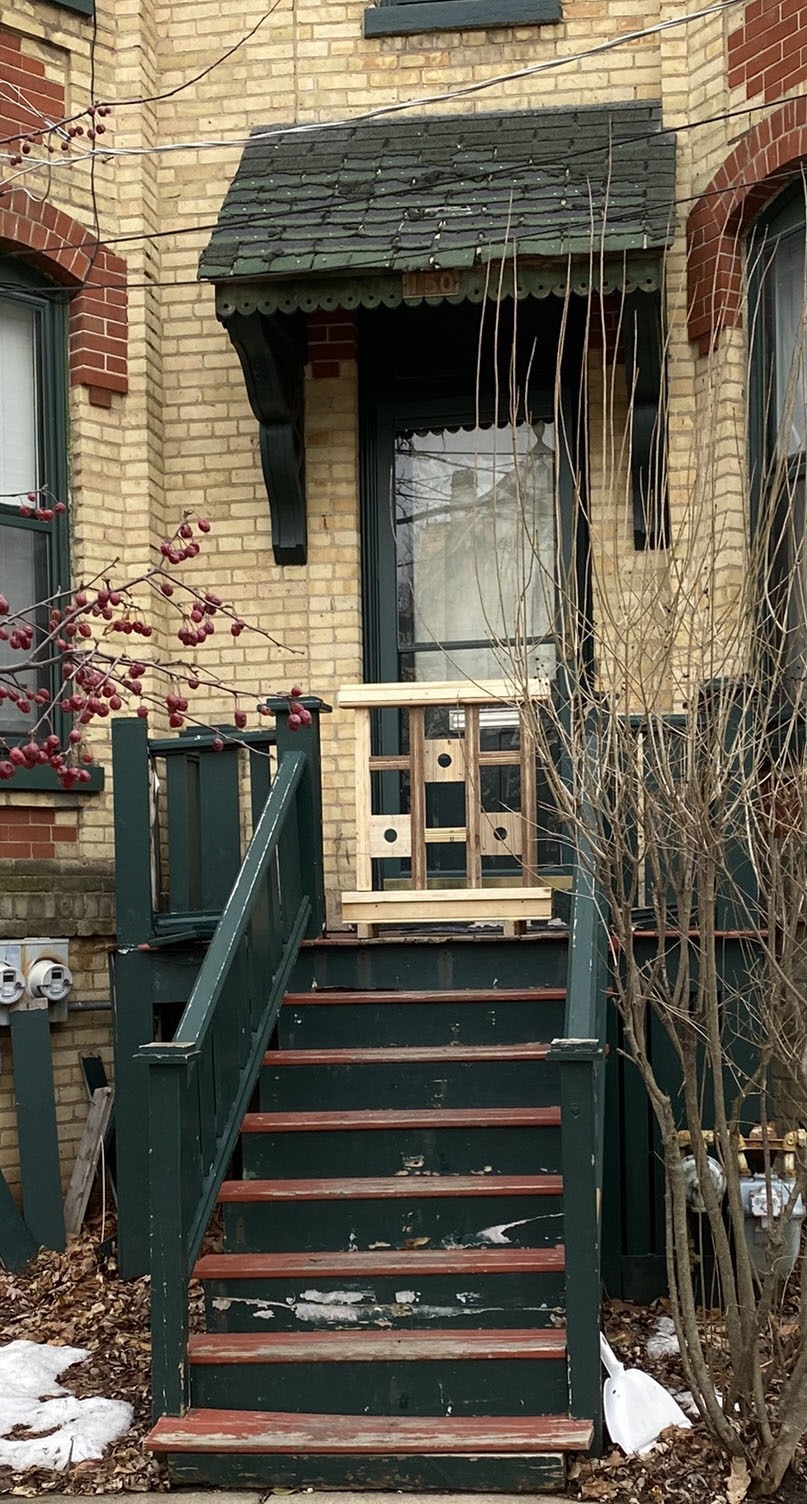
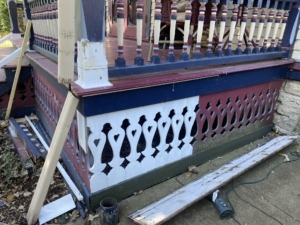
The owner of this home replaced the porch step rails with new, inappropriate details as seen below.
 There was no traditional newel post, and the balusters were nailed on the outside of the rail like modern deck builders do it. The Preservation Specialist asked the owner to redo the stair balustrade, and the owner asked me to make the parts.
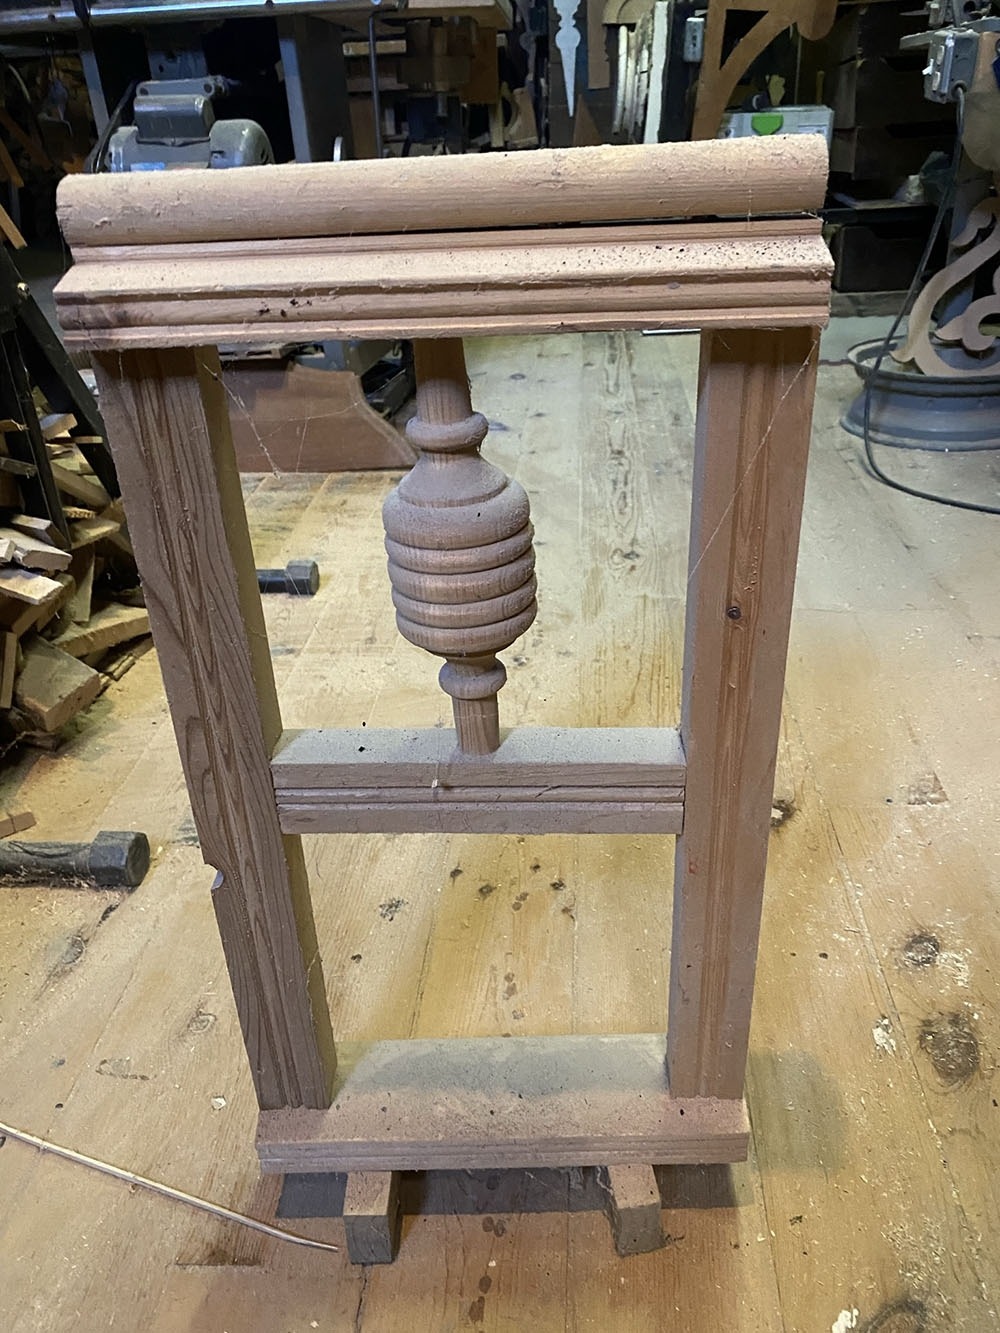
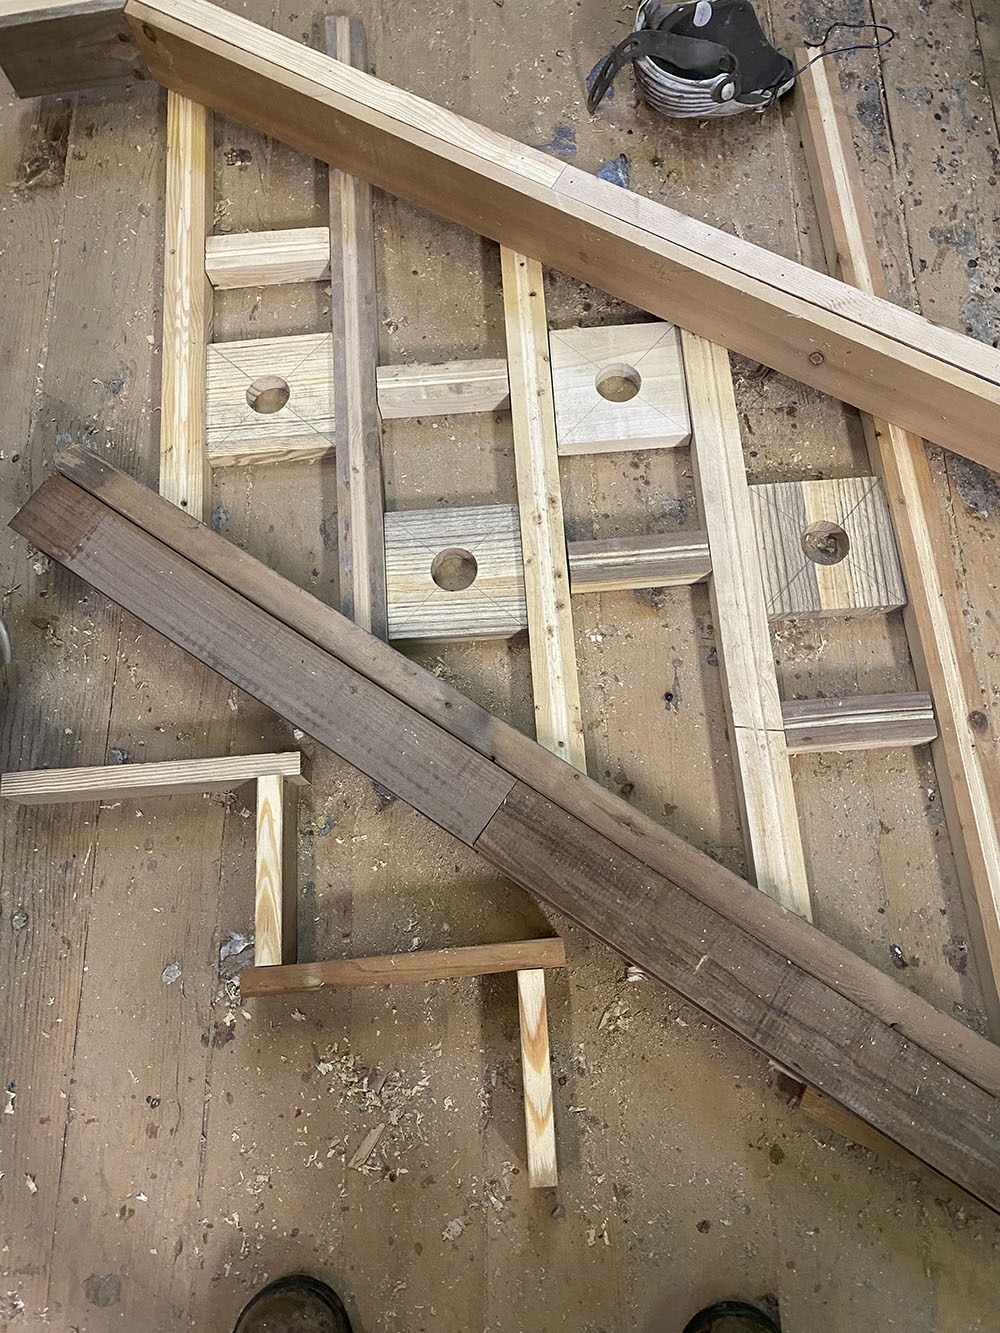
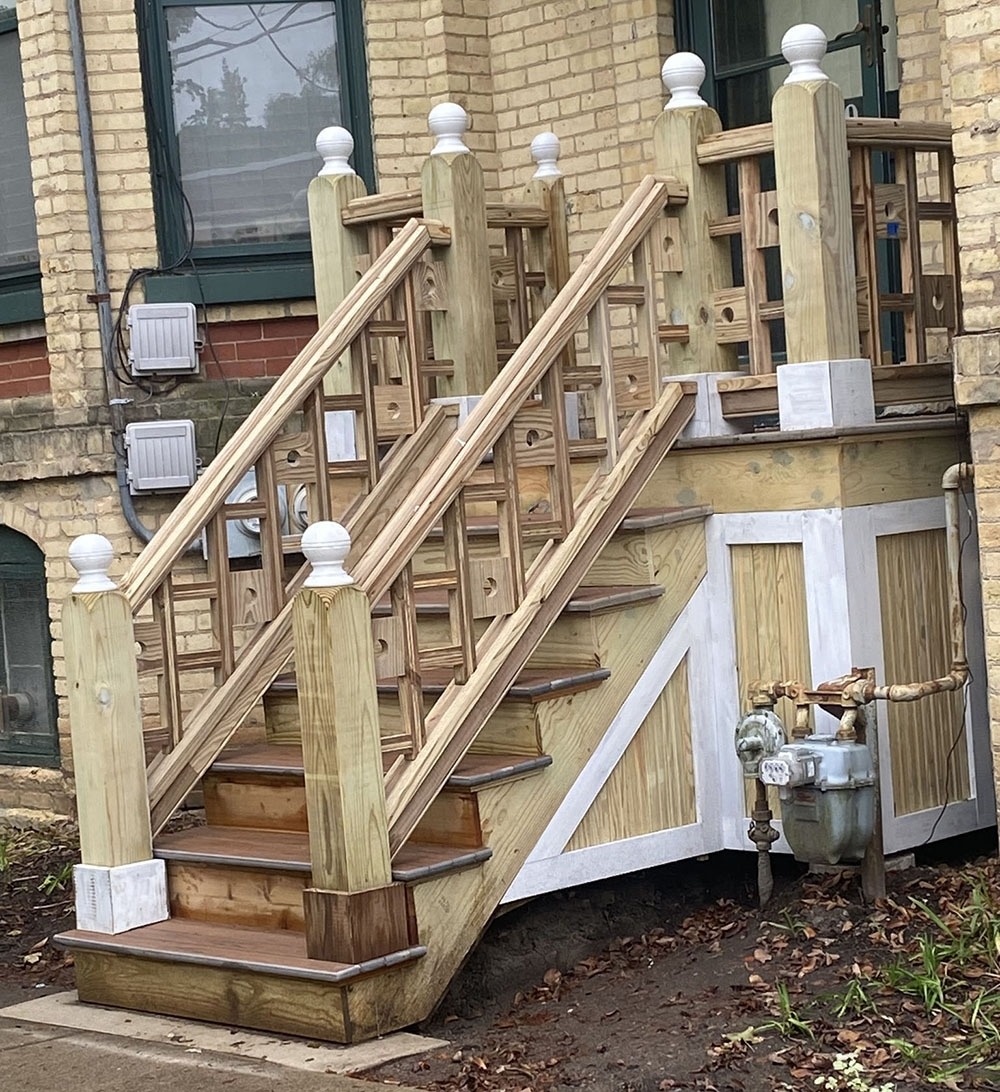
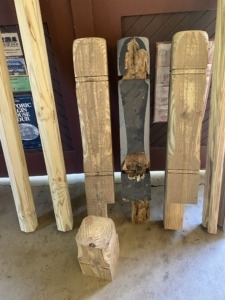
I made tapered newels, which were seen being glued up at right. All wood is treated.
![]()
![]()
![]()
![]()
![]()
![]()
![]()
![]()
![]()
![]() The treads that were used were not wide enough to accommodate a cove molding under the tread which was traditionally done. It’s a pet peeve of mine so I made new treads wide enough to accommodate a cove molding.
The treads that were used were not wide enough to accommodate a cove molding under the tread which was traditionally done. It’s a pet peeve of mine so I made new treads wide enough to accommodate a cove molding. I make a custom cove molding out of treated scraps so it will last forever. I take 2 X 12’s and cut out the vertical grain portion of the board leaving the center. I glue the pieces together then plane them to 1 1/8 inches – the traditional thickness of porch treads.
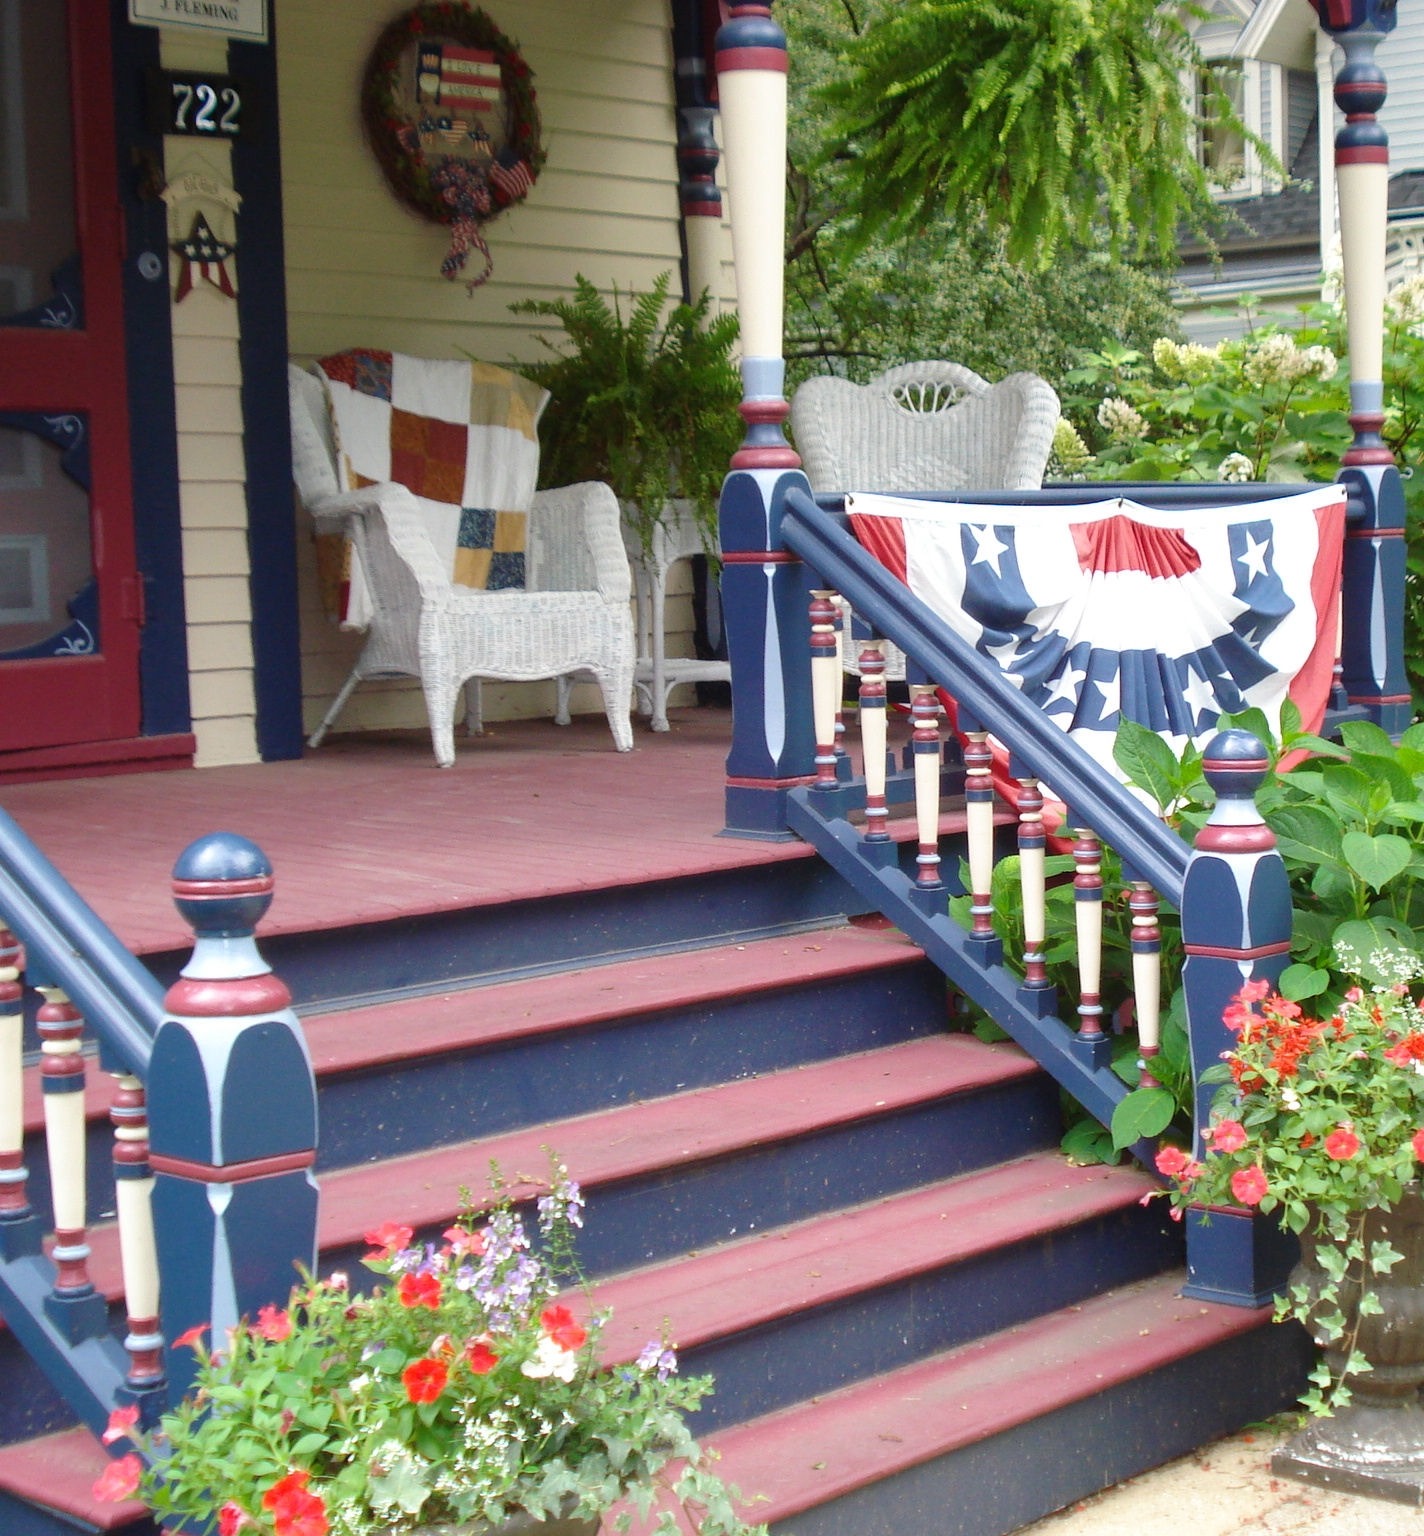
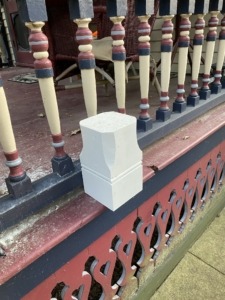
The new but inappropriate balustrade is shown at left below. A tapered newel, little cap and new balusters were attached the traditional way as seen at the right below.


After
In 2008 a woman came to the Design Review Committee with plans to add a porch to her old house. It would have had one originally, but it was long gone. Her proposed design was not appropriate. My wife was on the committee and suggested to the woman that the new porch recently built across the street from us would be an appropriate design. She took her suggestion. The house missing the porch is at left with the new porch at the right. 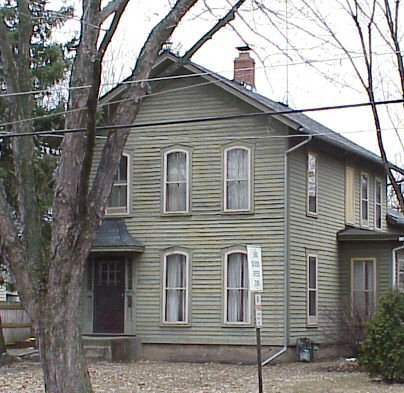 I made the brackets, posts, rails and hand turned 72 spindles for the porch. It is across the street from us, so I get to look at it every day. Very satisfying. The woman chose to go with the design of the porch on the right. She chose the same contractor that made this porch to make hers. My spindles were made from cypress and his were pine from Mr. Spindle.
She did not keep them painted and caulked so they rotted away. Her stair newel posts, rails and 12 spindles were all rotten as seen below. For five other spindles on the porch I just replaced the bottoms 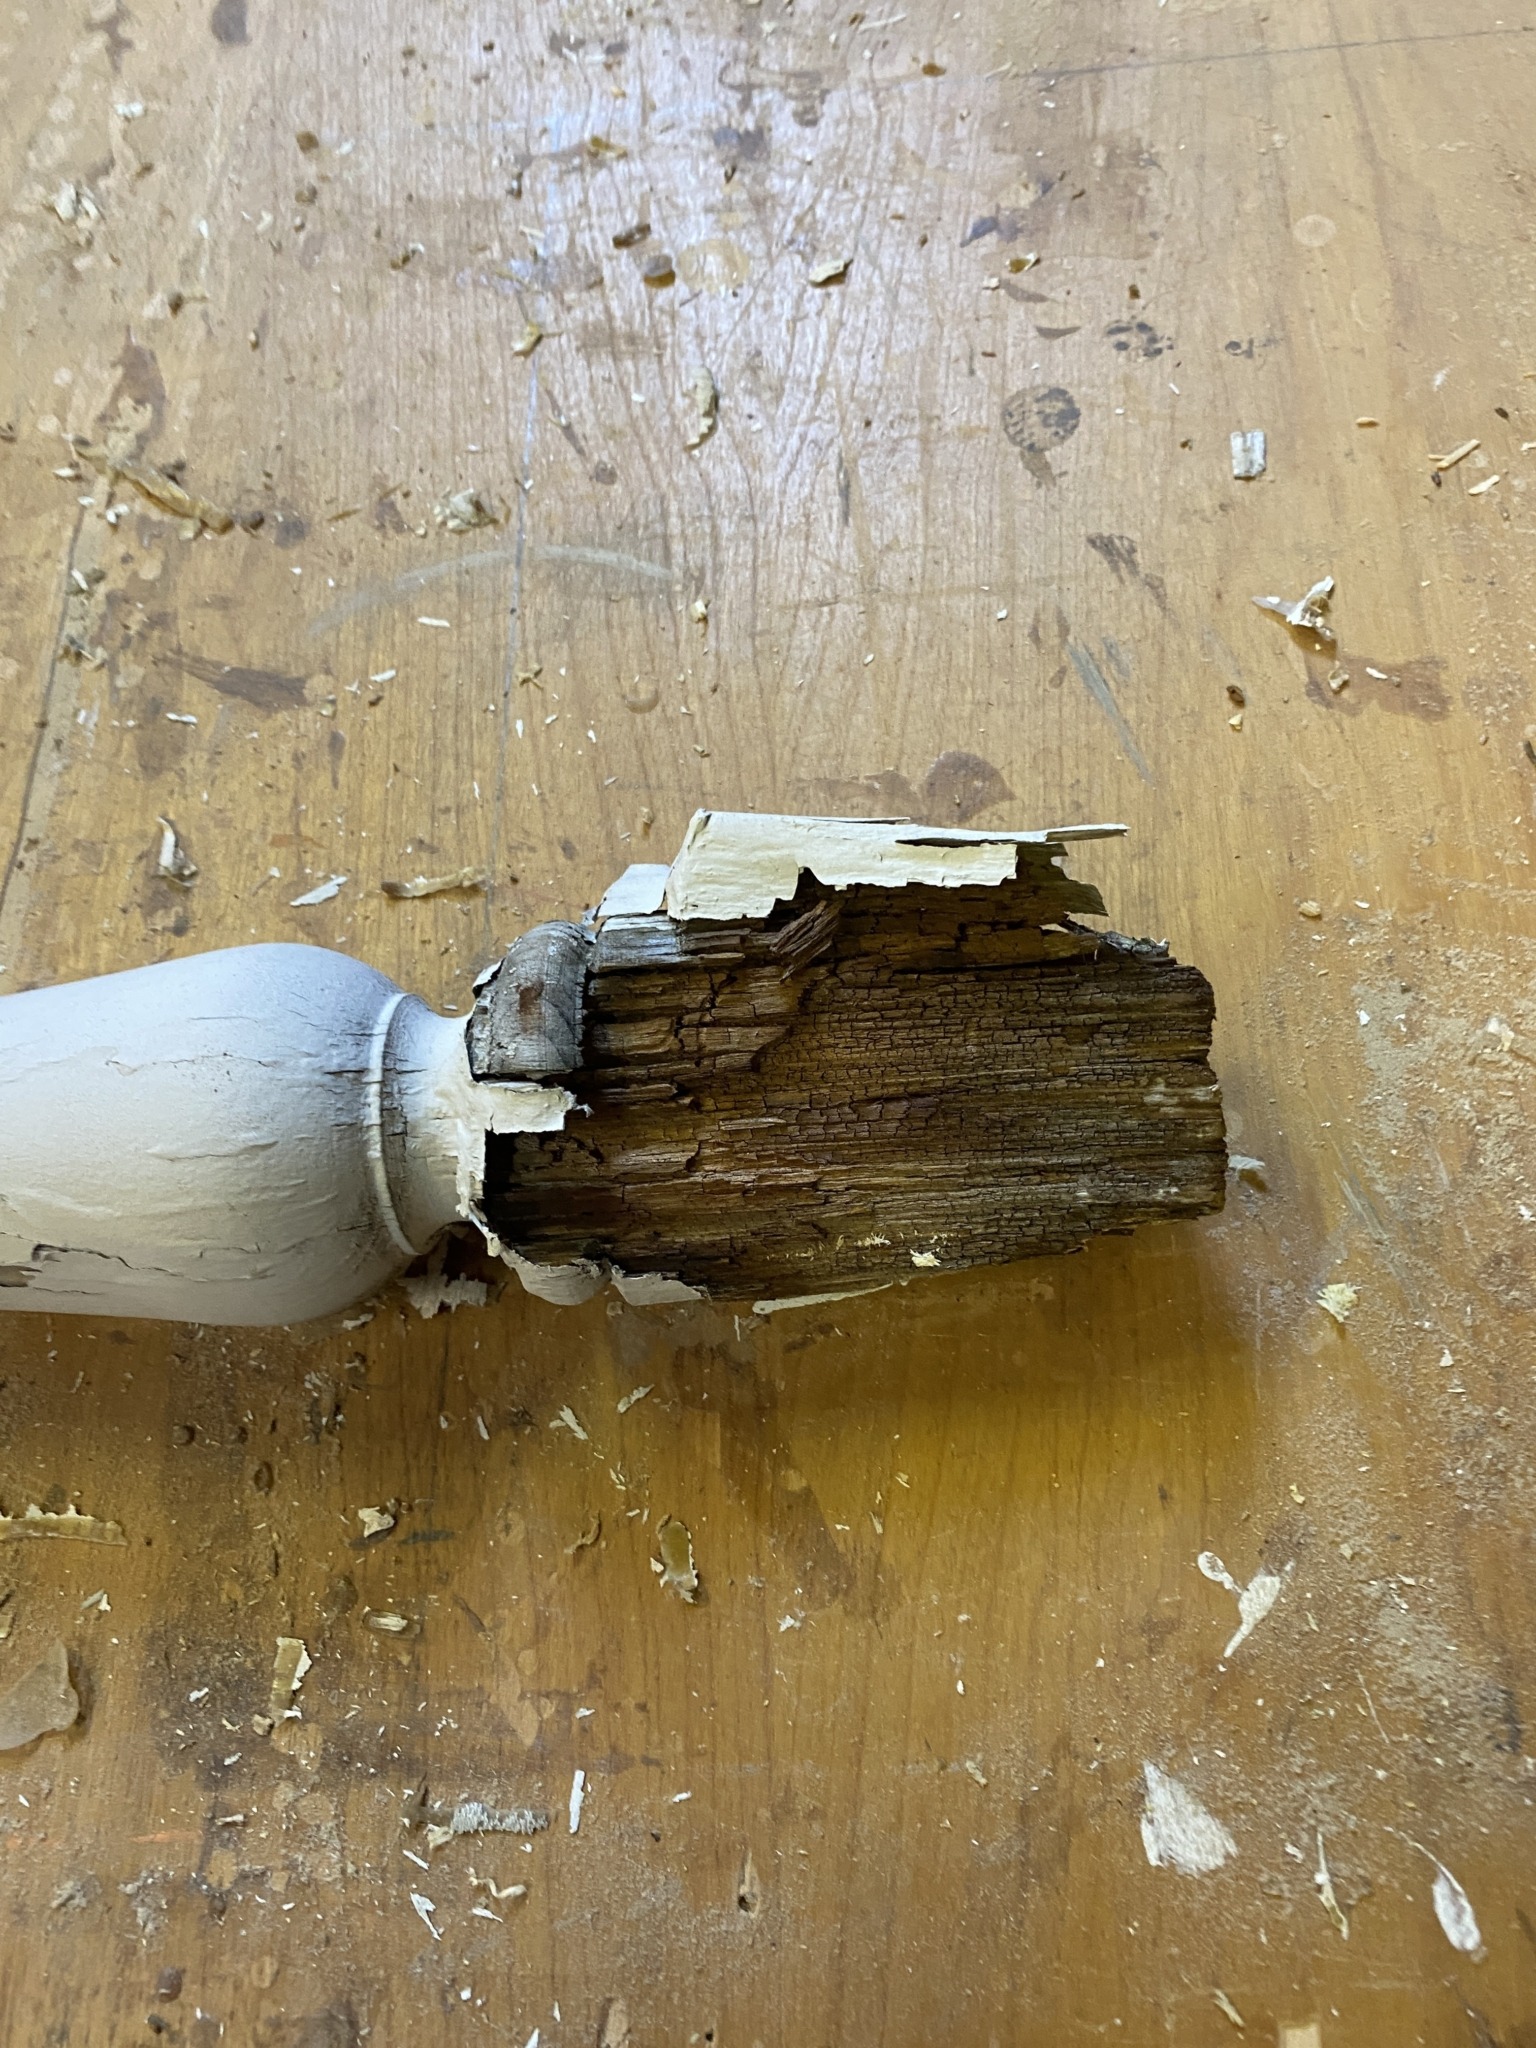 and five I filled in with Bondo. I connect the old part of the spindle with the new with a one-inch dowel. I make the holes liberal so there is some movement available and then use epoxy as glue to fill in the gap. The lesson to learn here is that if you use pine on an outdoor porch you have to coat it with preservative, paint the end grain and caulk all joints.
The stair treads that were recently replaced were not wide enough to accept a cove under them. It is a pet peeve of mine when people don’t do it as the old timers always used a cove. I added an inch and a half to the width of the treads, planed them down to 1 1/8 inches and bullnosed three sides as dictated by the preservation ordinance. I make my own treated cove molding from scraps so it will last forever. The woman has limited means, so I donated the time and materials to make the replacement parts. Very satisfying and I need projects to kill the time. A contractor friend of mine installed all of my parts for $3000.
My new spindles, rails and newel posts are shown below. The cove is shown under the tread. I prefer it to be the same color as the tread but the owner overruled me. It makes the tread look more massive.

Ten of the spindles at right I replaced the square bottom portion on or bondoed. They were painted with two coats and the bottom seem was caulked. If the endgrain is exposed to water it rots in a hurry. They now look great. Feels good.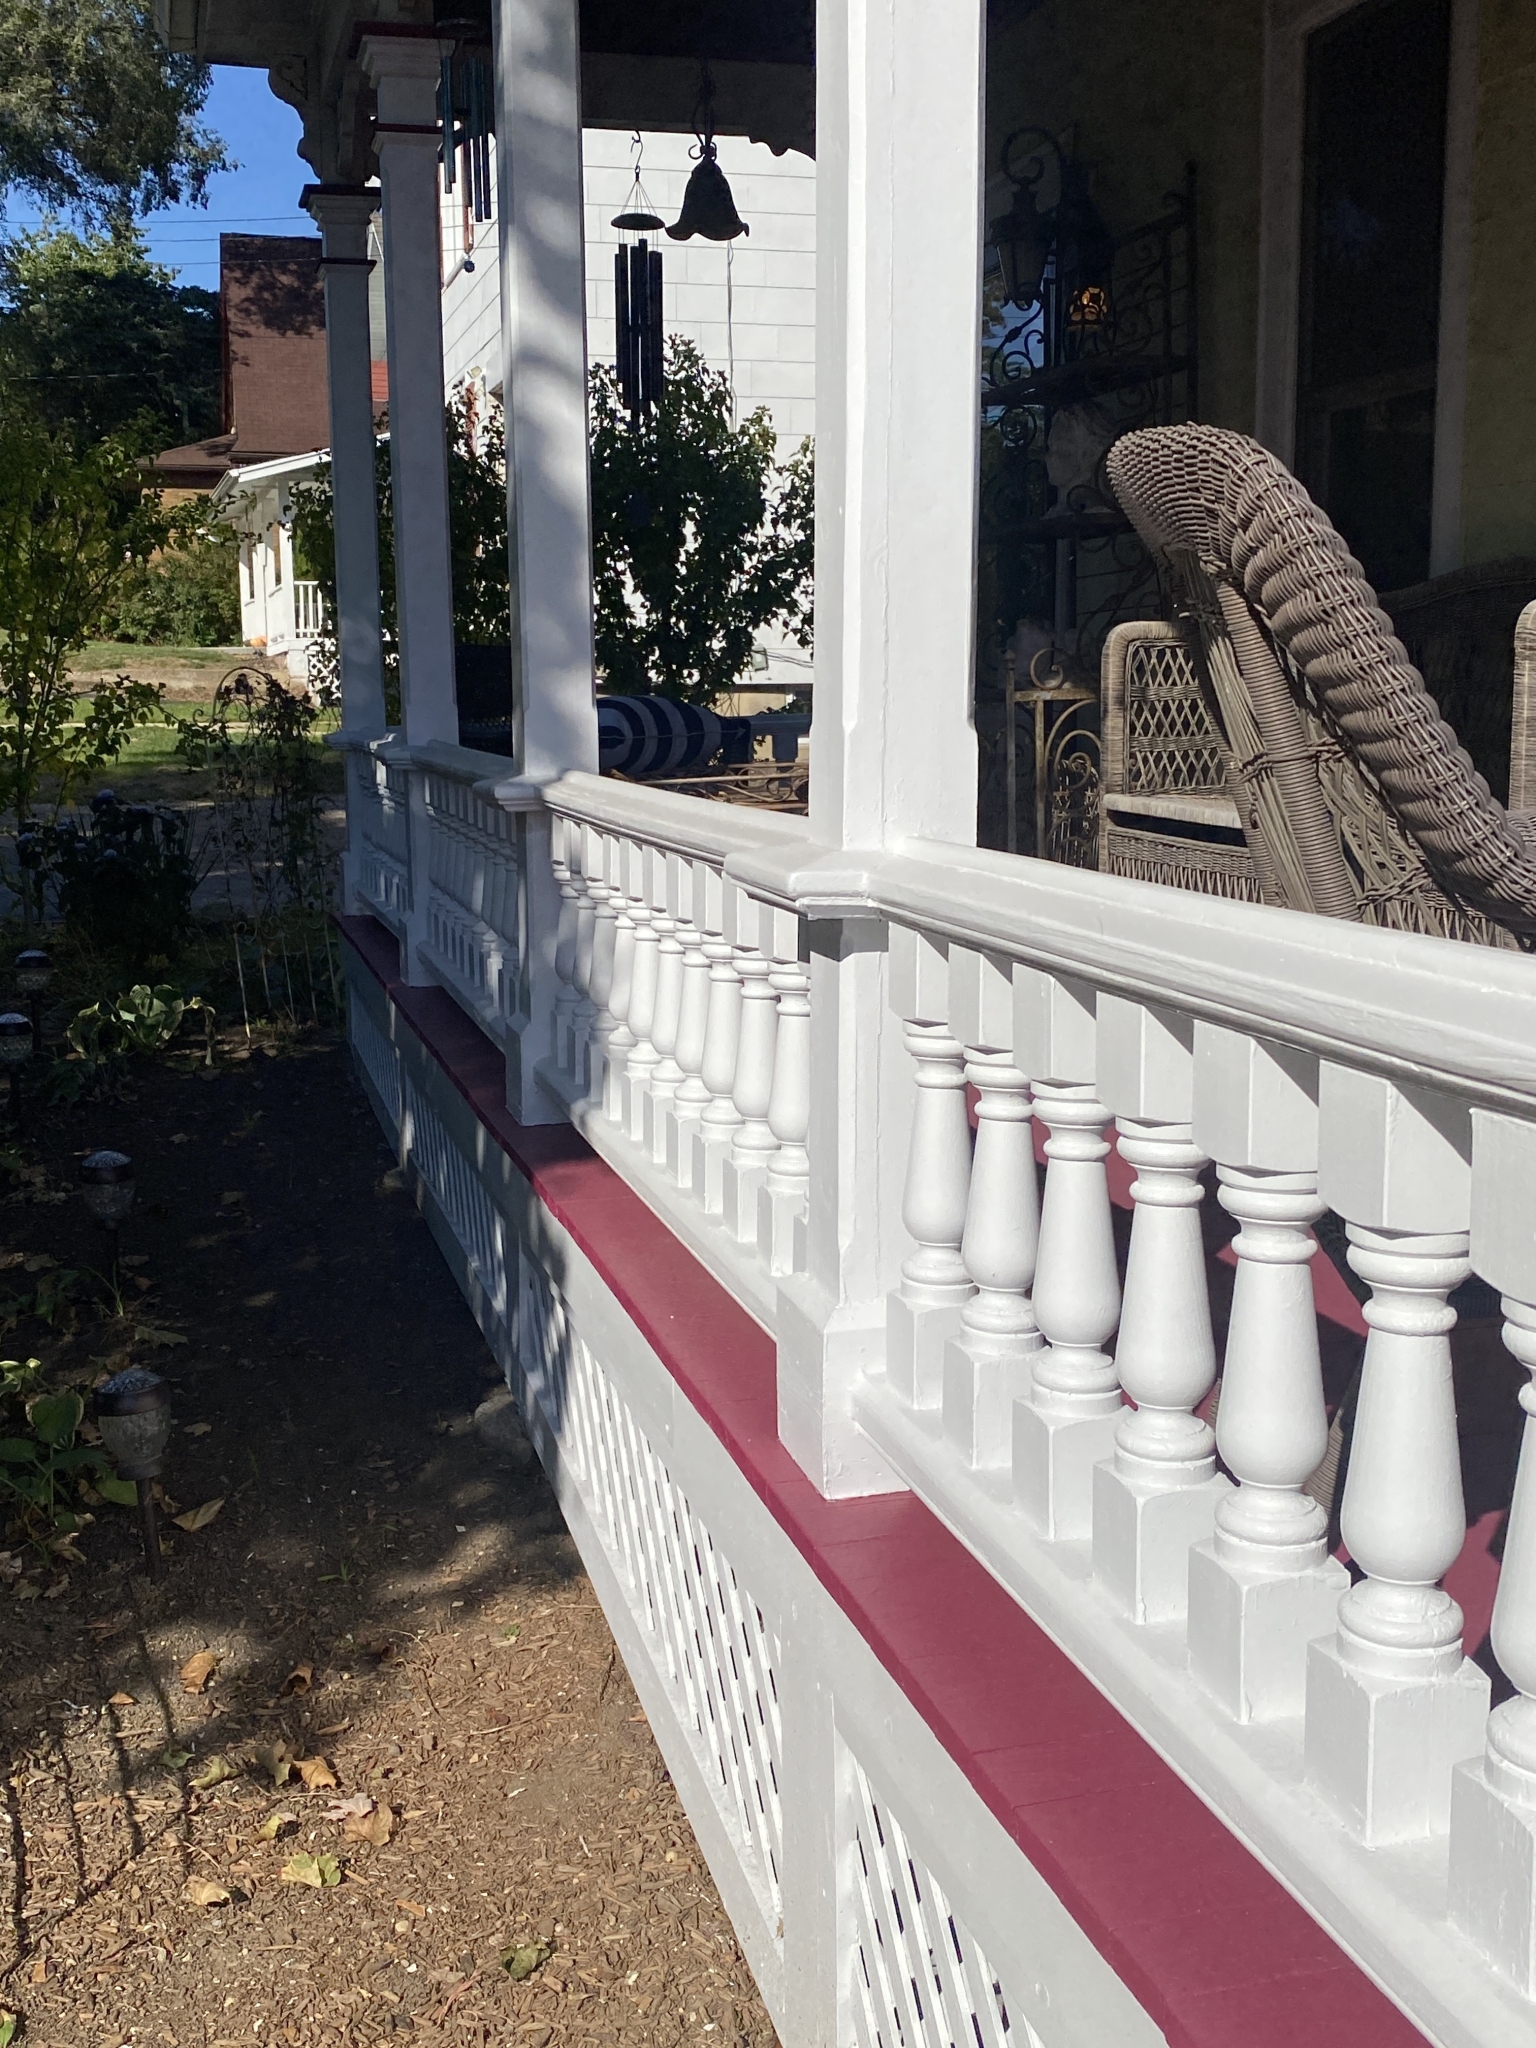
Several floorboards rotted away because she did not keep them painted. The flooring is 1 1/8 thick which was very available ten years ago. I used it on our porches. It is more like what the old timers used. Current 3/4 stuff is too thin. Now it is impossible to find. The owner and I google for hours and found a place on the East coast that sells it but they would not ship it. I milled in the tongue and groove from treated decking. The red boards to the right are my new ones. Porch flooring needs to be painted with porch and deck enamel on all sides before installation. The second coat is applied after installation. A lot of people make the mistake of using white primer. White House primer is not designed to have water set on top of it and if the top coat wears through a little bit the white really sticks out. The bullnosed treads are also visible here.

Many parts of the porch at 150 S. Gifford were rotten or missing as seen at right. The owner was given several code violations forcing him to repair or rebuild it.
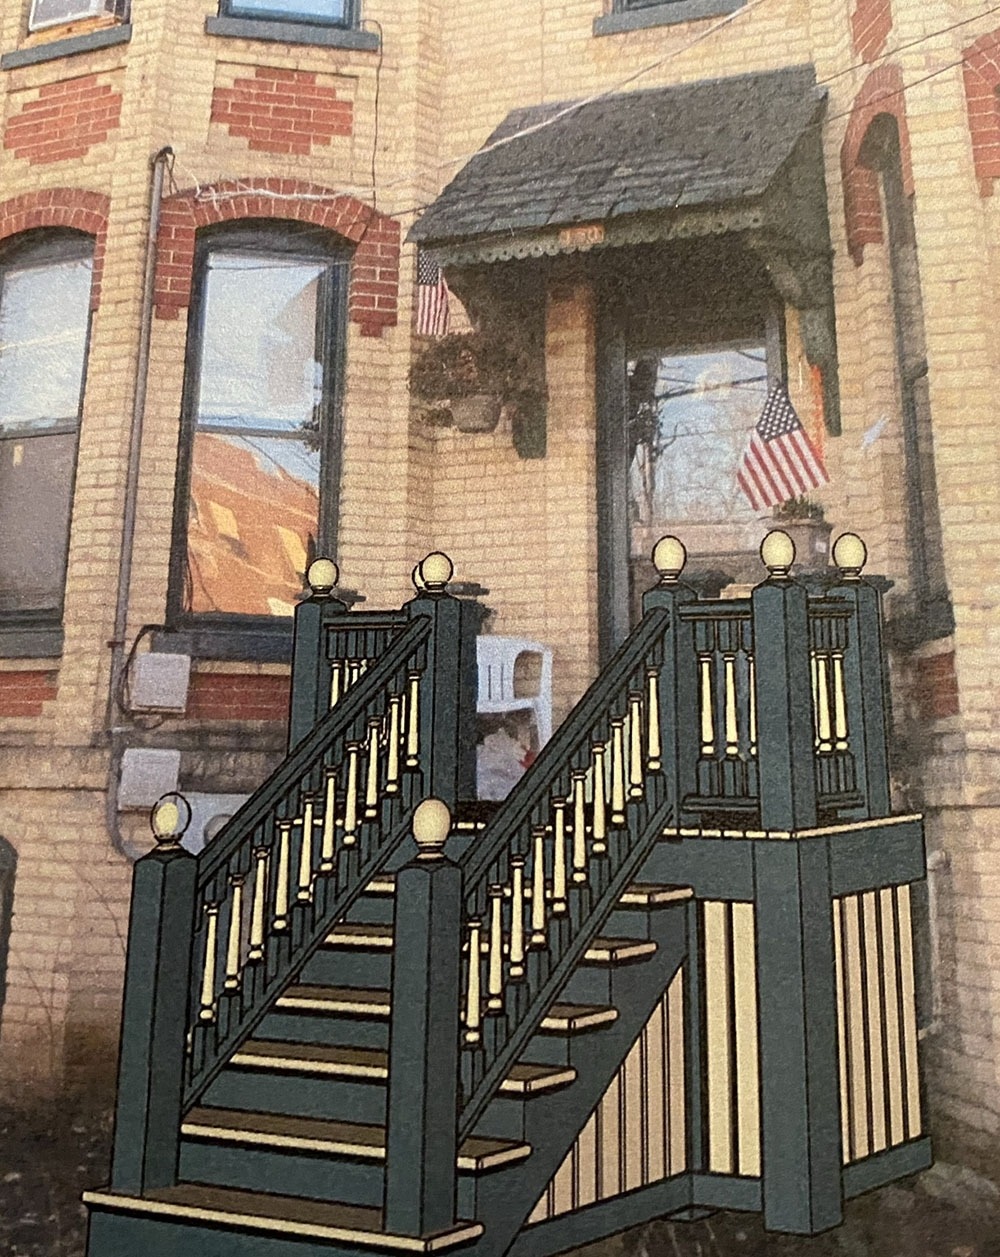
 I proposed several different actual designs for the new balustrade. The one below came from a porch on Laurel St.
This is one from Gifford St.
This is one I saw in a magazine
Here is a variation of Laurel St. That Brian Anderson, the owner of one-third of the building proposed.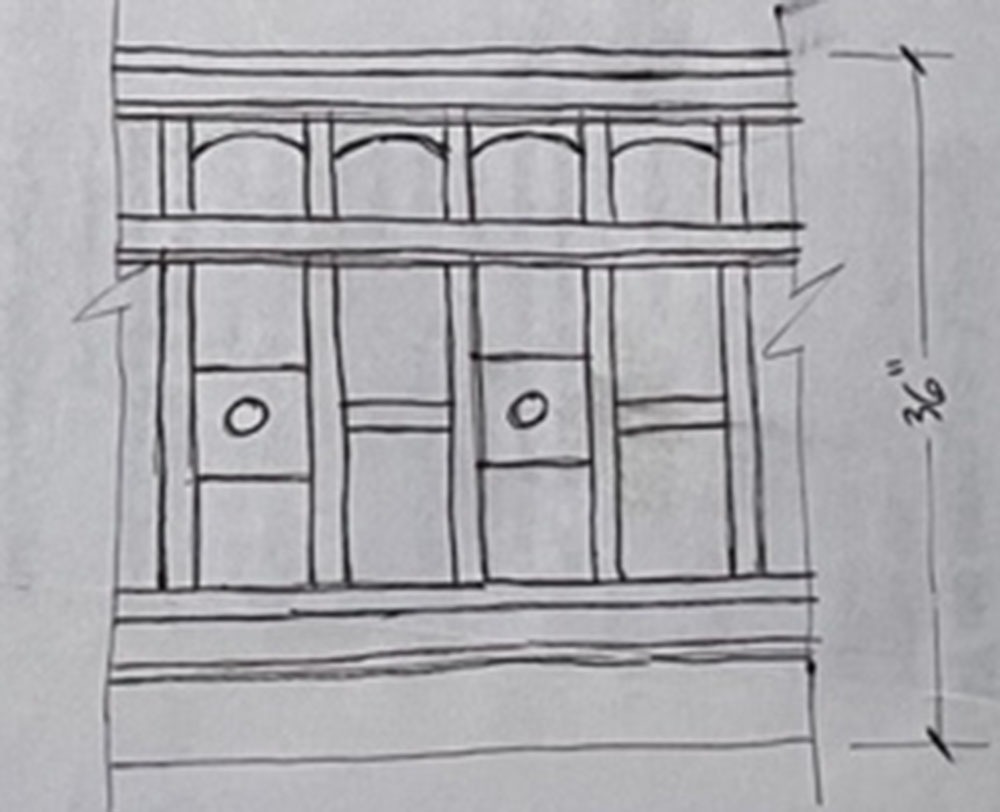
Christen Sundquist, the Preservation Specialist at the city made renderings of a possible design.
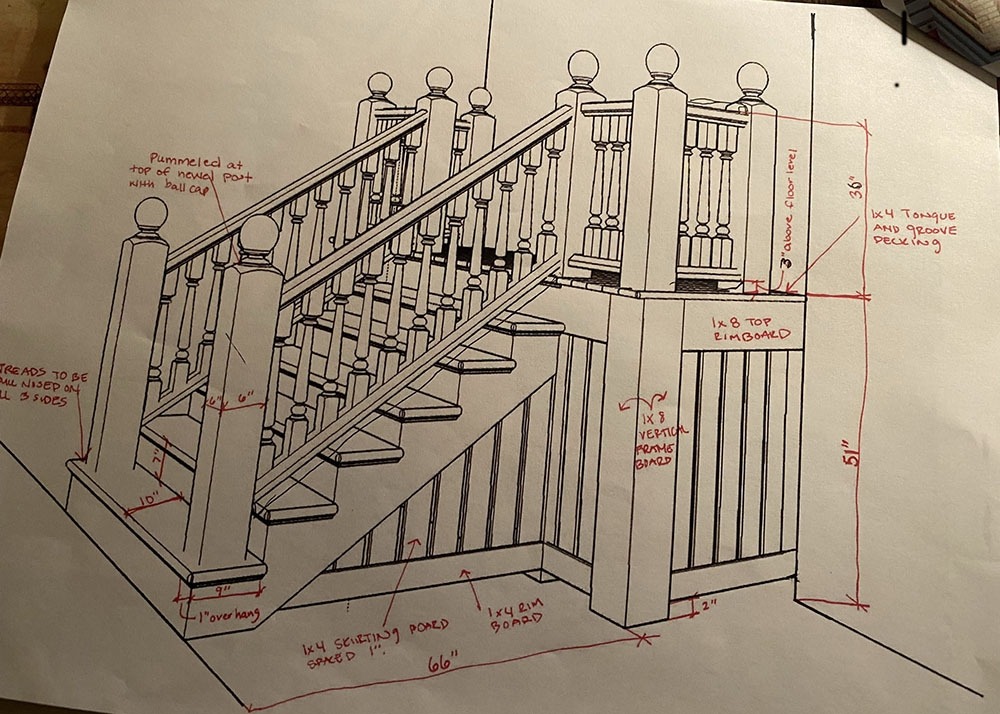
The owner decided to go with the Laurel St. variation. He hired an architect, which was dictated by the city, to draw up the plans as seen below.

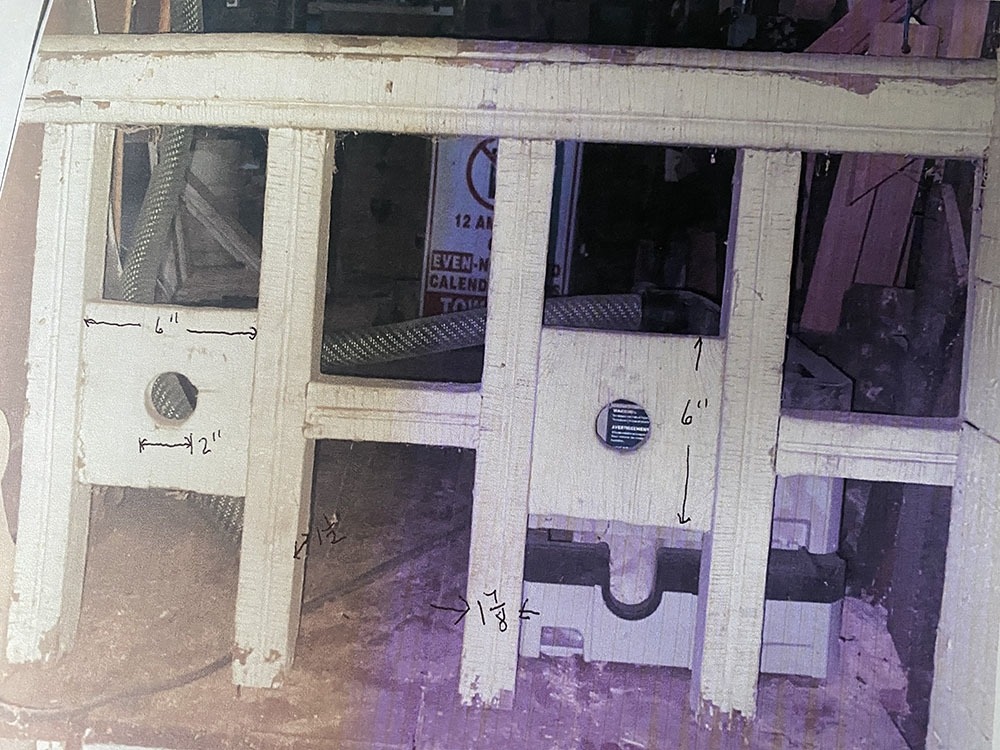
The layout of the stair rail is difficult so my wife and I made a mockup to visualize it as seen below.
I made a full-scale mockup of the proposed balustrade as seen below at right and placed it on the porch, bottom left, so the owner could see it and give the approval to move on. It should have been lower but since the porch is so high off the ground by city code, it had to be 36 inches tall. The International Residential Building Code has a rule called the four-inch ball rule. It is to prevent kids’ heads from getting stuck in between two balustrades. If a four-inch ball can fit between two balusters, they are too far apart. My design needed six inches between balusters to look right. The IRC has a page that says the code can be modified for historic homes if it is not life-threatening. The city has bought into that idea but it still took months to get the variation for the proposed design.
![]()
The old porch was completely removed and new 48-inch deep cement piers were installed.

New framing was added using treated lumber. The carpenter made it very strong.

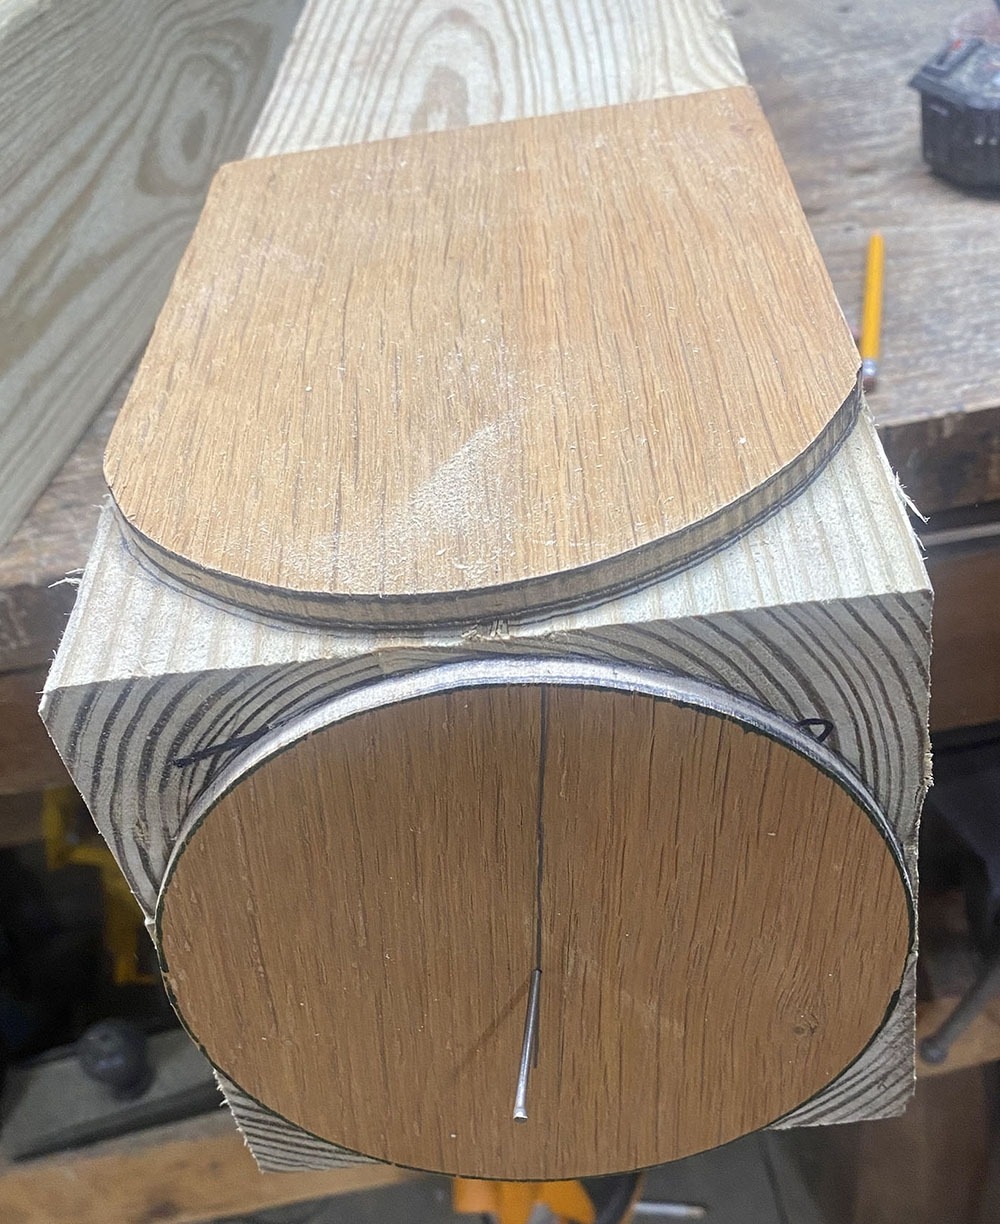
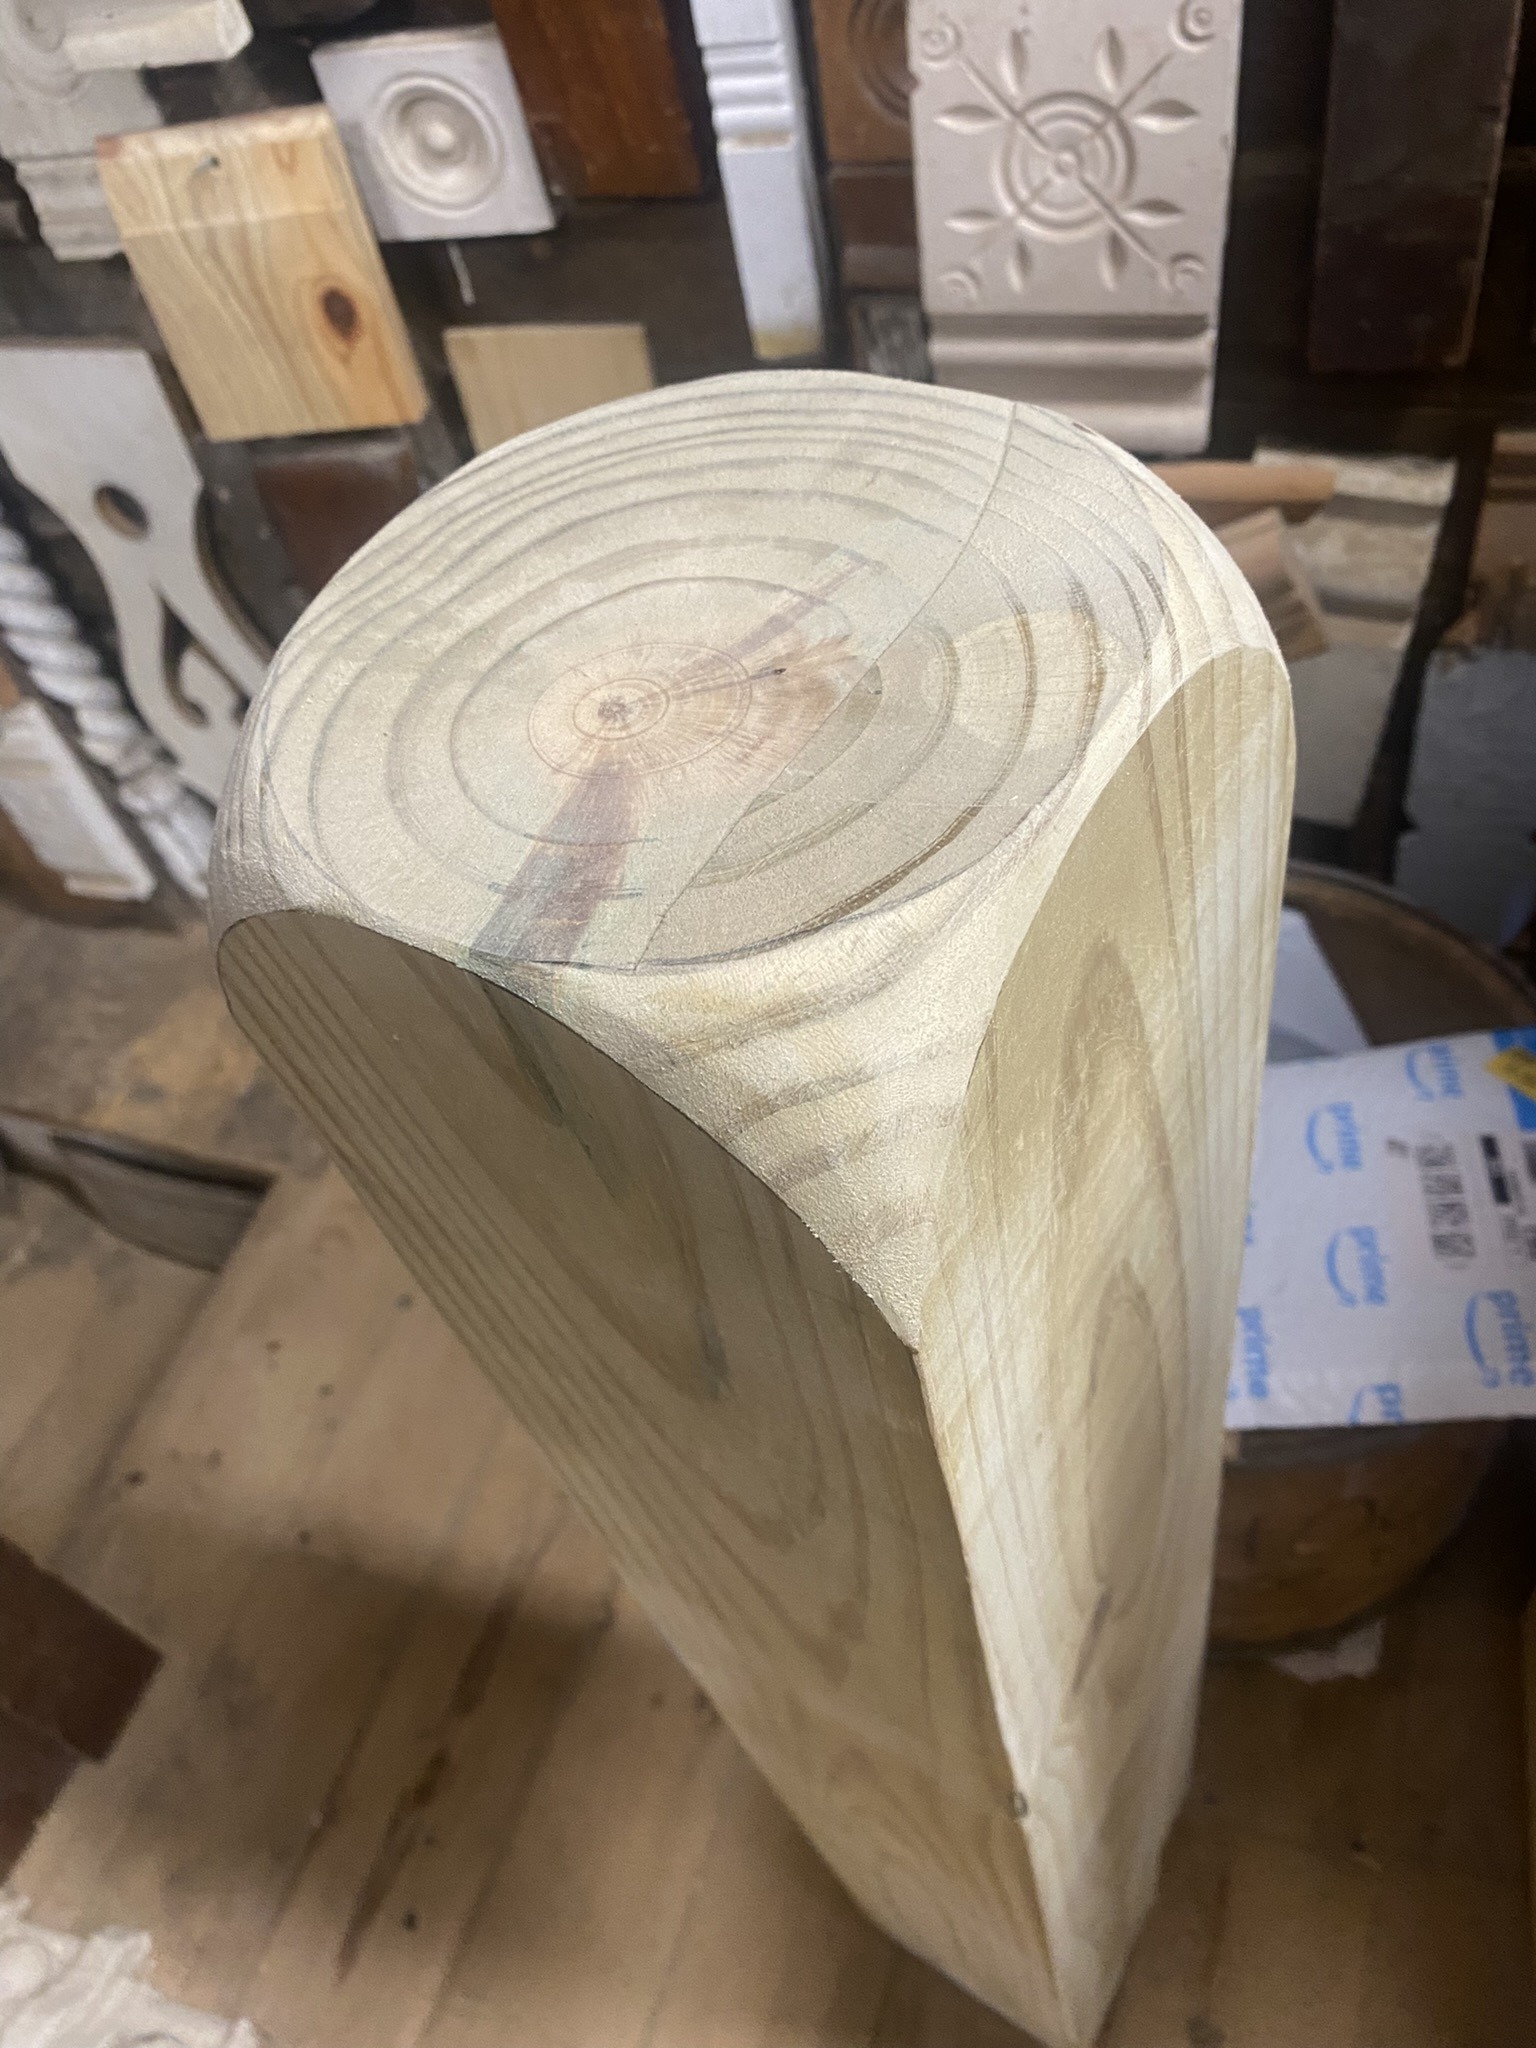
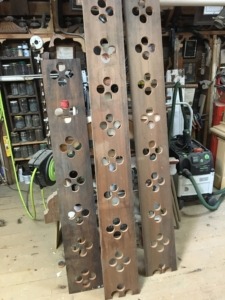
I pummeled the newels by first drawing circle patterns on the top and sides.
 I ground the wood off up to the line with an angle grinder as seen at right. A belt sander would also work.
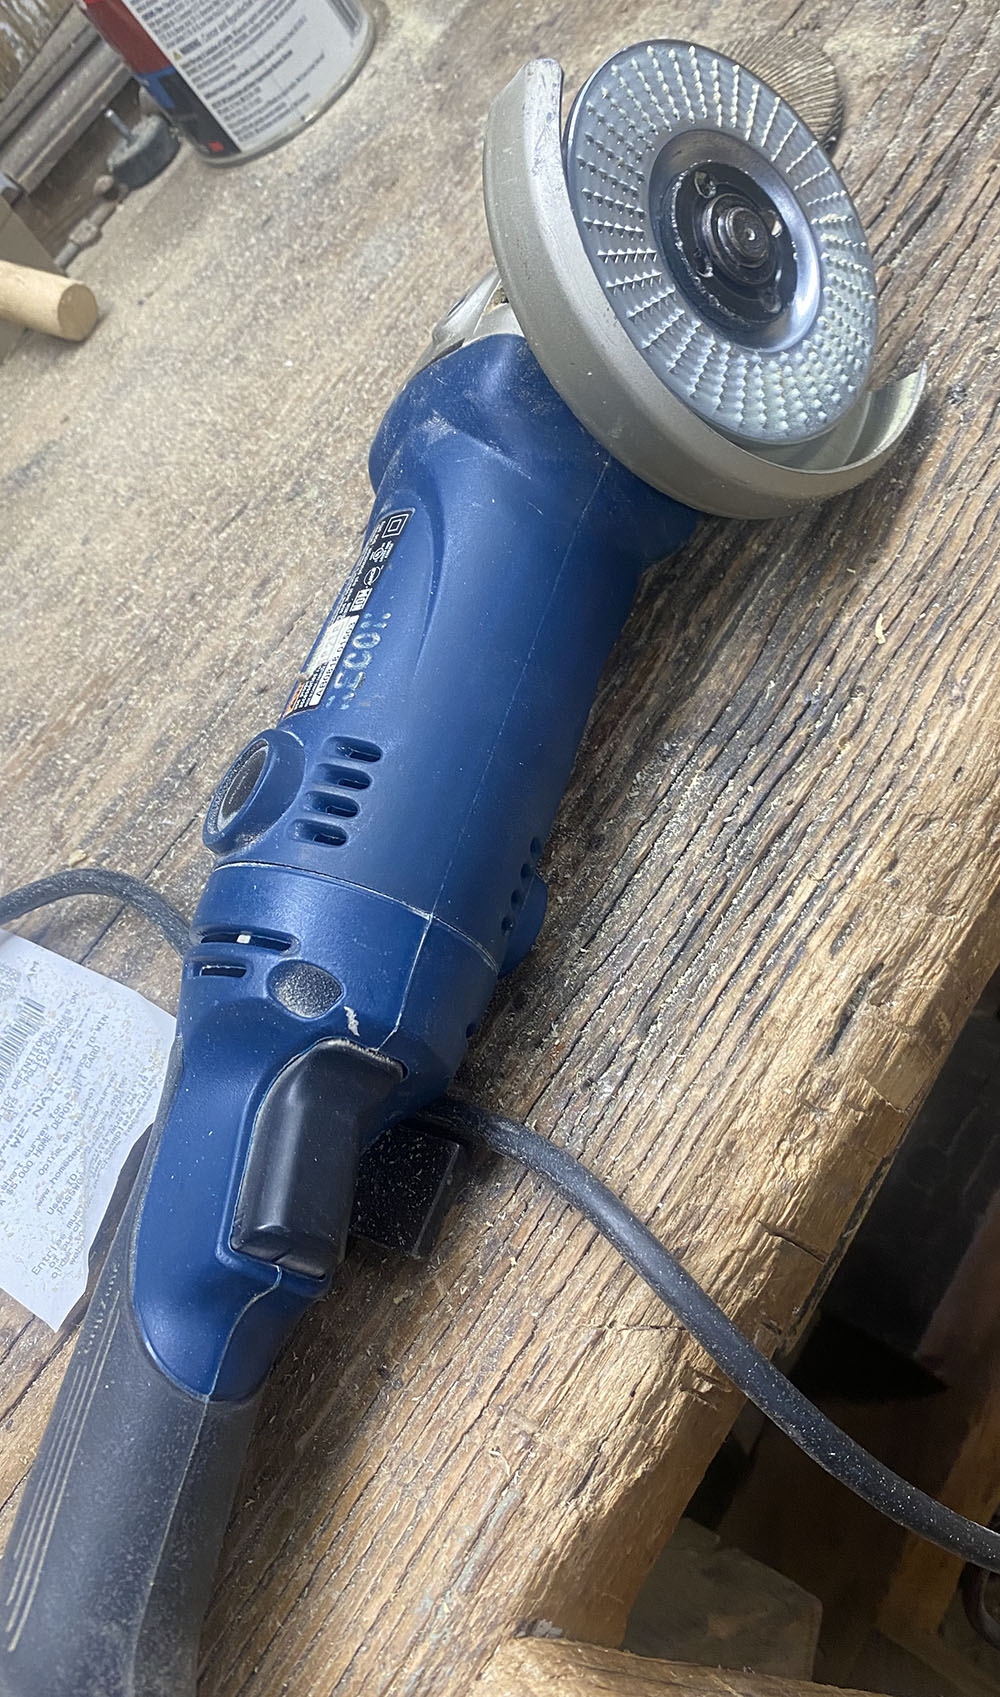
Here is the finished porch before it was painted and after. The finials are from Mr. Sppindle. I primed the flat boards on both sides to reduce shrinkage and warping. Treated lumber needs to be painted immediately or the sun and rain will make it twist and warp. I made the beadboard by making a custom molding knife to make the beadboard beads. It was milled from treated porch flooring. Pine beadboard is expensive and would rot away in five years. The decking and treads are Azec which will last forever. It looks almost like 1 X 4 porch flooring. 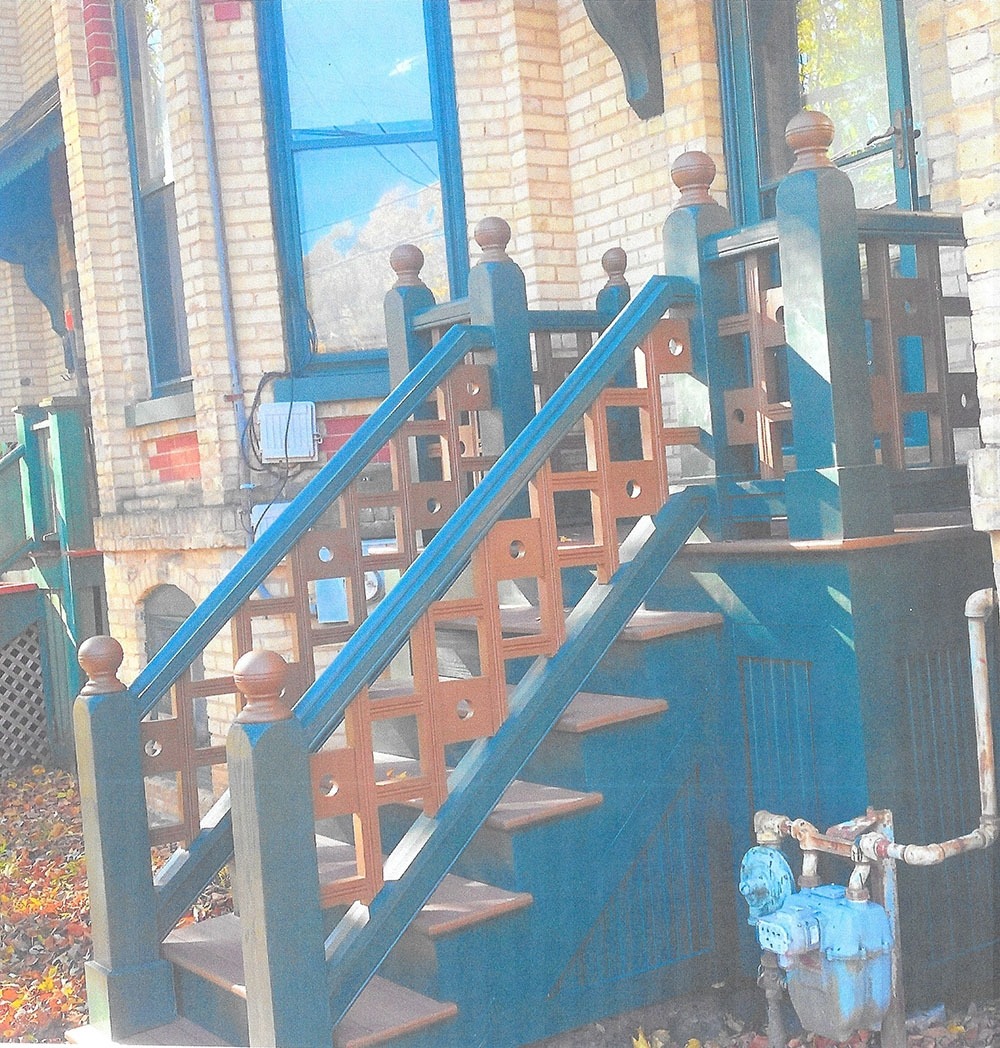
The owner received a 50/50 Architectural grant from the city which paid for half of the cost. He also received a $2000 Architectural grant from the Gifford Park Association.
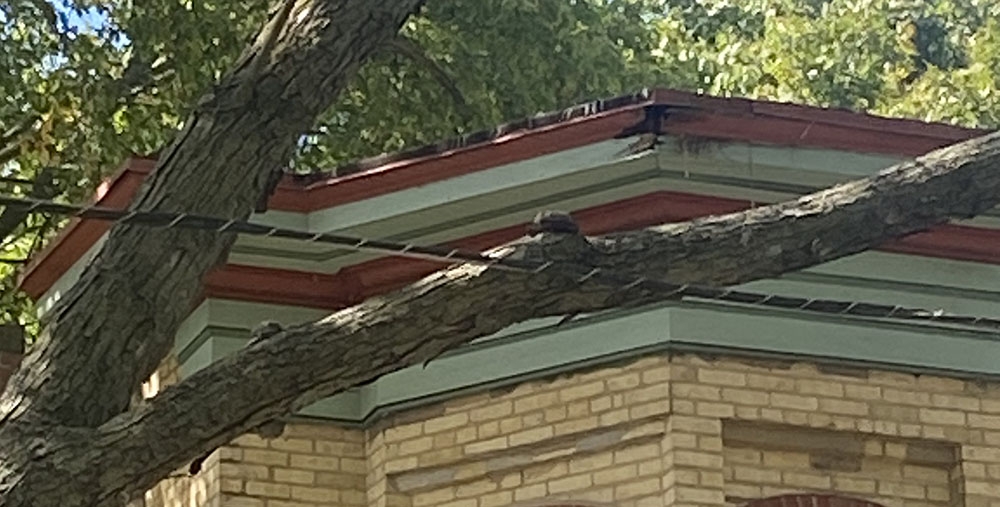
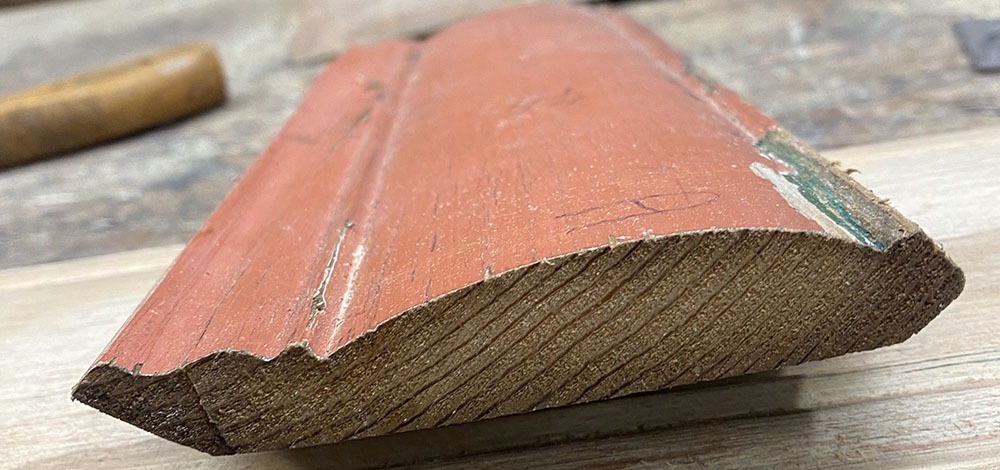
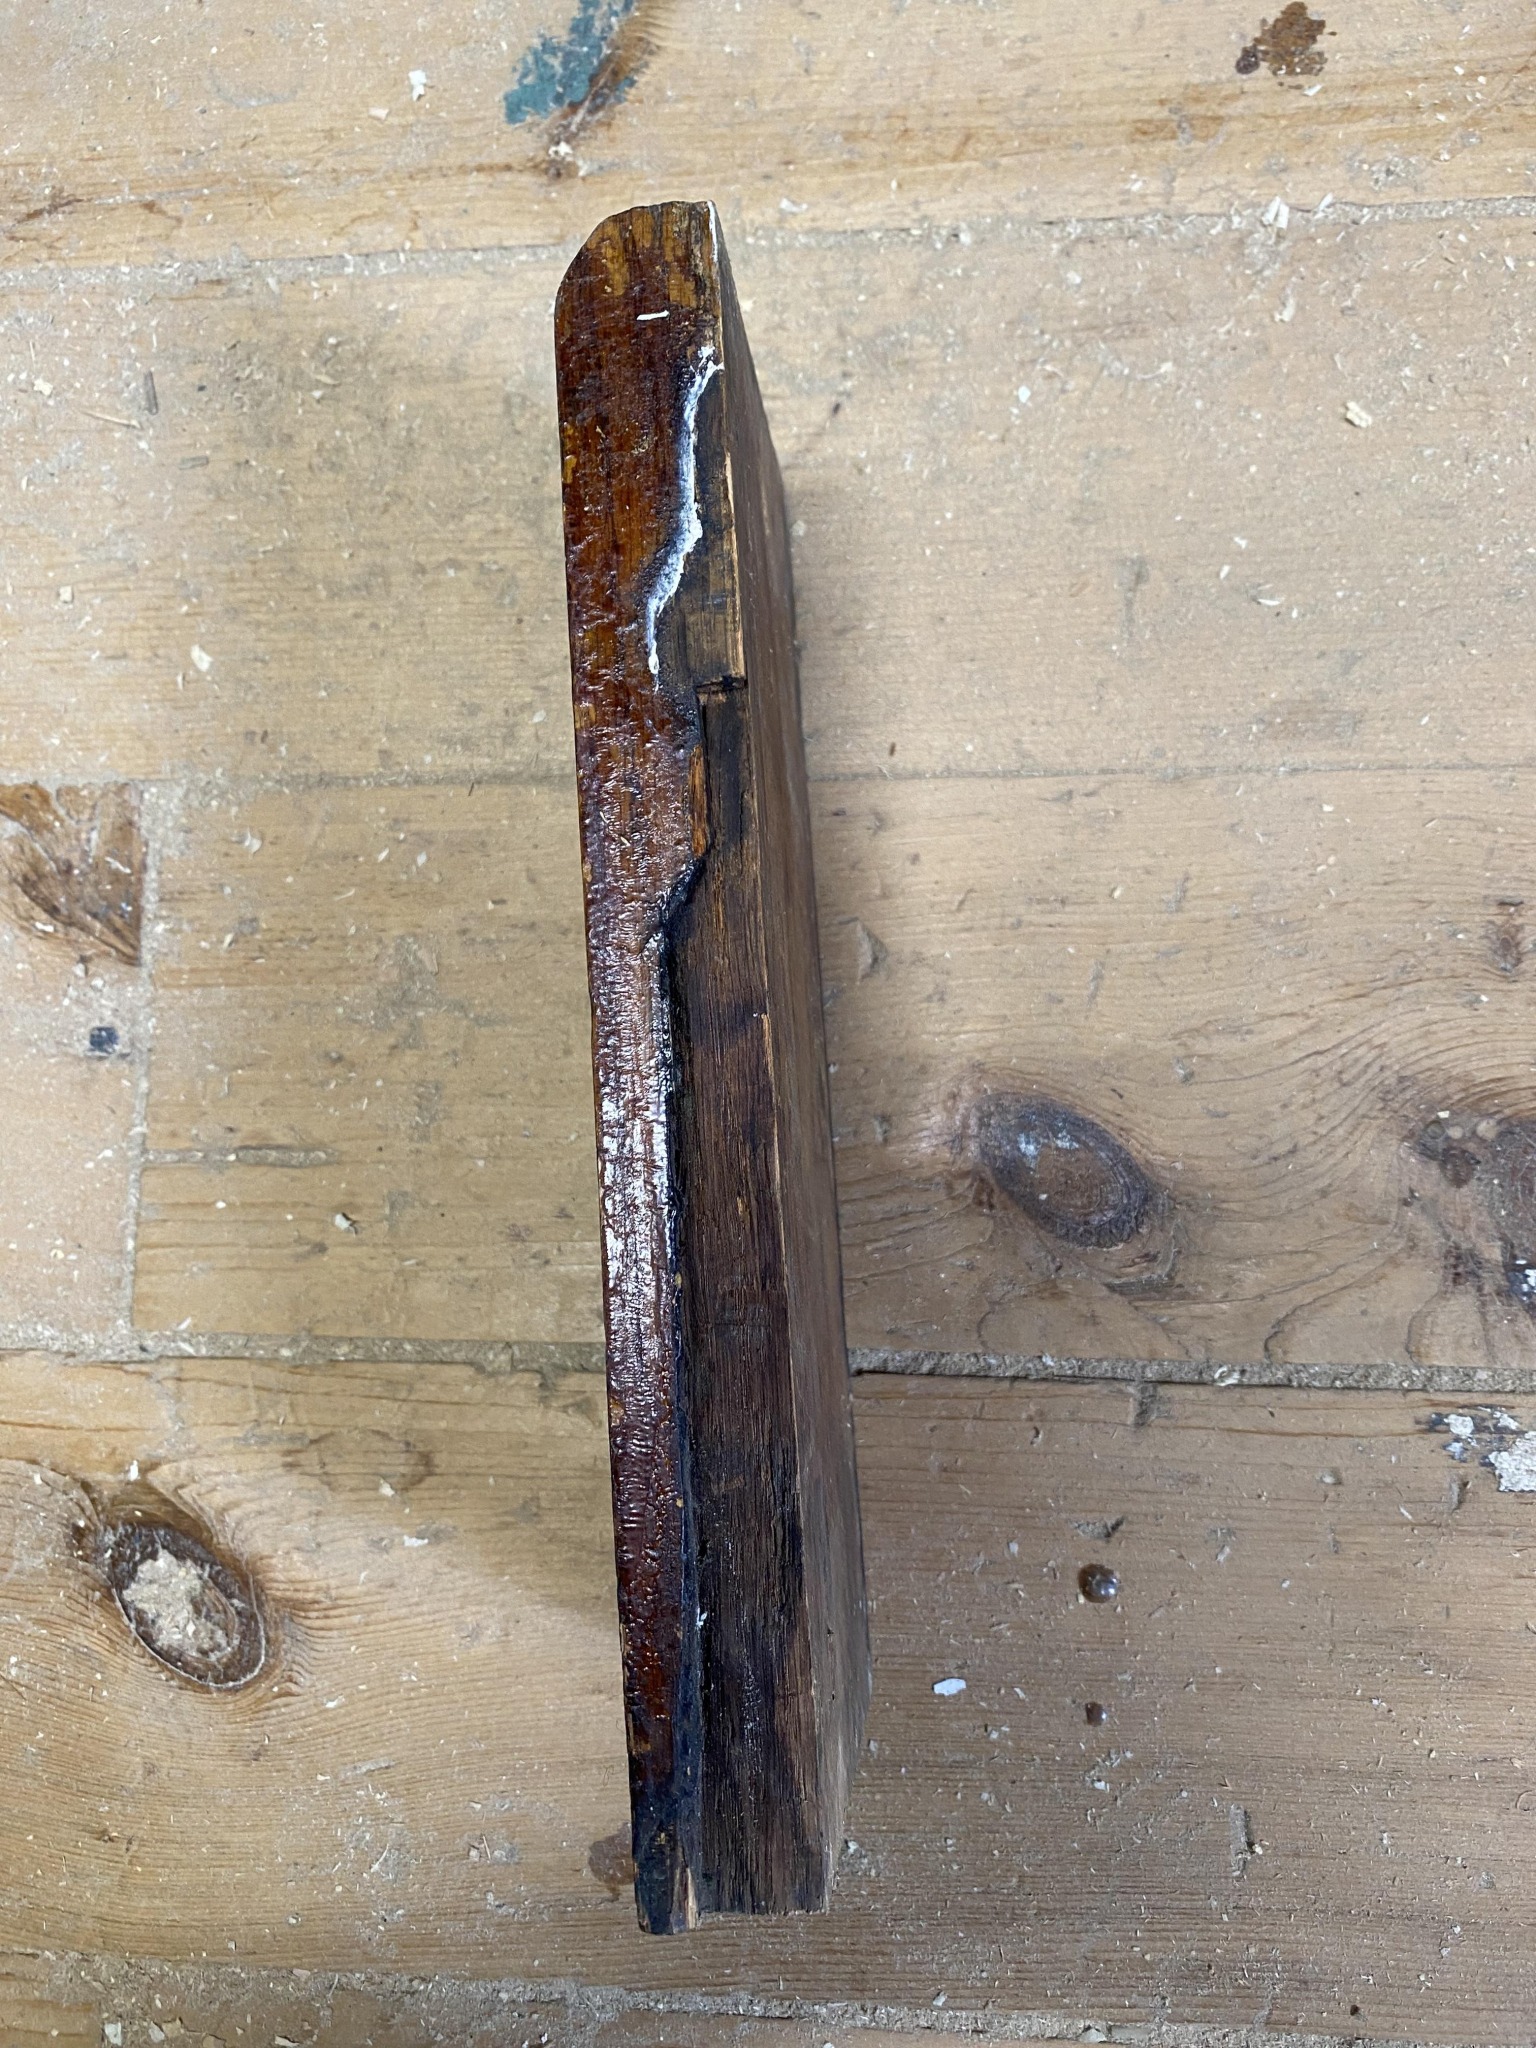
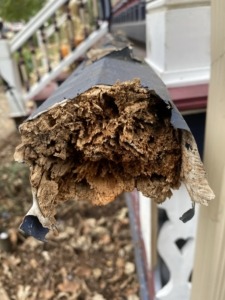
While I was there I noticed that a squirrel had made a hole in the fascia. I made two pieces of custom crown duplicating the original exactly and had my handyman install them. Here is a picture of the hole, the original molding, and the molding I made in treated lumber.
![]()
![]()
In my old house woodworking business I often get asked to duplicate old house trim baseblocks. I do not think the old timers used a molding machine or shaper to make them as you cannot mold perpendicular to the grain. I tried it once by putting the wood on a sled to hold short pieces to go thru the molder. The results were disastrous. I believe they used a bandsaw to cut them. I have seen some evidence of that on old ones. The only problem with a bandsaw is that it leaves a rough surface which takes a lot of sanding. I need to look into a fine-toothed bandsaw blade. The fine-toothed blade on my scroll saw leaves a smooth surface. I make my base blocks on a bandsaw and have spent hours sanding. Machines can be used for parts of them.
The first thing to do is to trace the pattern on the edge of the wood.

I screw the blocks of wood to a jig/handle that keeps the wood perpendicular to the table of the bandsaw. I then slowly cut to the line.

Here are the finished products after a lot of sanding.

The original base blocks were southern yellow pine. After a long search, I found a source for southern yellow pine. Our treated lumber is made from it but you cannot use it for interior wood that is to be varnished. Notice in the new books that the growth rings are very far apart making it kind of wild. New growth wood today is grown on a plantation where they water and fertilize it making the growth rings about 3/8 of an inch apart. In old growth trees, the growth rings would be 1/16 or less apart.
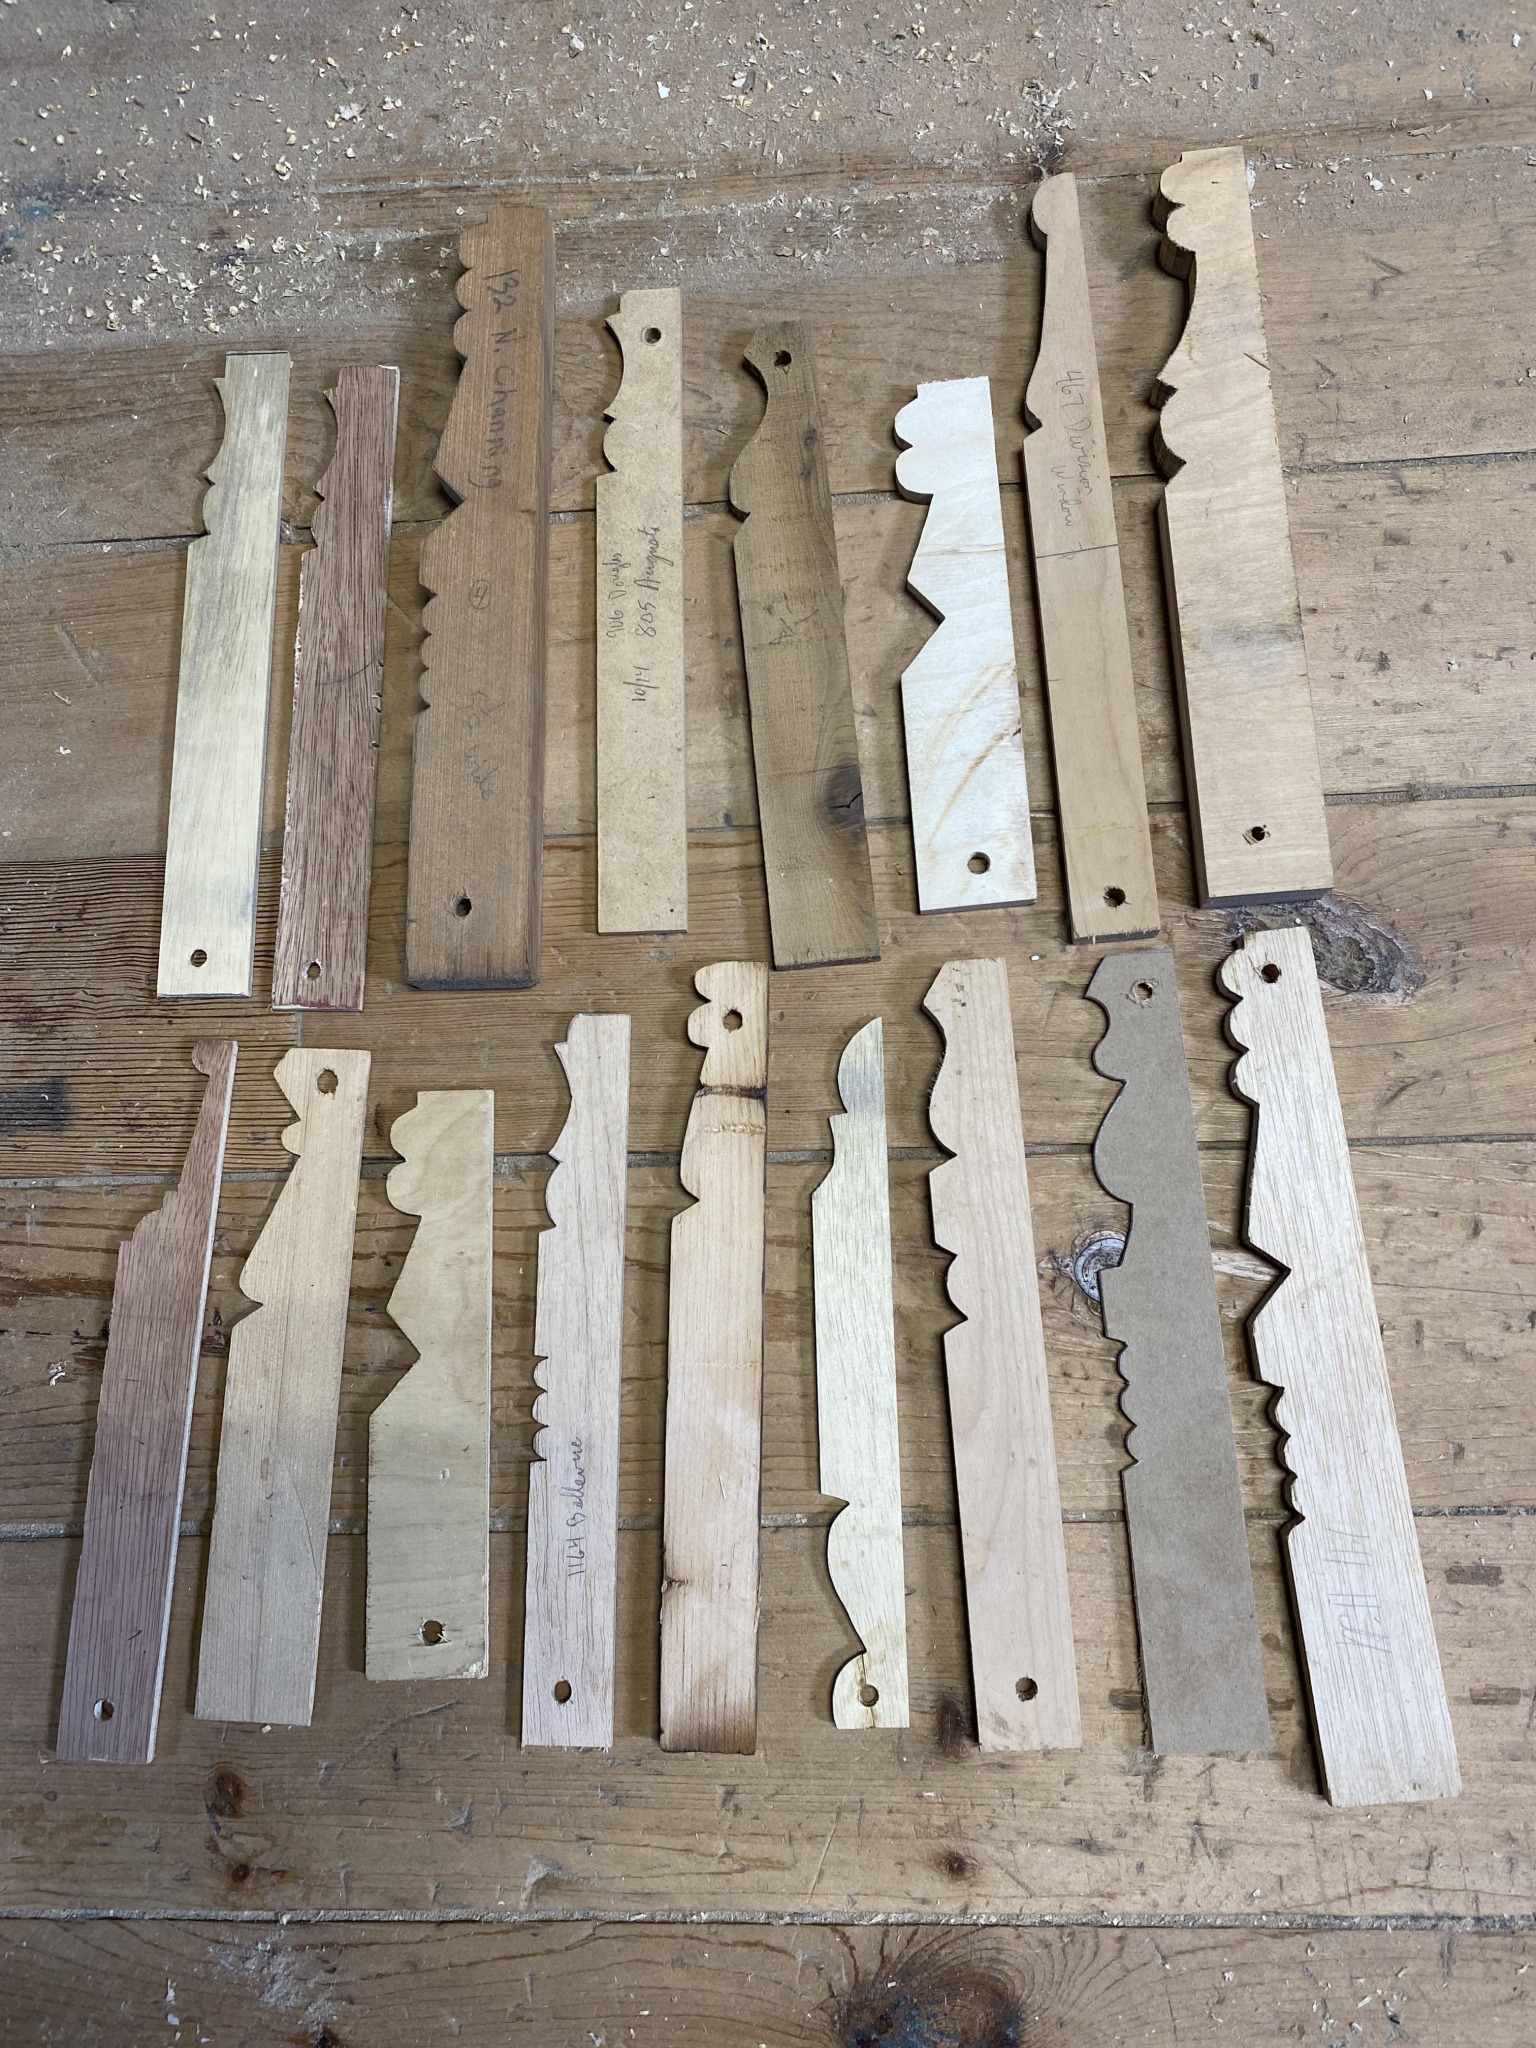
Here are the patterns I used to make base blocks over the past 30 years.
Here are some base blocks I have collected over the years from houses that were demolished.

Here is a base block where the trim carpenter mortised in a space for the baseboard. Wow! You will not find a carpenter doing that today. The baseboard can shrink slightly without creating a gap. I wonder why he did not include the base cap.
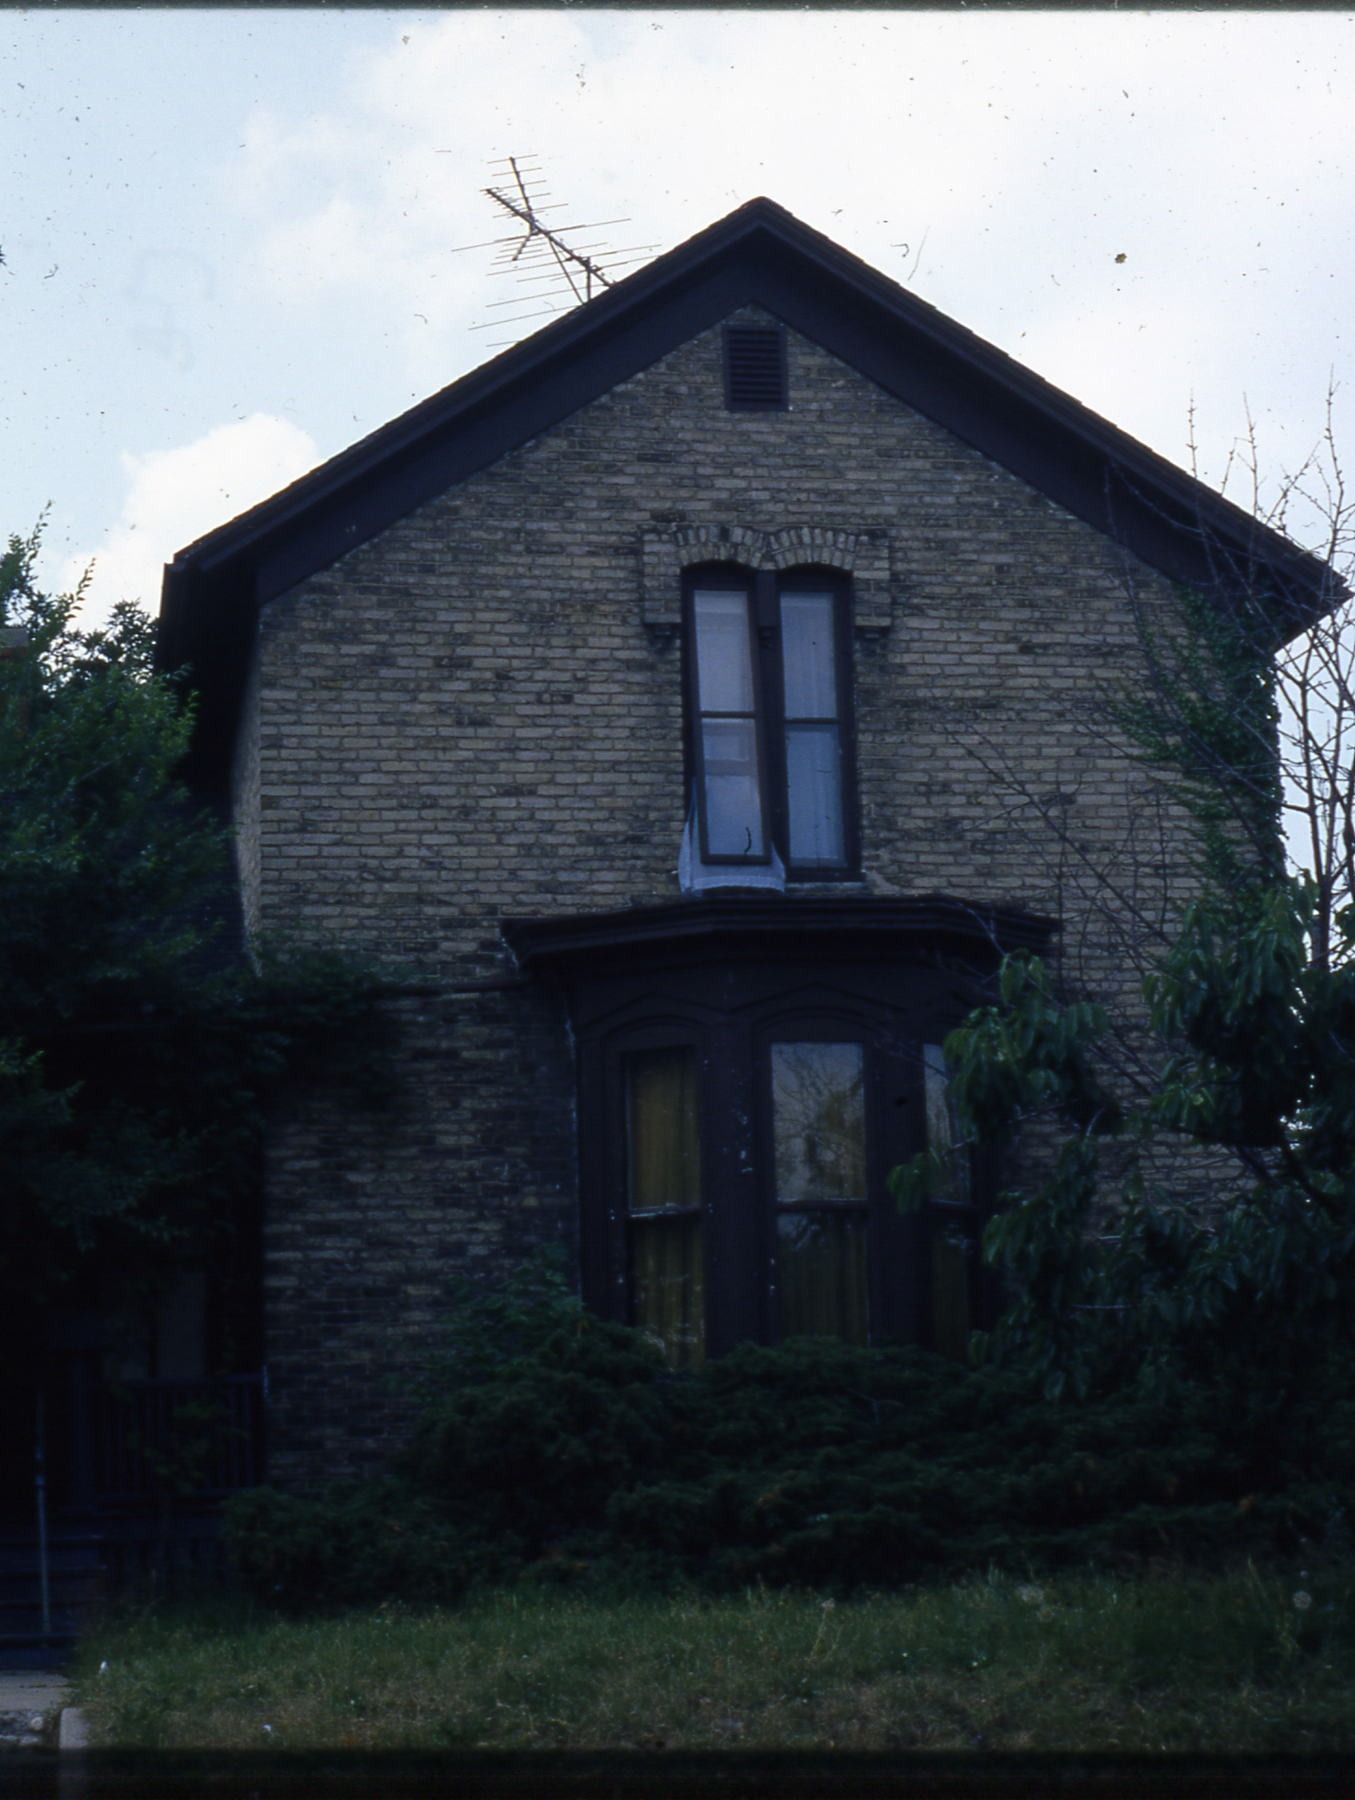
This is how the house looked in 1981. It was overgrown and not maintained. The bank holding the mortgage foreclosed several times as decent owners could never be found. The bank asked the Gifford Park Association to oversee a rehab to make it decent to attract a good new owner. They did it and new owners were found.
This is how it looked after rehab.

A year ago the new owner decided he wanted to add appropriate details to the porch and paint it. He chose details from a similar house in the neighborhood:

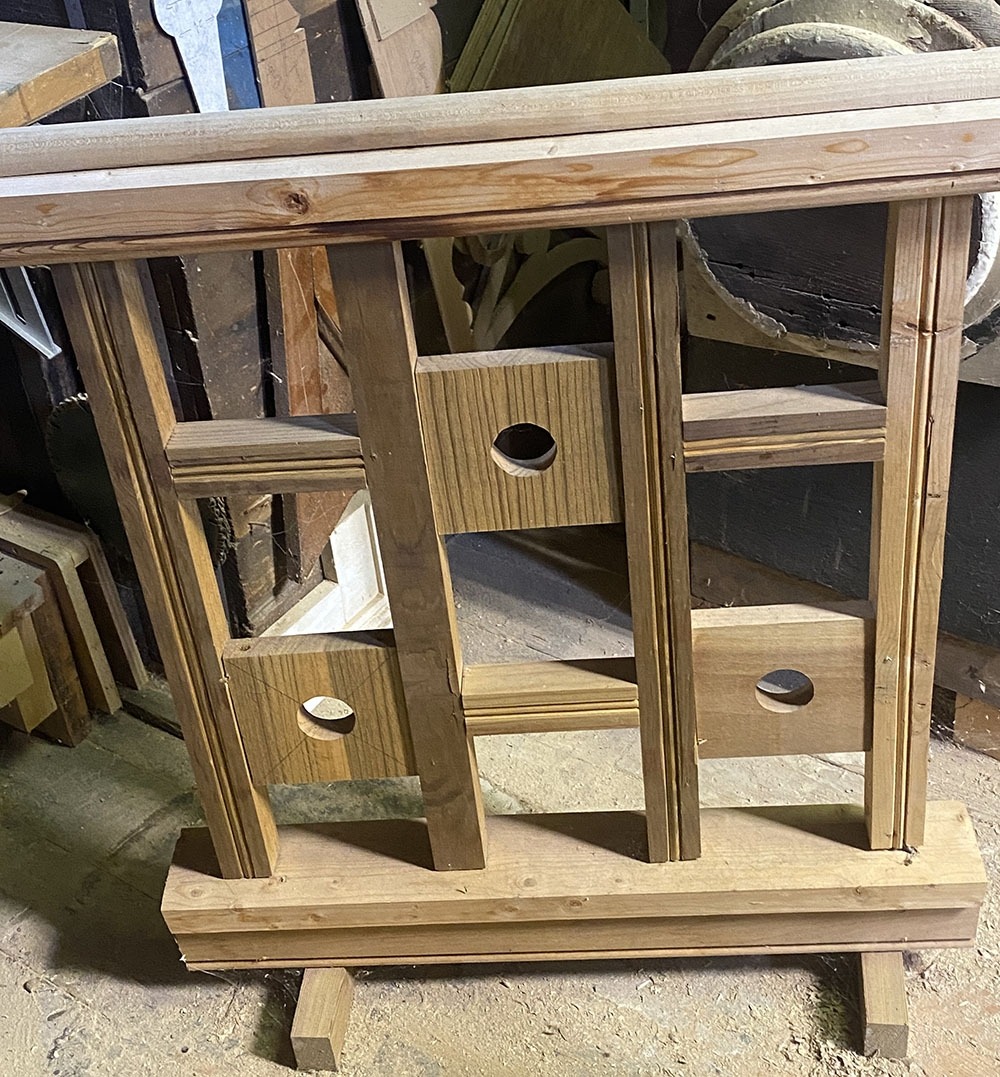
I made the mockups of the new frieze, brackets, and balustrade to show the owner and the city. The square balusters are turned 90 degrees to make them look bigger. It was often done and is a nice feature.

The bracket design was taken from an actual old house bracket as shown below:

The Preservation specialist at the city drew up the proposed changes for the homeowner and the Design Review Committee.
I made the new frieze and balustrade and a carpenter installed them.
The city Preservation specialist made several computer renderings to show different paint schemes. Two are below. Notice one has brackets in the eves. The homeowner requested them so they were included in the rendering for the Design Review Committee. Although appropriate for the house there was no evidence that they were ever there so the Design Review Committee denied them.


Here is a picture of the finished project before the bay and windows were painted:

The back porch was in bad shape:

I made new treads, rails, and balusters for the porch.

To reduce cupping the new treads had to be painted on all four sides with deck enamel before installation:


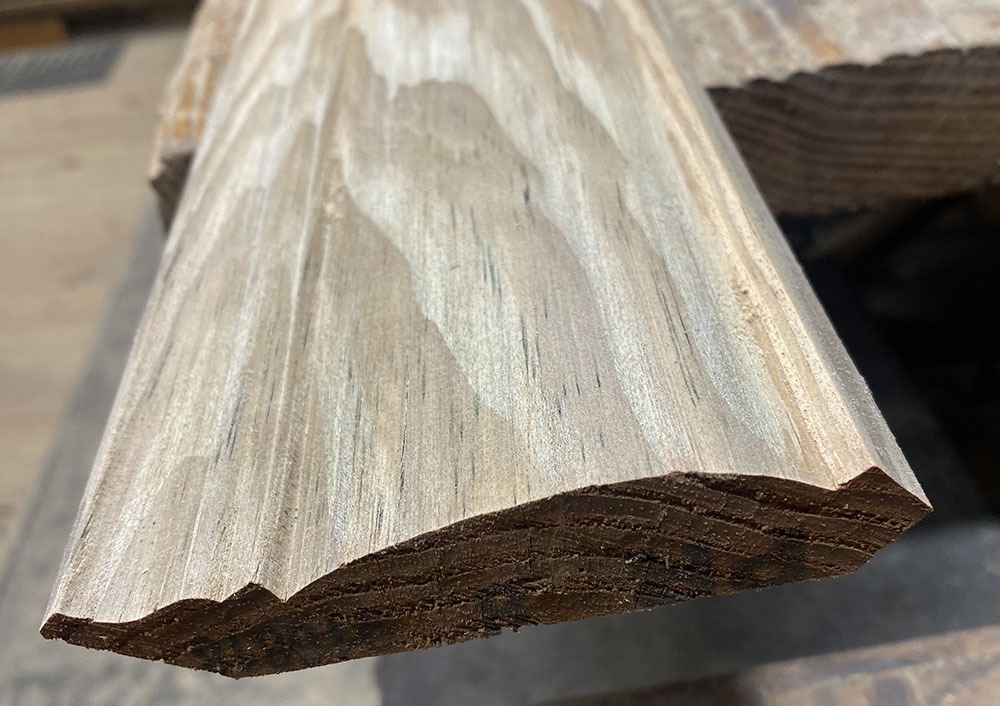
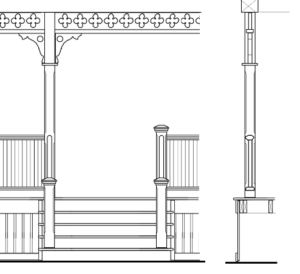
 About 10 years ago I made replacement porch rails for 722 Douglas in Elgin. It is an intricate rail so I had a knife made to duplicate it exactly. Below is the profile. luckily I kept the knife so I could make the rail again. It is made in two pieces and then glued together.
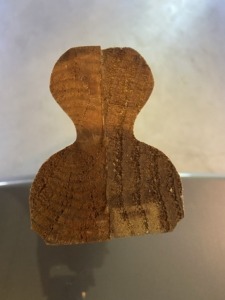
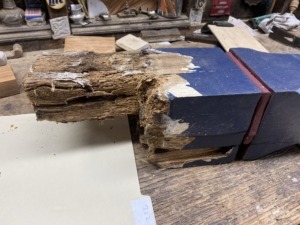
At the time I used cedar wood. Cedar has good rot resistance but it will still rot. After only 10 years the new rails rotted on their ends. A tree is designed to suck water up its length. If the end of a piece of wood is allowed to get wet it will suck the water into it. Once the water is there it will stay there and the wood will rot or attract carpenter ants. Below are the ends of the rotten rails. Once the wood is wet carpenter ants will eat it. They actually bored a one-inch diameter tunnel that is six inches deep in the one at the right.
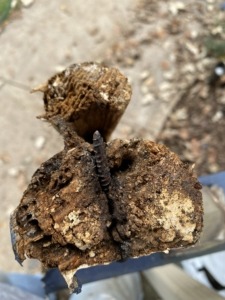
The 10-year-old newel posts also had exposed end grain and rotted badly, as shown below. Where two pieces of wood meet the joint has to be caulked and painted or it will rot. These posts were not maintained. The joint between the stair tread and the newel post was not kept sealed allowing water in and the wood to rot.

I made new newel posts to match the old exactly I used treated wood for everything.
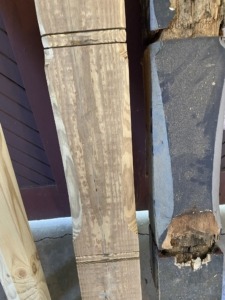
About three years ago I replaced a 6 inch section of the turned post because it was rotten and it broke. They did not seal the end grain when they installed the new piece so more of the old post rotted above my new section as shown on the right. I made another new turned section which was inserted into the post as shown on the left .
One of the big posts had a rotten bottom. I cut off about 10 inches and replaced it. I duplicated the bead and stop chamfer exactly.

The sawed apron boards have a framing board on the bottom. The seam between the frame and the apron boards needs to be caulked and painted. The owner did not do that so the open seam allowed water in trapping it between the boards so several of the apron boards were rotten and had to be replaced. I duplicated them exacctly.

If you have an old house porch and you see a black line showing a seam is open anywhere on the porch you need to caulk it then paint it. Use a minimum amount of caulk and make the seam neat. The best tool to spread caulk is your finger. I carry a can of water to lubricate my finger and scrape the excess caulk off of my finger after spreading it.