The Hegeler Carus Mansion, located at 1307 Seventh Street in La Salle, Illinois is one of the Midwest’s great Second Empire structures. Completed in 1876 for Edward C. Hegeler, a partner in the nearby Matthiessen Hegeler Zinc Company, the mansion was designed in 1874 by noted Chicago architect William W. Boyington. The mansion is now owned and operated by the Hegeler Carus Foundation, and is open to the public. It was designated a National Historic Landmark in 2007.


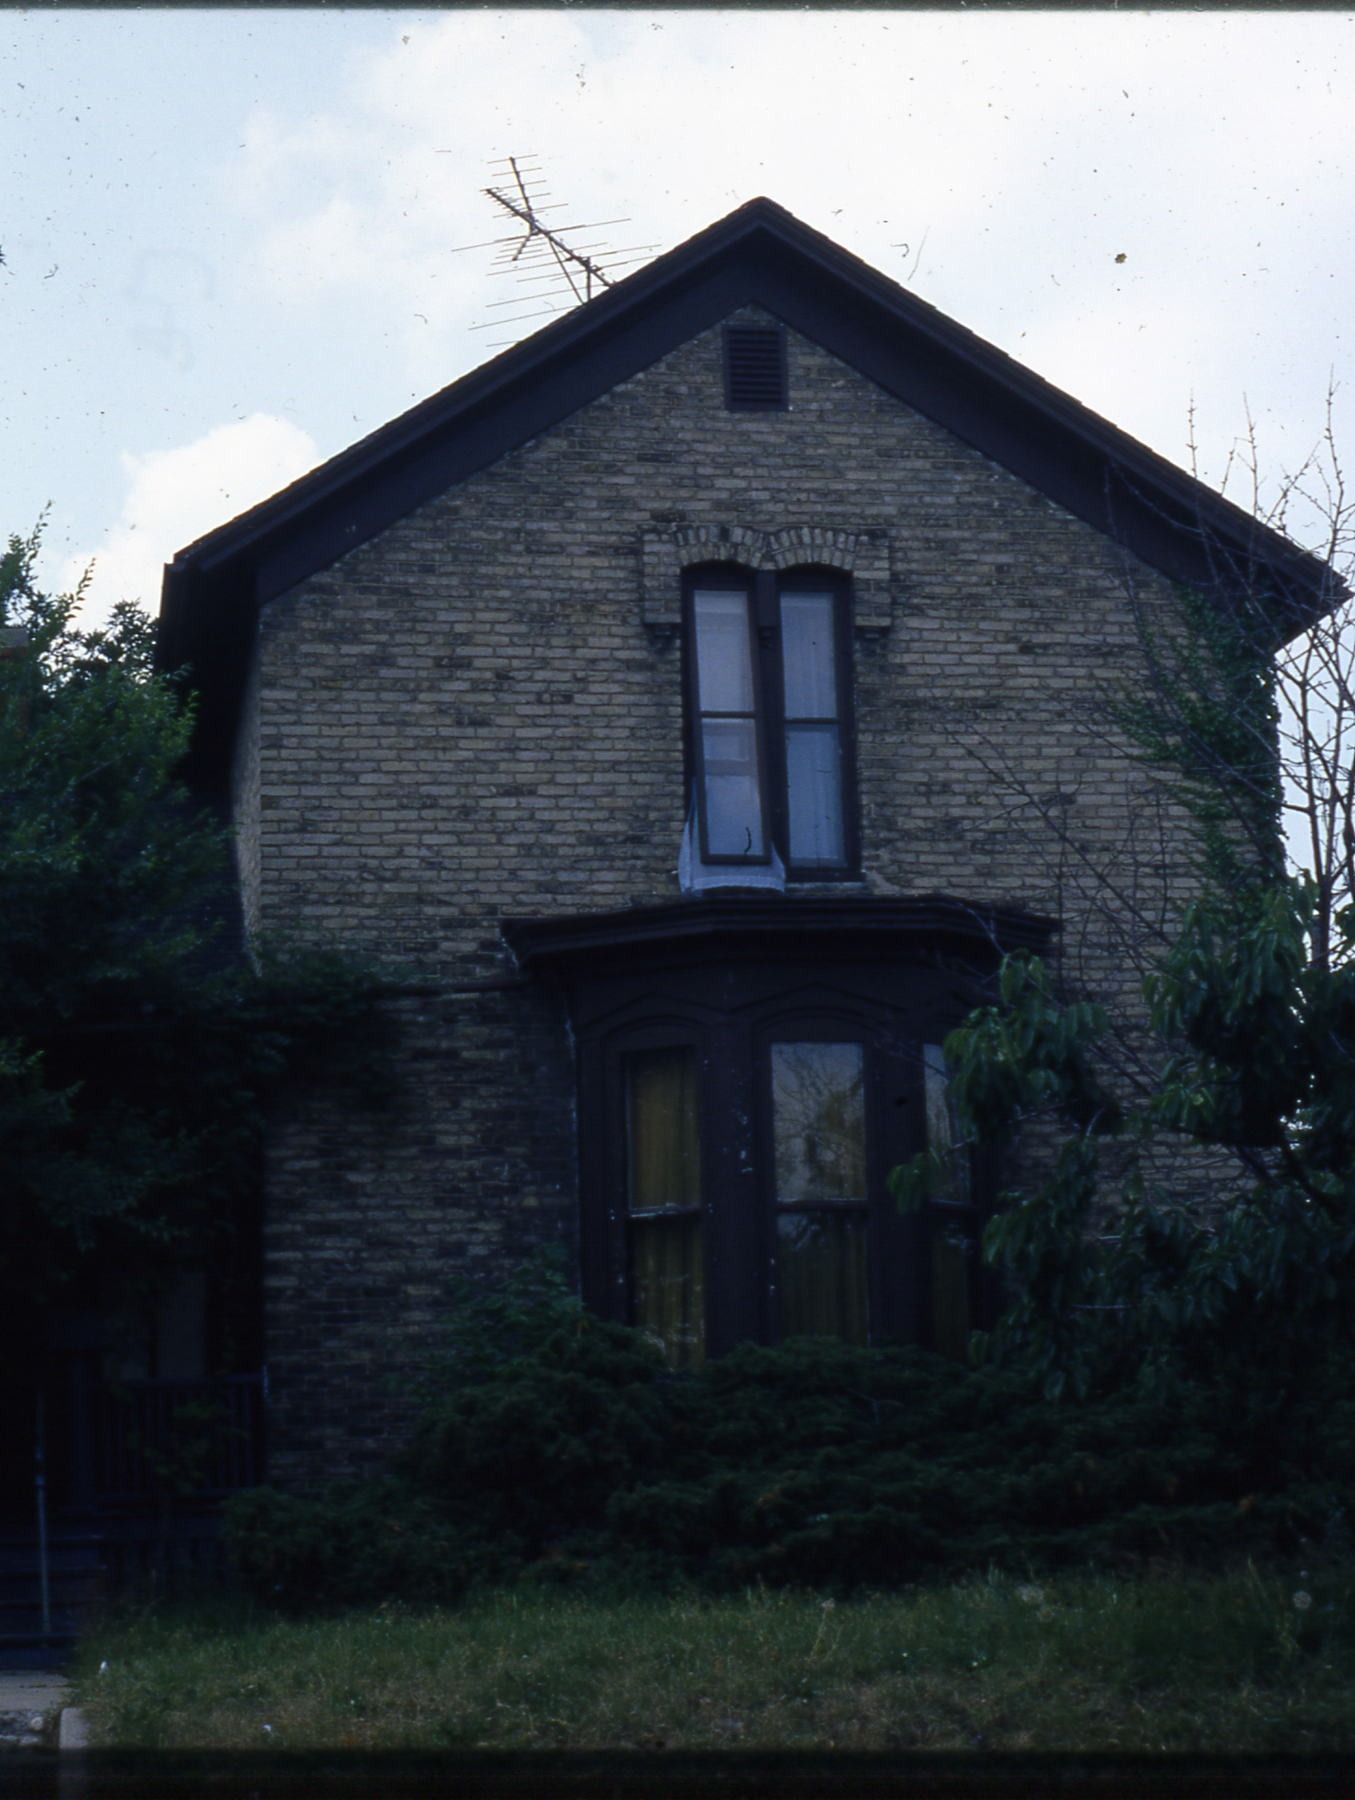
Haegler made his fortune in the zinc industry. They are still making zinc-coated nails in LaSalle. He built a mansion close to his factory as seen below. This is the south side.

South side with the porches missing


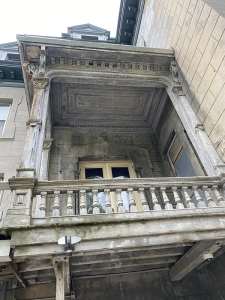
My mother-in-law has lived in LaSalle for the past 50 years so we’ve gone there often and have been following the mansion . We never saw it with its original porch intact. Below is what we saw for 40 years. This is the east side with the new porch.


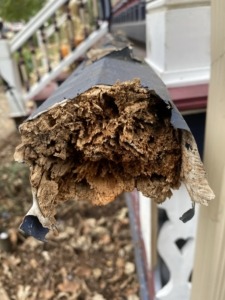
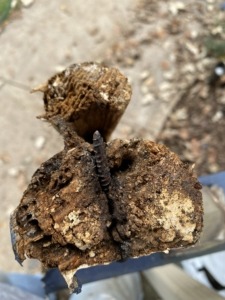
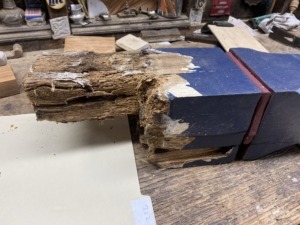
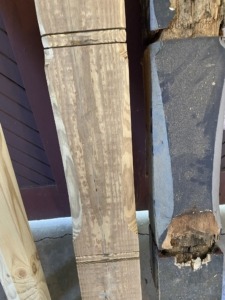
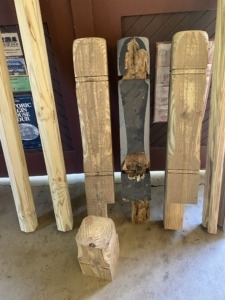
I have a woodworking business that specializes in old house porches so I called the guy wanting to learn from him. In talking I mentioned that I use treated lumber . He literally laughed at me on the phone. He said he wouldn’t use treated lumber for his doghouse I don’t know what kind of wood he used but I think he put some kind of epoxy coating on feeling that would protect it. I doubt he did the end grain and the owners didn’t keep it caulked and painted . It all rotted away in less than 10 years.  Even the stairs rotted away. They removed all of the rotting porch. I’ll bet now that he wishes he had used treated lumberEven the ceiling of the porch rotted.  I can’t imagine how he did not have an adequate roof coating on it,

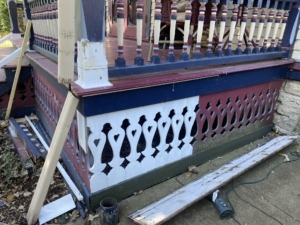
There is still an original part of the porch on the north side as seen below:

Click here to view interior pictures

Haegler Carus21 | Flickr


Many years ago, 409 Douglas had a new siding installed.

The neighborhood group did a Great Unveiling on the home and then the owner painted it nicely.

A previos owner had taken out part of the fancy interior stair balustrade to put in a wall to create an apartment

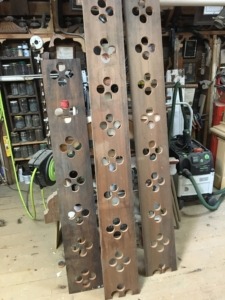
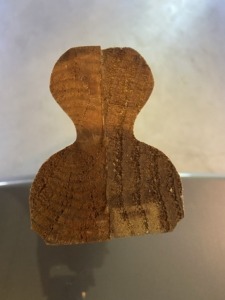
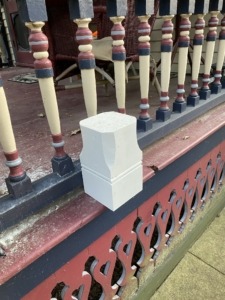
I made the parts to put it back.  Turning tiny spindles is very difficult.

Here is the finished  balustrade.  I also made two  newel posts,

I don’t normally do carving but had to here for the newel.

Using a bandsaw  I made the newel caps and pendents.

A previous owner had installed an inappropriate iron balustrade on the house at 507 E. Chicago.

Here is a picture:


The new owner hired me to put on an appropriate balustrade and newels.  I do not usually install but I did on this one. Here is a picture of my new balustrade and newels:

A woman at 643 Douglas contacted me about repairing her rotten newels, rails and one tread on her porch.  I agreed to take on the project.  I bought the materials and cut them to size for $600, and Dan Jensen built the porch for $1000.  She got a second bid for $2100 so she took ours.

Here is the front of the newel taken off to show the rot:

This shows the rotten rail:

Only one tread was replaced. As always,  I planed the treads to 1 1/4, rounded the edges and painted all sides.  If only one side is painted they tend to cup.A traditional cove was placed under each tread.

When we were finished there was a problem that concerned her – too difficult to explain.  Dan had to take everything apart and start fresh.


About five years ago, the porch steps on 140 N. Porter had rotted away.  The owner hired a guy to rebuild them.  He did so in treated lumber, but made newel posts that were not appropriate for the porch.  Newels are to match the porch posts.  He made square posts with a large cove chamfer.  The porch posts are round. The newels need to be round.  He added temporary 2 X 4’s as rails. Below is a picture:

The newel posts look terrible, and I hate the look of treated wood that is not painted. It has been this way for at least five years.  The city has been after the owner for 30 years to put back the balustrades that they took off and to do the porch steps.  They finally took him to court and he agreed to fix the situation.  They did not make the deadline and had to go back to court.  The judge gave them a month extension.  My porch step rails finished were a feather in their hat. A friend agreed to do the balustrades in exchange for a fancy Woodmaster planer that the owner had that is worth about $2000.  He had never used it.  I agreed to do the stair balustrade and newels as a volunteer.  I have known the owner for 30 years.  He is now 82 and not physically or mentally capable of doing the work.  I had just finished a porch where I made $400 so I committed that to this porch.   I ordered a custom knife to exactly duplicate the existing rails.

Here are cutoffs of the top and bottom rails that I made.  They duplicate the old exactly.

I duplicated the balusters exactly using a knife that I had.  They have one bead down the middle which is unusual for this type of porch.

I turned newels from a 6 X 6 treated piece of wood. They were heavy and hard to manipulate.  I also hand turned the top and base.

Here is the finished balustrade.  Having the rails meet up to round posts was a challenge.  The old saying applies her, “A little caulk, a little paint, makes a carpenter what he ain’t.”


One post had ten inches on the bottom and the base rotten,  I remade those.  Now, you can’t even tell it is new.

This is the post and base repaired.  The bottom 15 inches and the base is new.  Chuck Keysor did an amazing job blending the new with the old.  You cannot tell it was replaced.

This is the new base I turned. The other half of the base is just 2 X material glued up.

Here is the color the porch floor and steps are to be painted.  It is too cold to do it yet this fall.

Chuck Keysor spent months rebuilding the balustrades. apron and porch.  He put in several new cement piers and then added new posts.  He leveled the porch and replaced rotten floorboards.

Here are pictures with the lattice apron installed:


The people at 24 N. Porter built a new porch stair balustrade that did not match the original. As seen below, the rail on the stairs does not match the rail on the porch and it should. The city cited them for it and made plans for them for the rebuild.

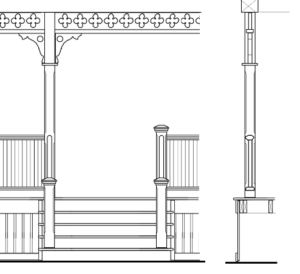
Here are the plans the city drew up

Their plans did not really fit the actual dimensions of the porch.  My wife and I struggled for a long time trying to figure out the best configuration.  We made several full scale mockups.

This is the mockup we finally decided on.I made the parts and Dan Jensen built the balustrade.  I turned the spindles and a finial for the newel.


I took off their 2 X treads and surfaced them to 1 1/4 closer to what an old porch would be.  I painted all four sides before installing to reduce cupping. I rounded over the edges and made a treated cove molding to go under each tread.


I made 20 hand cut fancy porch apron parts.  That was a huge job.  The outside cut could be made three at a time on the bandsaw but the inside cut had to be cut with a hand held scroll saw, one piece at a time.  Very tedious and the result is mediocre. The scroll saw does not always go where you want it to.

I pummeled the newel using a side grinder.

You use a compass to draw a circle on all five sides of the post and then grind up to the line to pummel the post.

Here is the finished porch.  The work cost the owner $1600.  Dan got $1000 to build the porch and I got paid $600 to make the parts.  A GPA grant paid half.


The porch rail newels and balustrade were rebuilt many years ago.  The parts that were not treated lumber rotted away. The owner asked me to rebuild the newel posts exactly as they were. I started making the parts and realized it would be too hard to tell anyone how to install them so I decided to make the newels myself.  I don’t usually install. Here is a picture of a rotten newel:

Below is the old post cap which I reused. I turned a new final.

The steps were an unpainted treated lumber.  I hate the look of it as seen below.

The owner did not want to change but I talked him into it. I had recently done a stair across the street that were unpainted treated lumber.  I planed down the treads added a cove under each tread and had the risers painted white. I convinced the owner to do the same.  Here are the steps I did across the street:

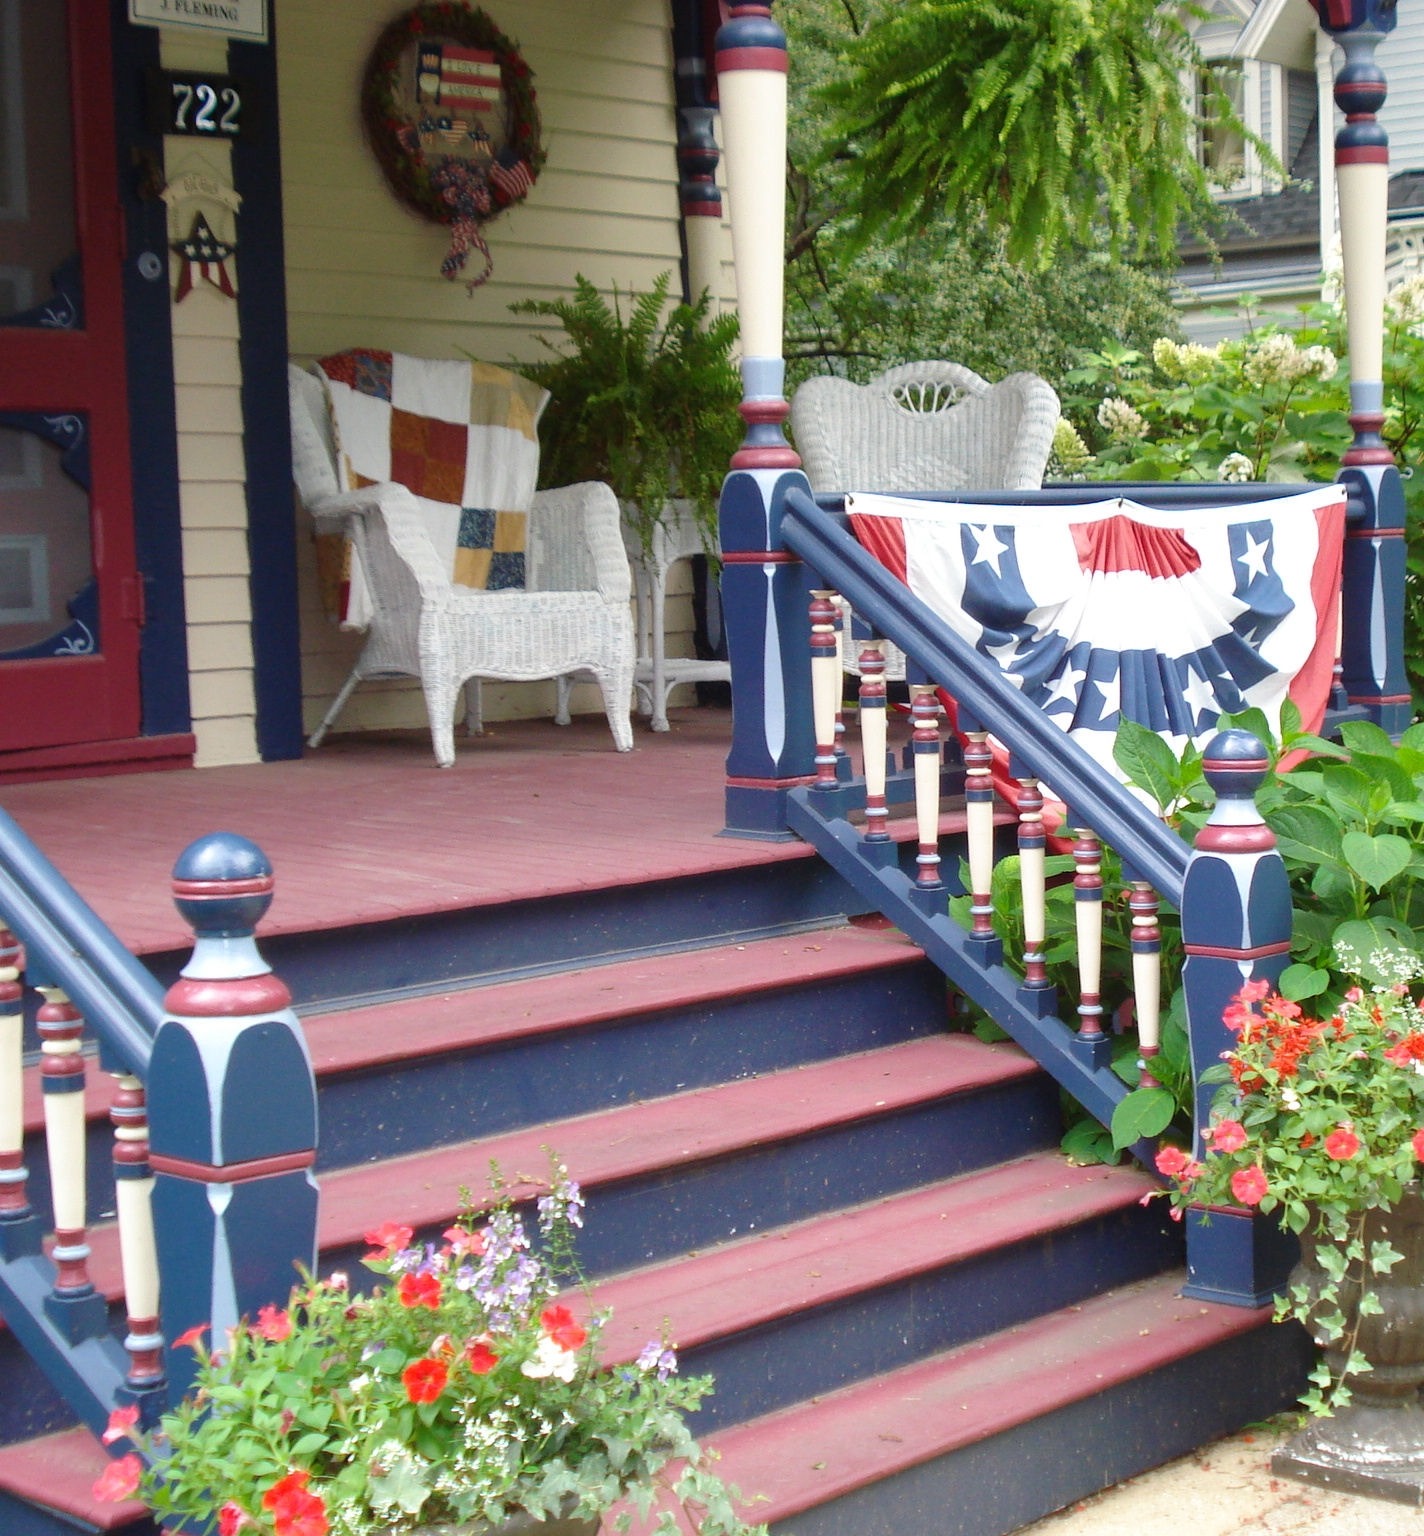
I feel strongly about the risers being painted a trim c0olor, not the color of the steps.  Below is what it used to look like on the house next door.


I convinced the owner to paint risers white.

I


Below is the finished steps with my new newels. I planed the old 2 X treads down to 1 1/4 like the old timers used to do.  I added a cove under each step just like they always used to. It gives it a classic look.


Six of the fancy post bottoms were rotten.  I turned new ones in treated lumber as seen below.  The one on the right is an original.


This is how the house looked in 1981. It was overgrown and not maintained. The bank holding the mortgage foreclosed several times as decent owners could never be found.  The bank asked the Gifford Park Association to oversee a rehab to make it decent to attract a good new owner.  They did it and new owners were found.

This is how it looked after rehab.


A year ago the new owner decided he wanted to add appropriate details to the porch and paint it.  He chose details from a similar house in the neighborhood:


I made the mockups of the new frieze, brackets, and balustrade to show the owner and the city. The square balusters are turned 90 degrees to make them look bigger.  It was often done and is a nice feature.

The bracket design was taken from an actual old house bracket as shown below:

The Preservation specialist at the city drew up the proposed changes for the homeowner and the Design Review Committee.

I made the new frieze and balustrade and a carpenter installed them.


The city Preservation specialist made several computer renderings to show different paint schemes. Two are below.  Notice one has brackets in the eves.  The homeowner requested them so they were included in the rendering for the Design Review Committee. Although appropriate for the house there was no evidence that they were ever there so the Design Review Committee denied them.

Here is a picture of the finished project before the bay and windows were painted:

The back porch was in bad shape:

I made new treads, rails, and balusters for the porch.

To reduce cupping the new treads had to be painted on all four sides with deck enamel  before installation:


About 10 years ago I made replacement porch rails for 722 Douglas in Elgin. It is an intricate rail so I had a knife made to duplicate it exactly. Below is the profile. luckily I kept the knife so I could make the rail again. It is made in two pieces and then glued together.

At the time I used cedar wood. Cedar has good rot resistance but it will still rot.  After only 10 years the new rails rotted on their ends. A tree is designed to suck water up its length.  If the end of a piece of wood is allowed to get wet it will suck the water into it. Once the water is there it will stay there and the wood will rot or attract carpenter ants.  Below are the ends of the rotten rails. Once the wood is wet carpenter ants will eat it. They actually bored a one-inch diameter  tunnel that is six inches deep in the one at the right.

The 10-year-old newel posts also had exposed end grain and rotted badly, as shown below.  Where two pieces of wood meet the joint has to be caulked and painted or it will rot. These posts were not maintained. The joint between the stair tread and the newel post was not kept sealed allowing water in and the wood to rot.

I made new newel posts to match the old exactly  I used treated wood for everything.

About three years ago I replaced a 6 inch section of the turned post because it was  rotten and it broke. They did not seal the end grain when they installed the new piece so more of the old post rotted above my new section as shown on the right. I made another new turned section which was inserted into the post as shown on the left .

One of the big posts had a rotten bottom.   I cut off about 10 inches and replaced it. I duplicated the bead and stop chamfer exactly.

The sawed apron boards have a framing board on the bottom. The seam between the frame and the apron boards needs to be caulked and painted.  The owner did not do that so the open seam allowed water in trapping it between the boards so several of the apron boards were rotten and had to be replaced. I duplicated them exacctly.

If you have an old house porch and you see a black line showing a seam is open anywhere on the porch you need to caulk it then paint it.  Use a minimum amount of caulk and make the seam neat. The best tool to spread caulk is your finger.  I  carry a can of water to lubricate my finger and scrape the excess caulk off of my finger after spreading it.

© Copyright 2017 - Old House Porches - Dan Miller Site Design by Resonate   Resonate Web Marketing  |   Log in