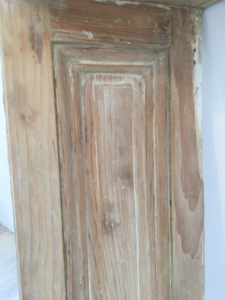
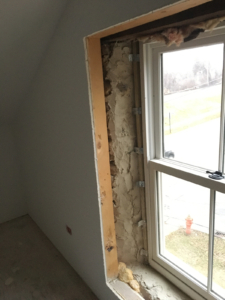
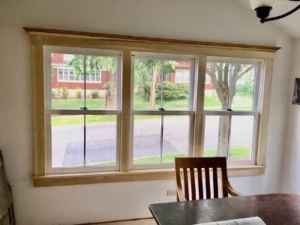
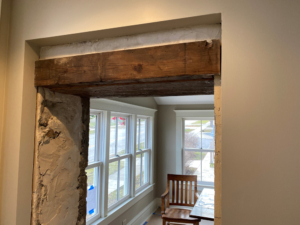
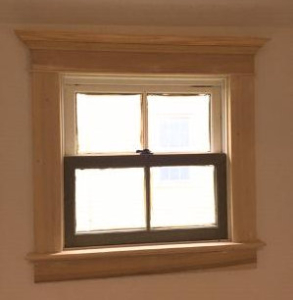
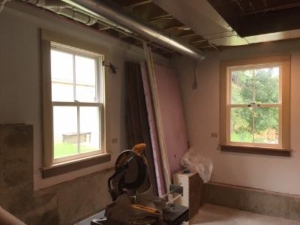
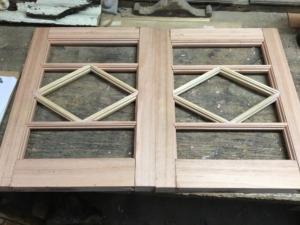
The owner wanted to change a plain window into one with embellishments like two others on the house. I was hired to duplicate the elements from the old window. On the left is the original old window which is to be duplicated on the right. The framing is finished on the right but the details have not been added.
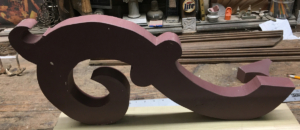
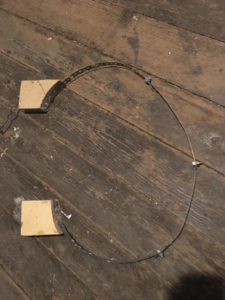
Here is a view of the old brackets and casings that are to be duplicated:
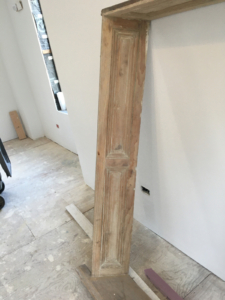
Here are the brackets I made for the new window:
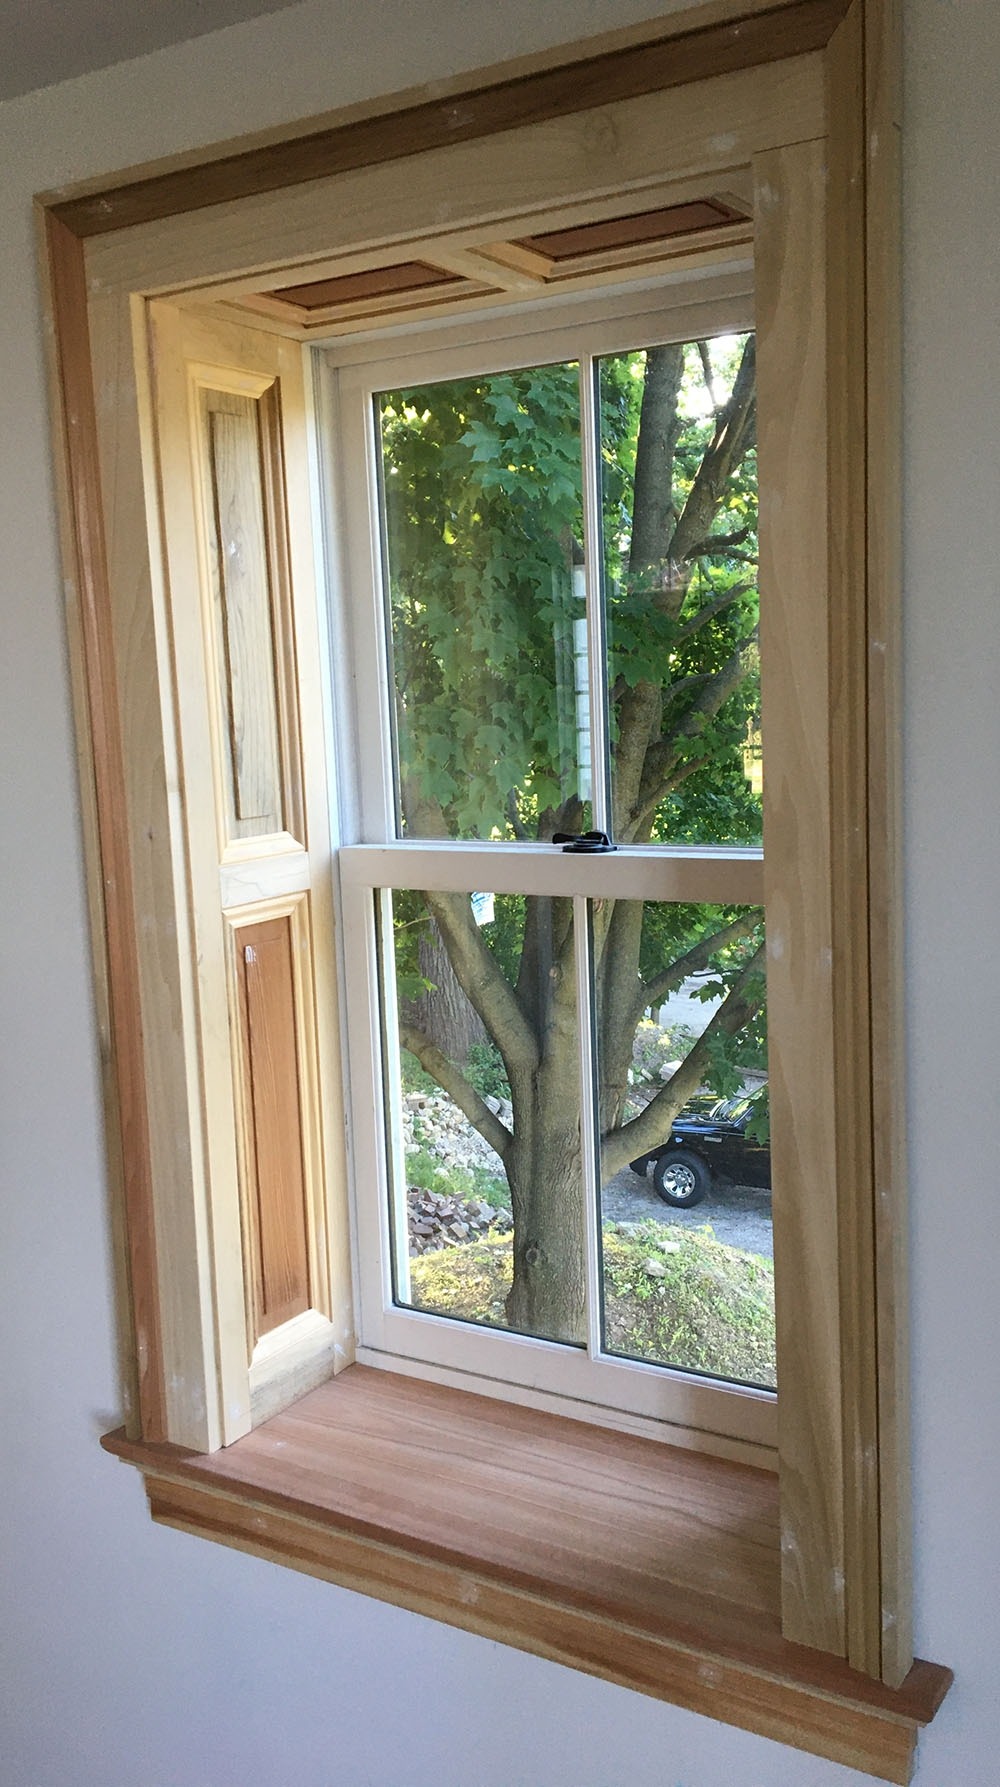
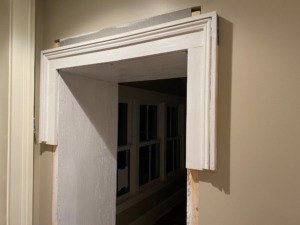
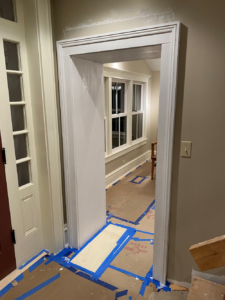
Here are the brackets and casings primed and ready to go.
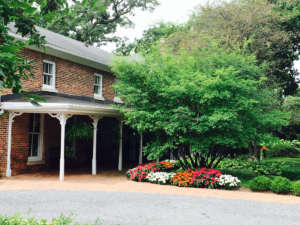
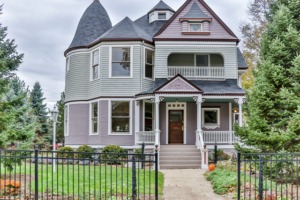
W. W. Abell, a prominent Elgin architect, designed the house at 327 W. Chicago.
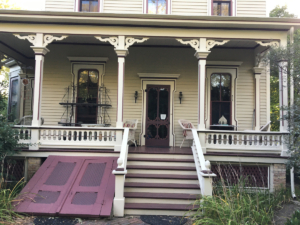
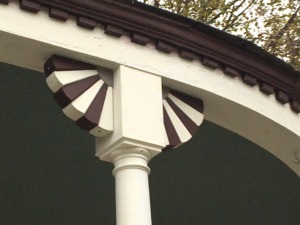
A contractor friend was hired to rebuild a rotting porch and he asked me to make the details. It was very satisfying working on a porch of that stature.
It needed a new porch apron. Abell had designed it to have the horizontal and vertical pieces interlock. I made it exactly the same.
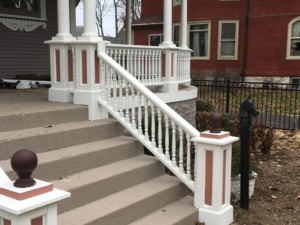
The gooseneck rails were simply bandsawed from a 4 X 4 so I did the same.
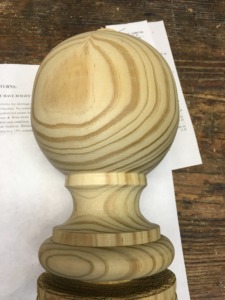
I turned all new balls for the balusters and the finials for the newels to exactly match the originals.
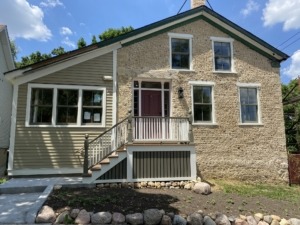
Here is the back of the house:
Here is one of the fireplace mantels and stained glass windows.
https://oldhouseporches.com/wp-content/uploads/2021/05/327-W-Chicago-porch.jpg15362048Dan Millerhttp://oldhouseporches.com/wp-content/uploads/2017/01/old-house-porches-dan-miller-logo.jpgDan Miller2021-05-13 21:52:092025-11-11 10:25:29327 W. Chicago porch by W. W. Abell
Abandoned Italiante home on Lake St in Hanover Park.
We drove past this wonderful old house hundreds of times going to and from work in the 70’s and 80’s. We so wished that someone would rehab it. The dormer in the roof is unusual for this style of house.
Here is an old picture of it. When it was originally built it was in Ontarioville, not Hanover Park.
Notice it originally had shutters. I’ll bet they were green. The old-timers did not have fine-trimmed lawns like we do today. They would let it grow long and then cut it with a scythe.
In the 70’s the home was the center of a huge sod farm. The land east of it was always filled with beautiful green sod. We stopped there once and asked the owner if we could go inside the home as we are old house enthusiasts. He said we could not as his migrant workers live inside.
In 1987 we were redoing our bathroom. My wife wanted a fancy ornament for above the tub. In driving past the home she realized their porch frieze would be ideal. We stopped and since no one was around we just traced it. Here it is in our bathroom.’
The porch on the east side of the house where we traced the element is completely gone as shown below.
Here is the frieze from the front porch.
The side porch did not have the little applique on it like the front porch has as shown below. We did not notice or we might have added it to the one in our bathroom.
Here is a picture showing a wonderful medallion and plaster cornice that is still in the foyer of the house.
Here is a picture of just the very unusual and wonderful medallion.
Here is the original interior balustrade that has been removed.
Here is another view of the balustrade.
Notice the original doors were false grained. All of the trim was also false grained which is very common in houses of this era. False graining was actually more prestigious than having actual hardwood.
The entire house was gutted some time ago. They were going to rehab it. A transom window above a wide door between the two parlors is very unusual.
The bay window had some wonderful details in including rope twists on the corners. The brackets and window hoods are wonderful.
Every window on the house had a large hood with little brackets.
The house had wonderful panels and brackets in the cornice.
Here is a picture of some old wallpaper left in the house.
This house did not have any fancy fireplaces which most houses of this era and stature had. Our own home is an Italianate of the same era and has four fireplaces. The house has a chimney in every room showing a stovepipe hole so each room had a potbelly stove for heat.
They have removed all of the exterior fancy details getting ready to demolish the house. I imagine they were sold to an architectural salvage. Such a crime!
https://oldhouseporches.com/wp-content/uploads/2021/03/lake-st-Italianate4.jpg506533Dan Millerhttp://oldhouseporches.com/wp-content/uploads/2017/01/old-house-porches-dan-miller-logo.jpgDan Miller2021-03-27 23:39:142025-11-11 10:25:37Nice Italianate mansion on Lake St. in Hanover Park
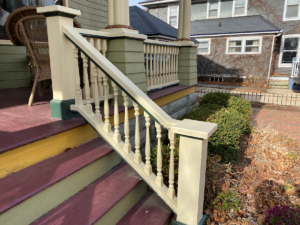
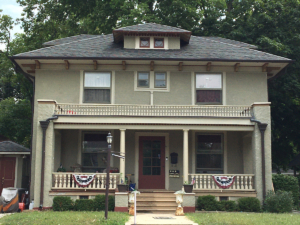
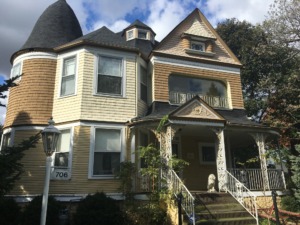
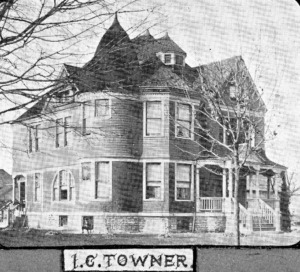
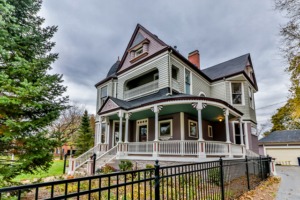
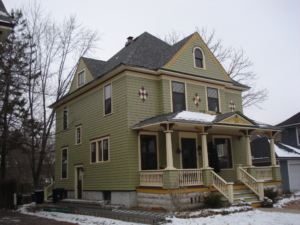
706 Douglas is a wonderful house in the Spring Douglas Historic District that was designed by prominent Elgin Architect W. W. Abell. Below is how it looked a few years ago.
The elderly woman that lived there was strong-willed and opinionated. I once told her that the wrought iron porch posts were not original to the house. She got very upset with me and insisted that they were. Below is an old picture of the house from the book Picturesque Elgin showing the original porch with posts and brackets.
The investor that rehabbed the home put back appropriate front and rear porches.
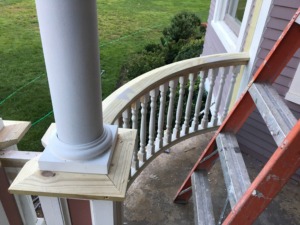
Their carpenter did a great job on the curved balustrade as shown below.
The second-floor balustrade was missing so the previous owner filled it in with a huge sheet of plexiglass for safety. The rehabber put back an appropriate spindled balustrade.
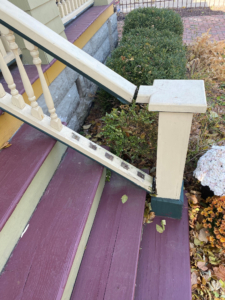
I had a minor part in the porch only making the finials and brackets.
The attic windows in the little dormer on the east side were rotten as shown below.
I made new ones to exactly duplicate the original.
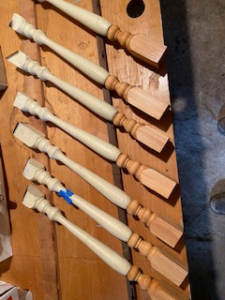
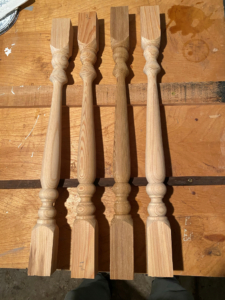
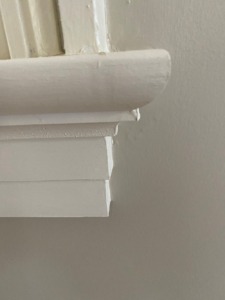
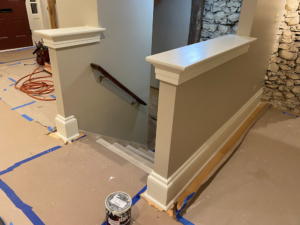
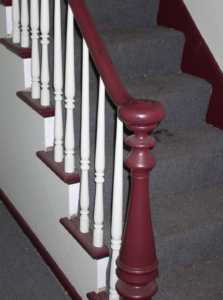
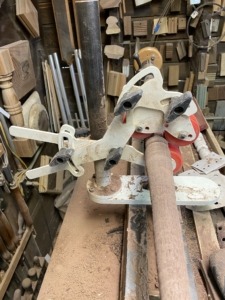
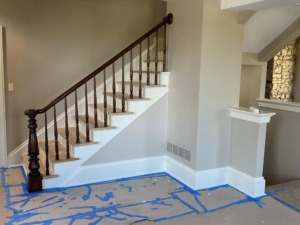
The interior stair balustrade is very unusual, fancy and had some missing finials.
I remade them duplicating the originals exactly. The one on the right is an original.
The Gifford Park Association has a page on their website dedicated to W. W. Abell. He designed a home at 427 Fulton and the plans were left with the home. The first part of the post is the plans but then it goes on to talk about the man. Check it out:
https://oldhouseporches.com/wp-content/uploads/2021/02/706-Doulgas23.jpg427640Dan Millerhttp://oldhouseporches.com/wp-content/uploads/2017/01/old-house-porches-dan-miller-logo.jpgDan Miller2021-02-09 20:32:592022-04-07 13:50:45706 Douglas porch and more
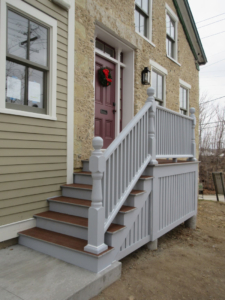
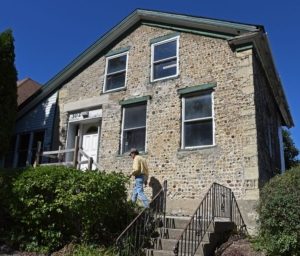
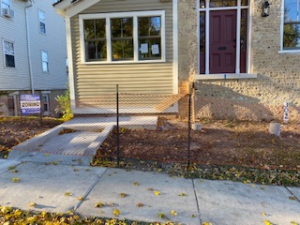
The Historical Society is rehabbing the oldest home in Elgin. The city bought the problem property that was six units. They are keeping possession but letting the Historical Society rehab the property for their use. The interior is almost finished so they switched to putting back an appropriate porch. Here is what the property looked like when the Historical Society took possession. The cement steps lead to a recently and poorly built porch.
Below is an earlier picture with a different configuration for the porch.
The poorly built porch was taken off and a new concrete approach was added as shown below.
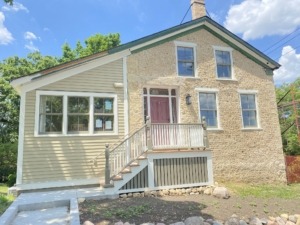
Here is what the new porch looks like.
Scott Savel of All Around Home Improvements was commissioned to build the new porch. His Facebook page does an excellent job of describing the process.
https://oldhouseporches.com/wp-content/uploads/2020/12/finishedresized.jpg1067800Dan Millerhttp://oldhouseporches.com/wp-content/uploads/2017/01/old-house-porches-dan-miller-logo.jpgDan Miller2020-12-13 22:20:132022-04-07 14:21:17Great new porch on 1846 Greek Revival home
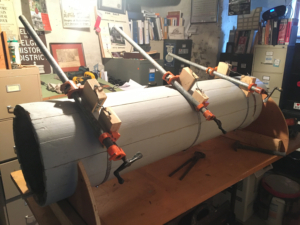
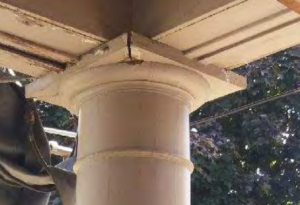
The porch columns on this building were coming apart and some of the tops and bottoms were rotting with the beam sagging. The owner took it apart, put in a new beam and I repaired the posts and remade the tops and bases.
The coopered columns on this apartment building are 18 inches in diameter. Coopered means they are made from many pieces of wood like a cooper makes a barrel. Two of the posts came apart. I cleaned the edges and made special clamps to pull them together while gluing. The clamps are metal strapping attached to blocks of wood. the strapping allows you to make them any diameter you want by screwing pieces of strapping together. The pipe clamps can pull very tightly. A typical band clamp is not strong enough so I made the special ones and have used them several times. I have not seen them anywhere else so I think it was my original idea.
Here is an adjustable band clamp that I made out of strapping and blocks of wood.
I made cradles to hold the columns while gluing.
Several of the bases and tops were rotten.
They were originally made using a shaper with a huge custom head. I don’t have a huge shaper and custom heads would be very expensive so I used a lathe to turn them. They are 20 inches in diameter so I had to use the outboard side of the lathe. The wood is glued up cypress. Make sure the pieces are from the same board. If one board is denser than the other it will jump so badly that it will not turn nicely and may fly off. A very low speed is also crucial.
The people that rehabbed this porch used balusters designed for interior use. Had they painted or caulked the end grain it would’ve helped them last longer. After installation, they needed to have the edges of the bottoms caulked so that water can’t get into the end grain. You always have to seal the end grain of wood on the exterior of a house. A tree is designed to suck water up its length through the grain. If you let water hit the end grain it sucks it into the element, stays there, and rots it. The end grain of the rails needed to be sealed also so they would not rot as shown below. Also always use treated lumber on porches.
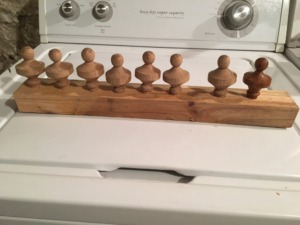
On seven spindles I cut off the rotten bottoms and made new ones.
Here are the spindles with new bottoms. I did not cut them to length in the shop. I let the carpenter do that on-site in case there is some variance.
Four spindles had gotten lost so I made new. The wood is cypress which has great rot resistance but I still covered them with preservative.
Here is the balustrade repaired.
The young couple is new to old house living and the neighborhood so I did the project at no cost to them.
Here is a picture taken in 1981 of a house in our neighborhood.
The wrought iron rail and posts are not appropriate for the house so the owner decided to put in more appropriate spindles for the balustrades and posts for support.
He bought new spindles and installed them along with additional porch posts as seen below.
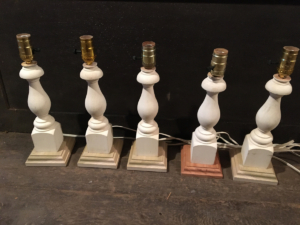
Even tho the spindles in the upper balustrade are spaced too closely together the owner had a lot left over. He gave them to me and I gave them to an antique shop downtown to sell. They sold a lot at $5 each and when they went out of business they gave me five back. My sister has a shop in Wisconsin where she sells furniture and some of her creations. I decided to make lamps out of the spindles to be sold in her shop. Getting a hole drilled down the center was a challenge but I solved it on the lathe.
Here are the lamps wired and ready for painting and a fancy shade.
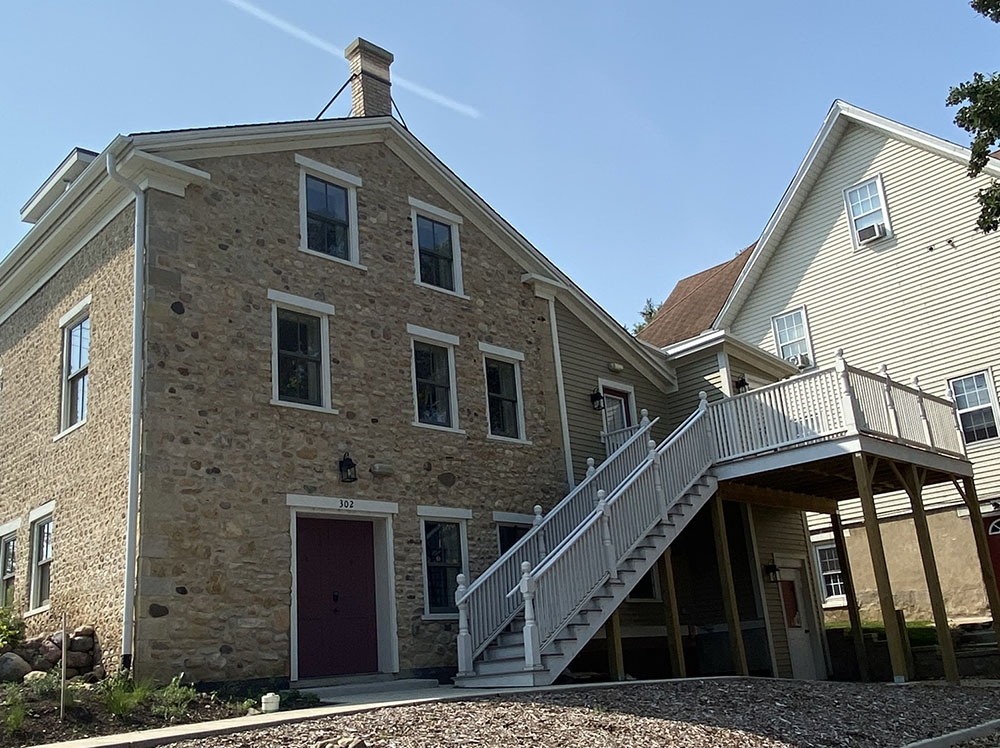
Nancy Kimball Cobblestone interior and exterior rehabilitation
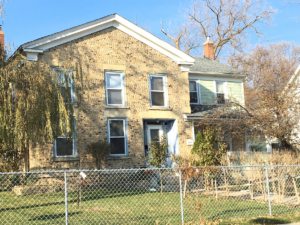
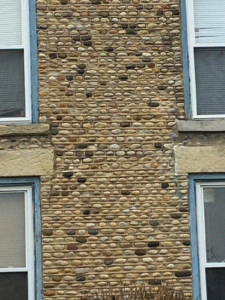
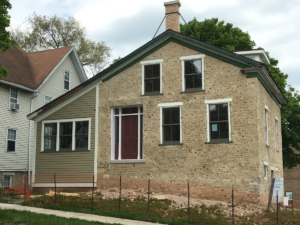
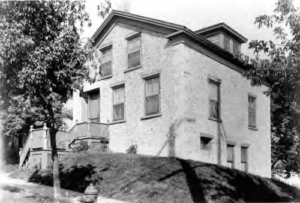
302 W. Chicago was built in 1846 by the Kimball brothers for their mother Nancy. The Kimballs were some of the founding fathers of Elgin. It is one of many cobblestone structures in Elgin. An early picture of the home is shown below.
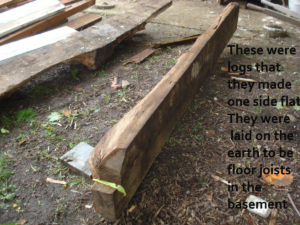
In Mike Alft’s book Elgin: An American History he states, “The oldest home in Elgin still existing is a cobblestone on the NW corner of Crystal and W. Chicago streets. All the floor beams are of oak from a forest that once grew in the area.” The joists for the basement floor were tree limbs made flat on one side with an adze. They were laid directly on the earth and lasted all these years. Below is a picture of one of them:
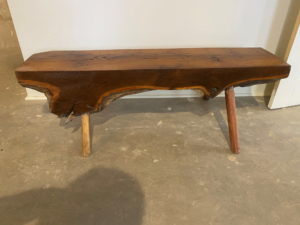
John Crowe, the mason that rebuilt the north wall has taken parts of them to make some interesting benches.
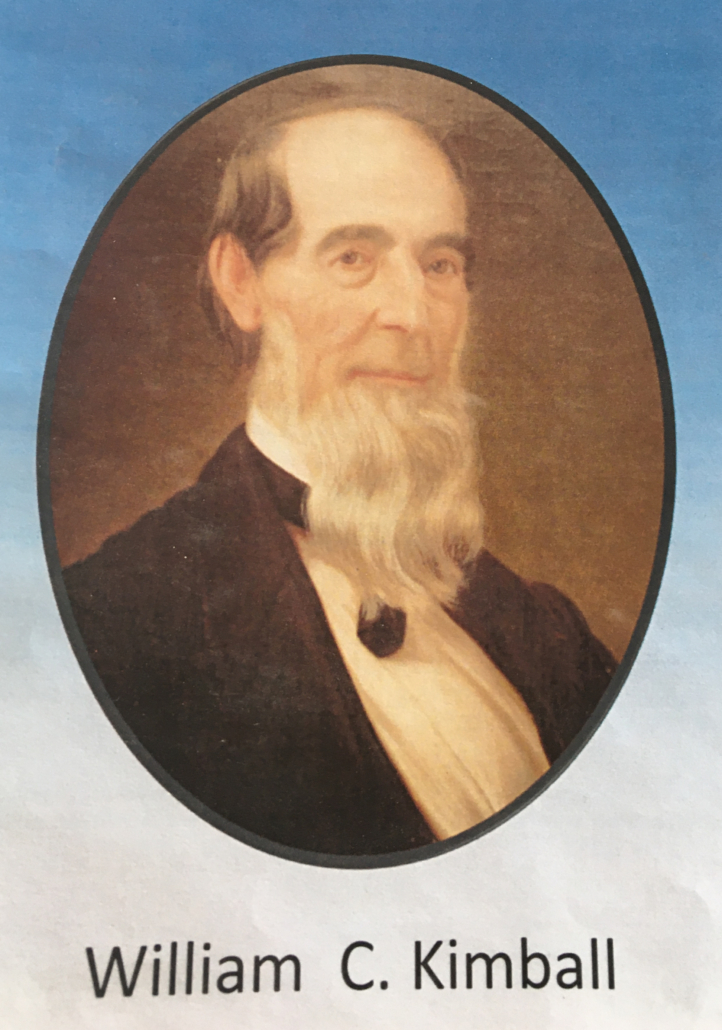
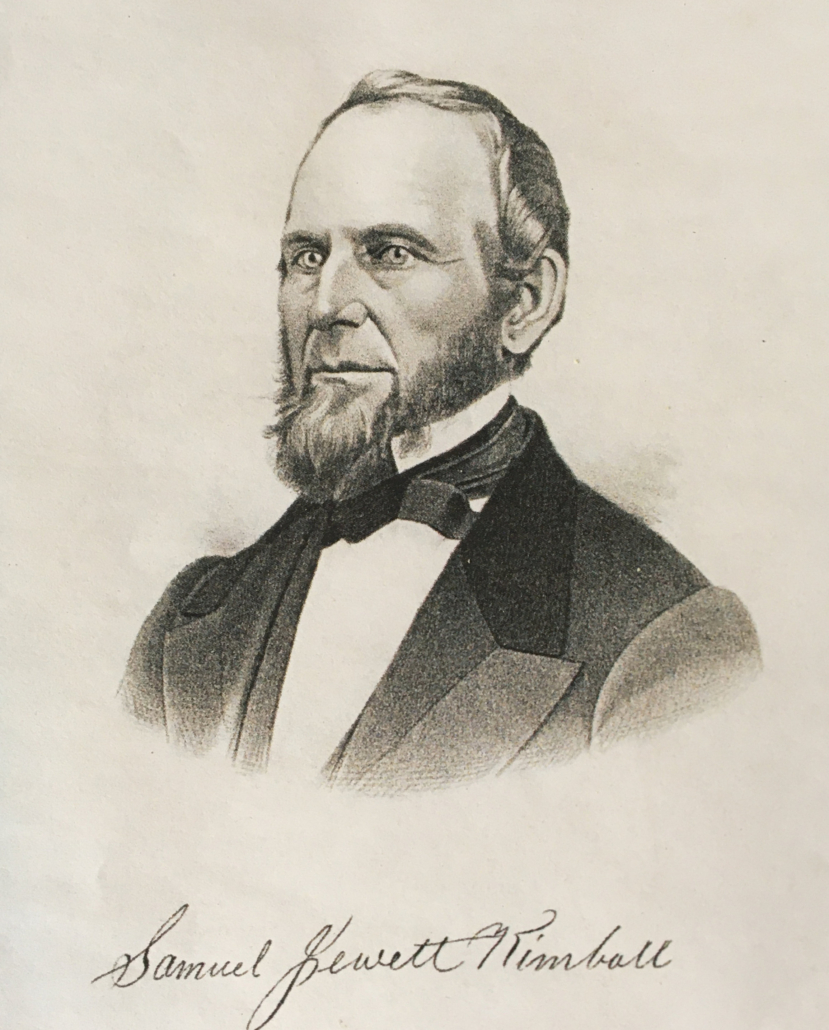
Pictured below are the Kimball brothers.
In 1854 Sam and William Kimball’s cousin Edson built a very nice cobblestone house at 328 Mountain, just a block away from 302 W. Chicago. The cobblestones are more uniform and the trowelling is fancier. The placement of windows is much more pleasing to the eye than 302 as shown below:
302 W. Chicago has wood lintels and sills, many of which had to be replaced and 328 Mountain as seen below has limestone ones. They formed straight lines with the troweling which they did not do at 302.
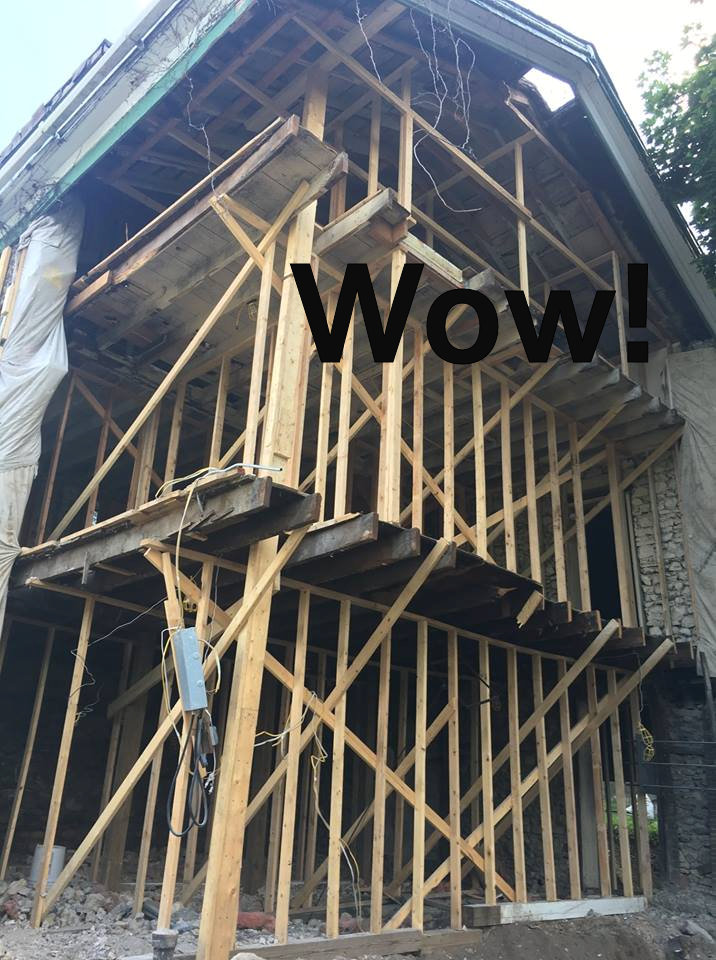
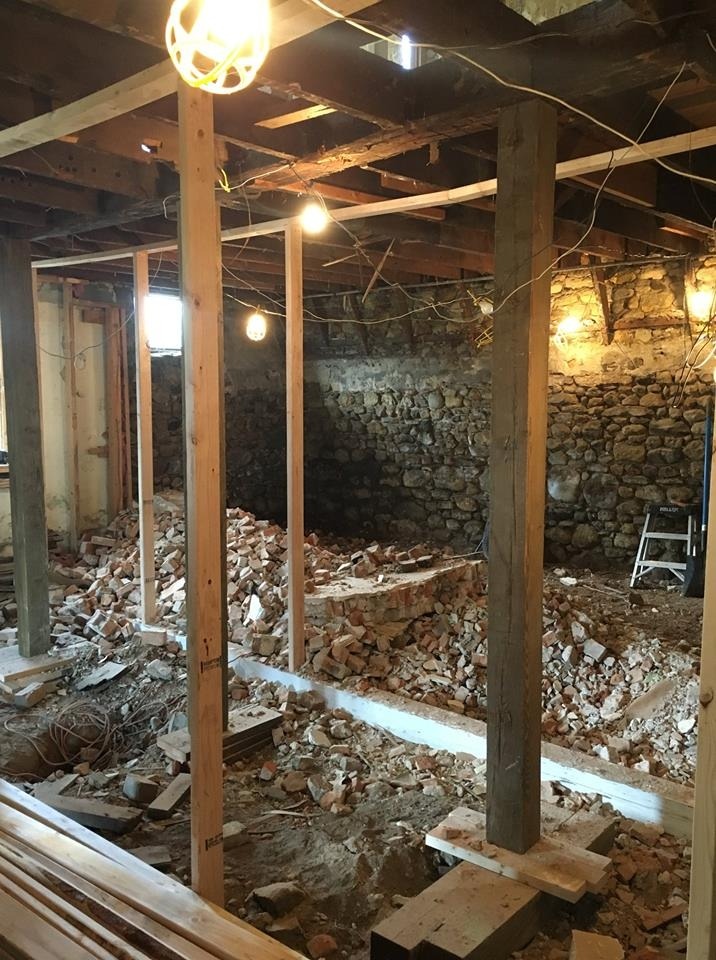
302 W. Chicago was turned into six apartments that in recent years attracted troubled tenants. There were lots of code violations and police calls made to the property. To get rid of this problem property the city decided to buy it in 2009. They gutted it to better determine what path to take in rehabbing it. They asked contractors for bids to rehab it and because they were so high they gave up on the thought of doing it. In 2015 the city entered into a contract with the Historical Society to allow them to take control of the property and rehab it for their use but without any further financial help from the city. They started work on it in 2016 and have made a huge difference. There were six apartments with two on each floor. The past owners had to make a back staircase to allow entrance into the apartments on the second floor.
The cobblestones on the entire north side and east corner had to be taken down and rebuilt stone by stone. The fancy troweling was absent on the back just as it is on 328 Mountain.
John Crowe did an amazing job putting it back together.
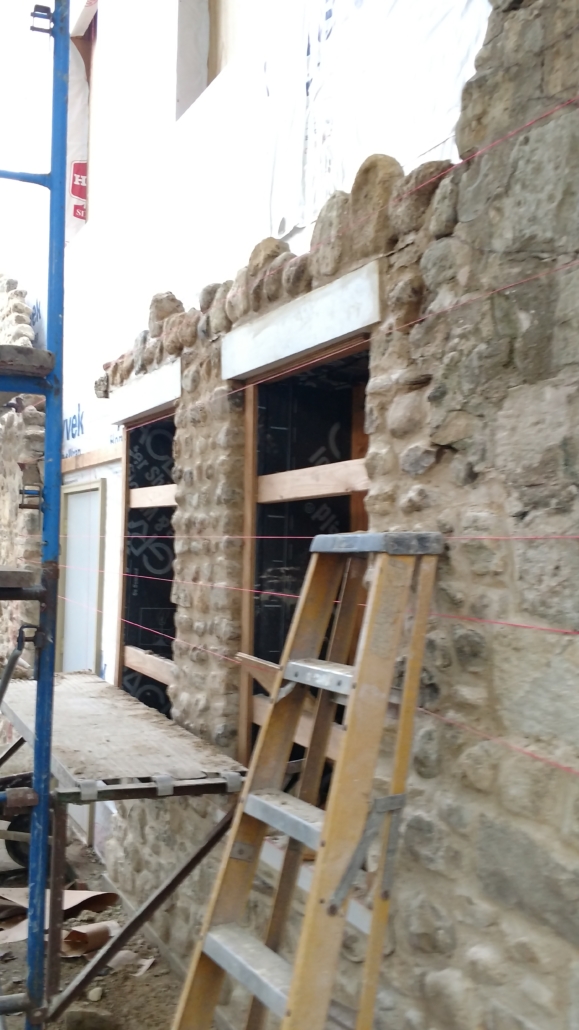
The interior trim side panels on three original windows were left in the house. They were put back and I made and installed the trim on them and the other remaining thirteen windows. The moldings in the side panels of the new windows I made exactly match the original. Here is one panel of an original window surround chemically stripped of many layers of paint by John Crowe:
Below is the whole old frame that was removed and installed back in one piece. Three of these frames were left in the house from the south side of the main room and were reused.
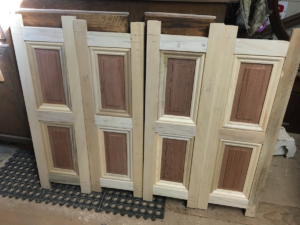
Here is a window before new panels and trim were added and after hand-made panels were installed on fourteen windows.
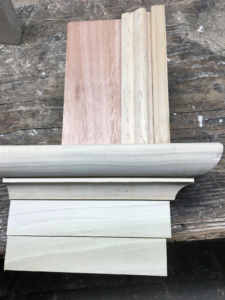
Some trim was left in the house but no complete pieces. After much consideration, my wife and I picked an appropriate new design. Below is the mockup of the trim and sill that I proposed. The committee approved it and I milled it for 16 windows.
Below are some of the panels that I made for the windows.
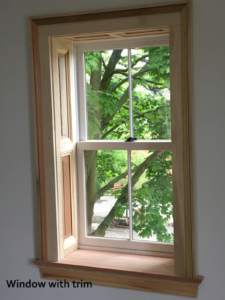
Here is a finished window with side panels and trim.
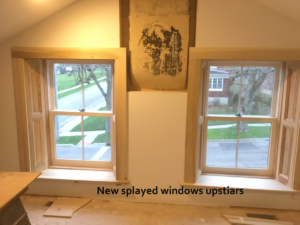
The three original windows left in the house had side panels that were splayed. I think all the windows in the house were originally splayed but the plans did not call for that so they are built perpendicular to the window. I decided to try to splay the two windows in the south upstairs bedroom. I did it! The angles of the moldings in the top panel were difficult to cut but I did it. There is an old saying that says, “A little caulk, a little paint, makes a carpenter what he ain’t.” I do admit to having to use some caulk. Here is a picture of those splayed window treatments.
The open wall shows a chimney breast and a patched hole for a coal-burning stove pipe. The Historical Society is leaving it to tell the story of how the people lived – with only a few coal-burning stoves, I’m sure they were cold.
In finishing the interior, two small closets were created. They did not have doors so I made jambs and doors for the openings. Greek revival homes often only had two vertical panels so I chose that design for the closets. Gifford’s cobblestone cottage on Prairie has doors that have two vertical panels. Here is a picture of a door from Gifford’s home showing the two vertical panels common to the era:
Below is one of the finished closet doors that I made.
Rebecca Marco has done a wonderful job, as a volunteer, painting the trim.
270 feet of baseboard and cap were missing. Pat and I studied several other cobblestones and decided on the design that is used in the foyer of the Gifford cobblestone on Prairie. Below is a picture of it.
A mockup was built to get the okay from the committee.
I milled 270 feet of the new base and cap from clear poplar. Volunteers painted the molding before installation and I installed it on the first and second floors as shown below.
New maple floors have been installed in the entire house and the walls have been painted. The original floors were 1 1/8 X 6 tongue and groove pine.
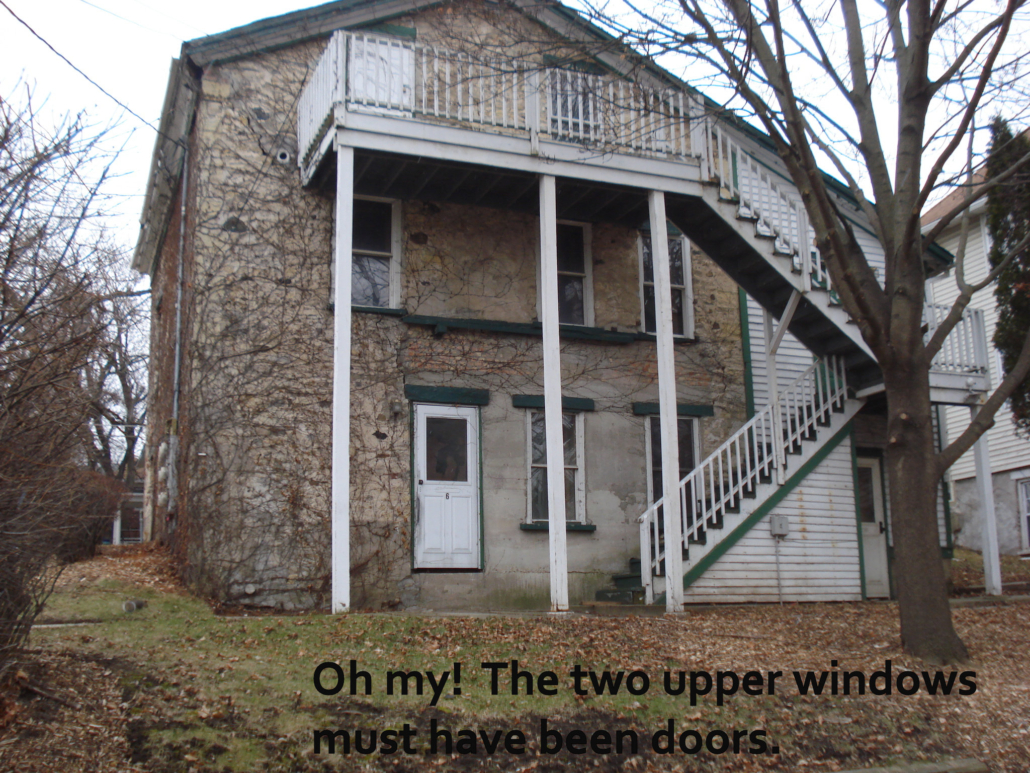
The people that built this house did not know that the fenestration, the placement of windows, and doors should show some symmetry. I hate the way it looks. The window placement, on the east side without any symmetry, hurts my eyes as seen below. The owner must have had reasons for the odd size and placement of the basement windows. The left basement window could have been the same size as the others but was not made that way. Maybe Nancy wanted to put a bench there??? The black triangle is an unfortunate mistake made of new cement. The cobblestones should have been continued to the ground just like the corner.
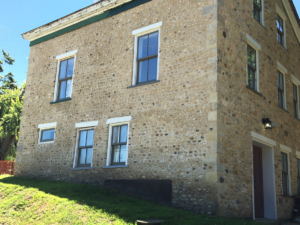
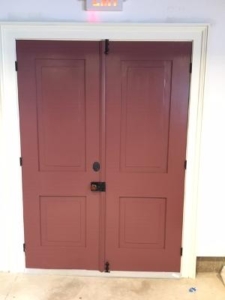
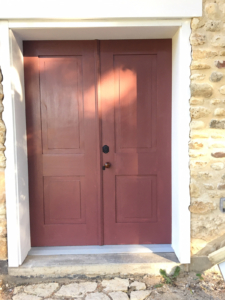
Originally, the basement had a single door for entrance as seen below. Again, without any symmetry and vertical alignment, the windows and door look terrible.
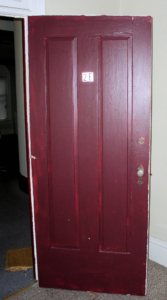
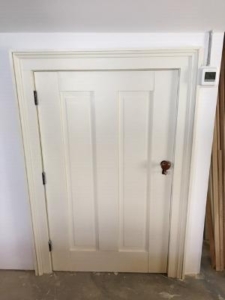
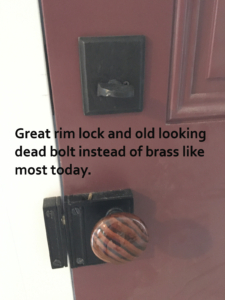
The committee decided to make the basement door a double door to accommodate bringing wide displays into the building. After getting a design okayed by the committee I made custom jambs and doors for the opening. The walls are very thick so the jambs are 14 inches wide. Here are the interior and exterior pictures of the new doors that I made. We chose rim locks with Bennington knobs as they are appropriate for the period.
In the ’20s there was an addition put on the building as seen below. Additions are to be set back from the original building which was not done here so it does not look right. The owner probably built it himself without the help of an architect. The return on the soffit/fascia on the left will be replaced to match the right side. The sills will be painted white to match the lintels. The green in the soffit fascia will be replaced with white when it is rebuilt. All trim on a home is to be the same color. The sills have been changed to white. Notice the return on the cornice is missing on the left side.
A new front door and surround were professionally built and installed at a cost of $13000. They did not trust me with that one.
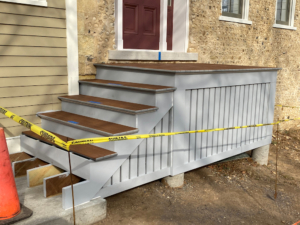
Work has begun on the new front porch. Scott Savel of All Around Home Improvement got the contract. Here he is starting the work.
The new porch is taking shape.
Here is the finished new porch expertly constructed by Scott Savel. The gray color is primer.
Here is the porch painted. The cornice needs to be repaired and painted.
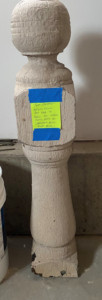
This is an old newel post they are using as a model for newel posts for this porch. It represents a newel from a porch in the 1890’s. An old picture of the house shows a newel like this but I do not believe it was original to the house. I do not think it is appropriate for an 1846 home. Most Greek Revival homes did not have porches or newel posts.
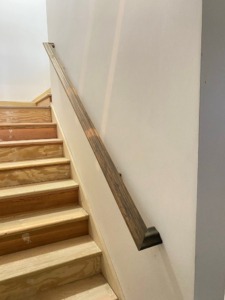
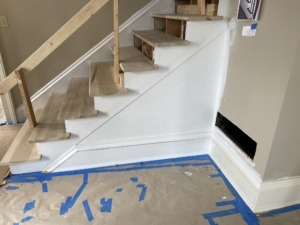
There were drywalled knee walls on the stairs going to the first floor as seen below.
I suggested adding something to them to make them look old. We tried lots of different combinations of moldings and finally decided to go with the design of the window aprons as shown below.
Here is the finished product:
New windows were installed in the addition so I needed to make new trim. Since it was built in the 20’s I wanted a trim design from that era. Here is a mock-up I made using an old piece of trim and a new molding for the committee to approve and they did.
Here is the new trim on the conference room in the addition.
To make access for six apartments they made a hole in the wall to go from the old portion of the house to the addition as seen below. They did not put in a header to hold up the wall above it. George Rowe installed a steel header and added old wood to look like an old header. I did not like the look of the exposed cement right next to the front door in the main room of the house so I suggested putting in jambs and framing it out.
Below is a mockup of my proposal to show the committee what I wanted to do.
They agreed with me and here is the final product. The jambs are 22 inches wide.
Here is the new trim I added to the bathroom in the addition.
The addition has a full basement that houses the utilities. It was drywalled so I made trim for it. I scaled it down a little from the upstairs addition as it is a basement. The trim in the basement of the original part of the house is the same as the rest of the house. Here are the basement windows in the addition with new trim.
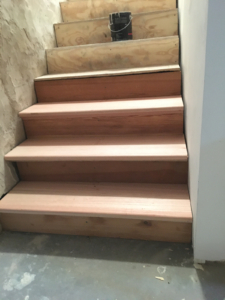
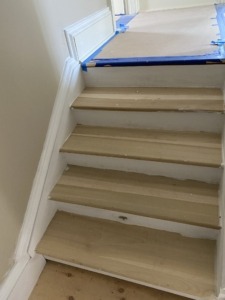
The next big project is to replace the plywood treads and risers with actual bullnosed treads and risers. I made three to get the okay for the committee as shown in the picture below:
They gave me the go-ahead so I replaced all of the plywood treads and risers as shown below.
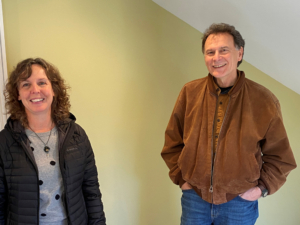
Here are the King And Queen of the rehab committee for the Nancy Kimball Cobblestone project. Liz Marston and Bill Briska.
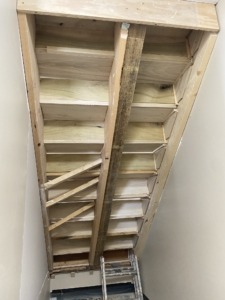
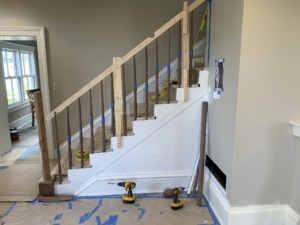
The big project for this winter is to make a fancy newel, treads, and balustrade for the stairs going to the second floor. After a lot of research and visits to other cobblestones, it was decided to duplicate the newel and balustrade at James T. Giffords cobblestone on Prairie. Here is a picture of his house:
Here is a picture of the balustrade to be duplicated:
For the basement steps that I made, I simply took off the plywood treads and added appropriate 5/4 bullnosed treads. I put in stringer boards but they were just for looks, not actually functioning like the old-timers made stairs.
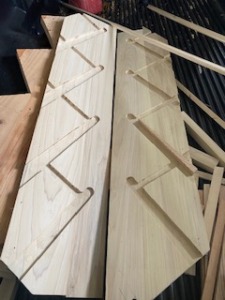
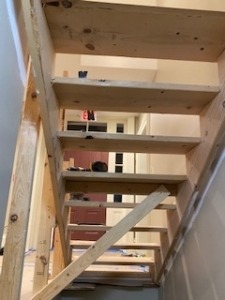
On the other stairs I was inspired by the story on FB (Restoration Workshop in San Francisco) where he made an old-fashioned stringer with dadoes for the treads and risers which is called an enclosed stringer. Here is a picture of the enclosed stringers that I made. By doing it with a jig and a router it was much easier than the old-timers had to do it with hand tools.
I tackled the four steps from the landing to the second floor first as I needed a small project to test my wings. Here is a picture of the temporary stairs removed and the enclosed stringers installed.
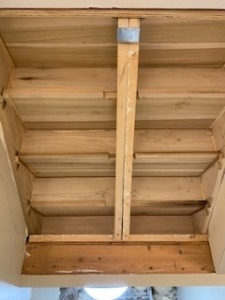
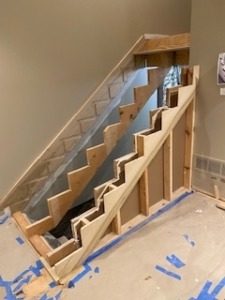
Here is a picture of the underside of the stairs with the treads and risers installed.
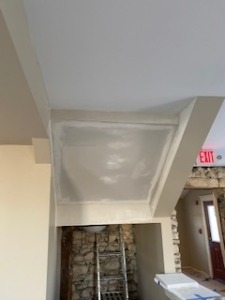
Here is a picture of the backside of the stairs drywalled.
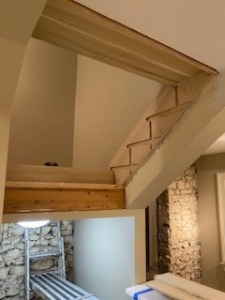
Here is a picture of the finished stairs.
Here is the underside of the construction stairs that go from the first floor to the landing.
Here is a picture of the backside of the stairs drywalled.
I plan to do the same thing that I did for the landing to the second floor with the stairs going from the first floor to the landing. Here is a picture with the temporary stairs removed and the enclosed stringer and outer faceboard installed.
Here is the underside of the stairs reinforced for strength.
Here is a picture of the wall finished off.
Here is a picture of the balustrade at the Gifford Cobblestone that will be duplicated exactly.
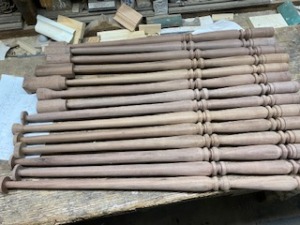
I turned fourteen walnut spindles for the balustrade. They match the Gifford cobblestone spindles exactly.
The spindles were long and slender so I had to use a steady to turn them as seen below.
I made a 2 X 4 trial rail to make sure everything worked and to mark where to drill the holes for the balusters.
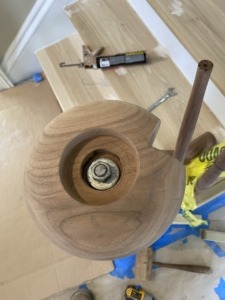
The newel has a half-inch bolt going thru it to the floor to attach it. The old-timers did it the same way. It is very strong. A turned cap hides the bolt.
Here is the finished balustrade waiting for the stain and finish to be applied.
My wife Pat stained and finished the balustrade.
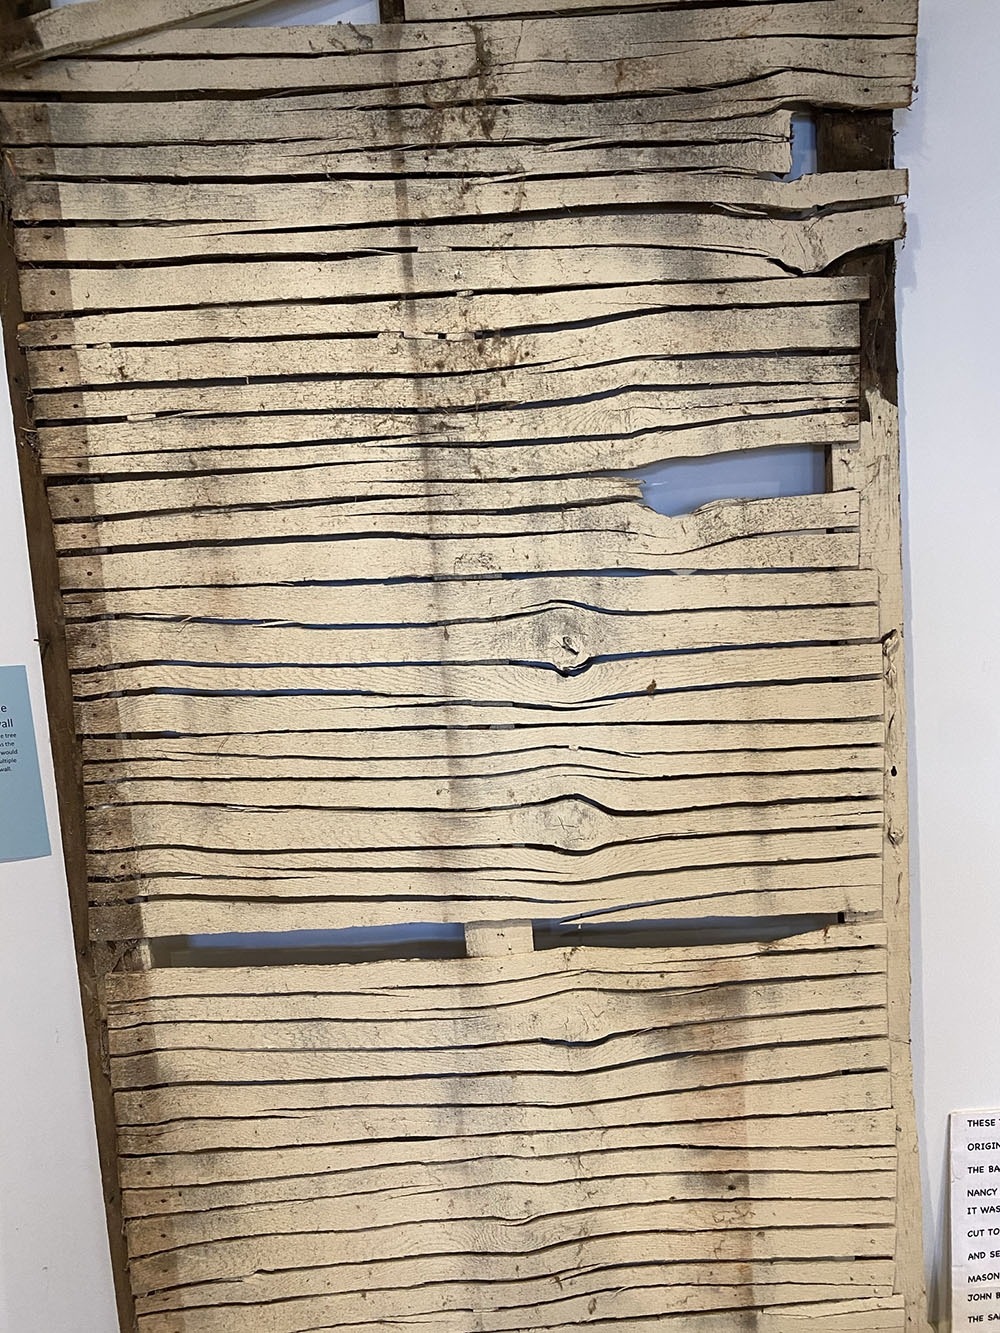
The house originally had split lath and plaster. It was all removed but a section of the split lathe was kept to display.
Split Lath is sometimes called Accordion lath.
The section of split lath shown below was taken from the north wall of the second floor of this home. Split lath, was the plaster base on early American homes. It was sawn at the sawmill from a wide log into a 1/4 or 3/8 inch thick piece of wood. Wide boards were often available early in U.S. construction as old-growth trees were often quite large in diameter.
The plasterer preparing the lath may have nailed the top of the thin board to the wall studs. With the top of the lath in place, it was split along its length with an ax to provide 3/16″ to 1/4″ gaps, and then pulled down like playing an accordion and further nailed to keep the splits open. The base coat of plaster could then be pushed into the splits to form plaster ears or keys on the backside to get a good bond with the wall.
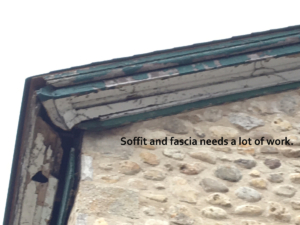
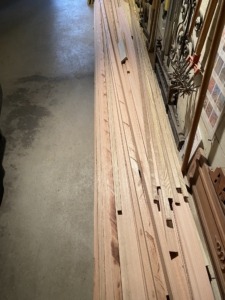
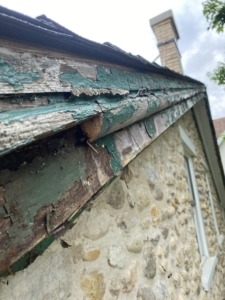
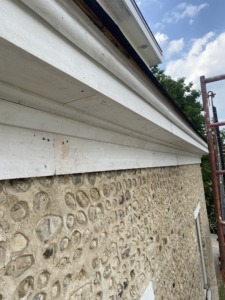
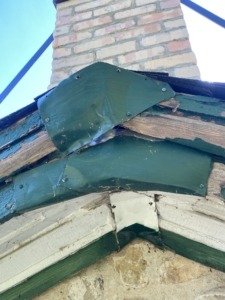
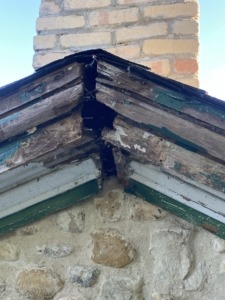
The last huge project was to repair the soffit and fascia which was in terrible condition. I milled the boards to exactly duplicate the original. Here is a picture showing how it looked before restoration:
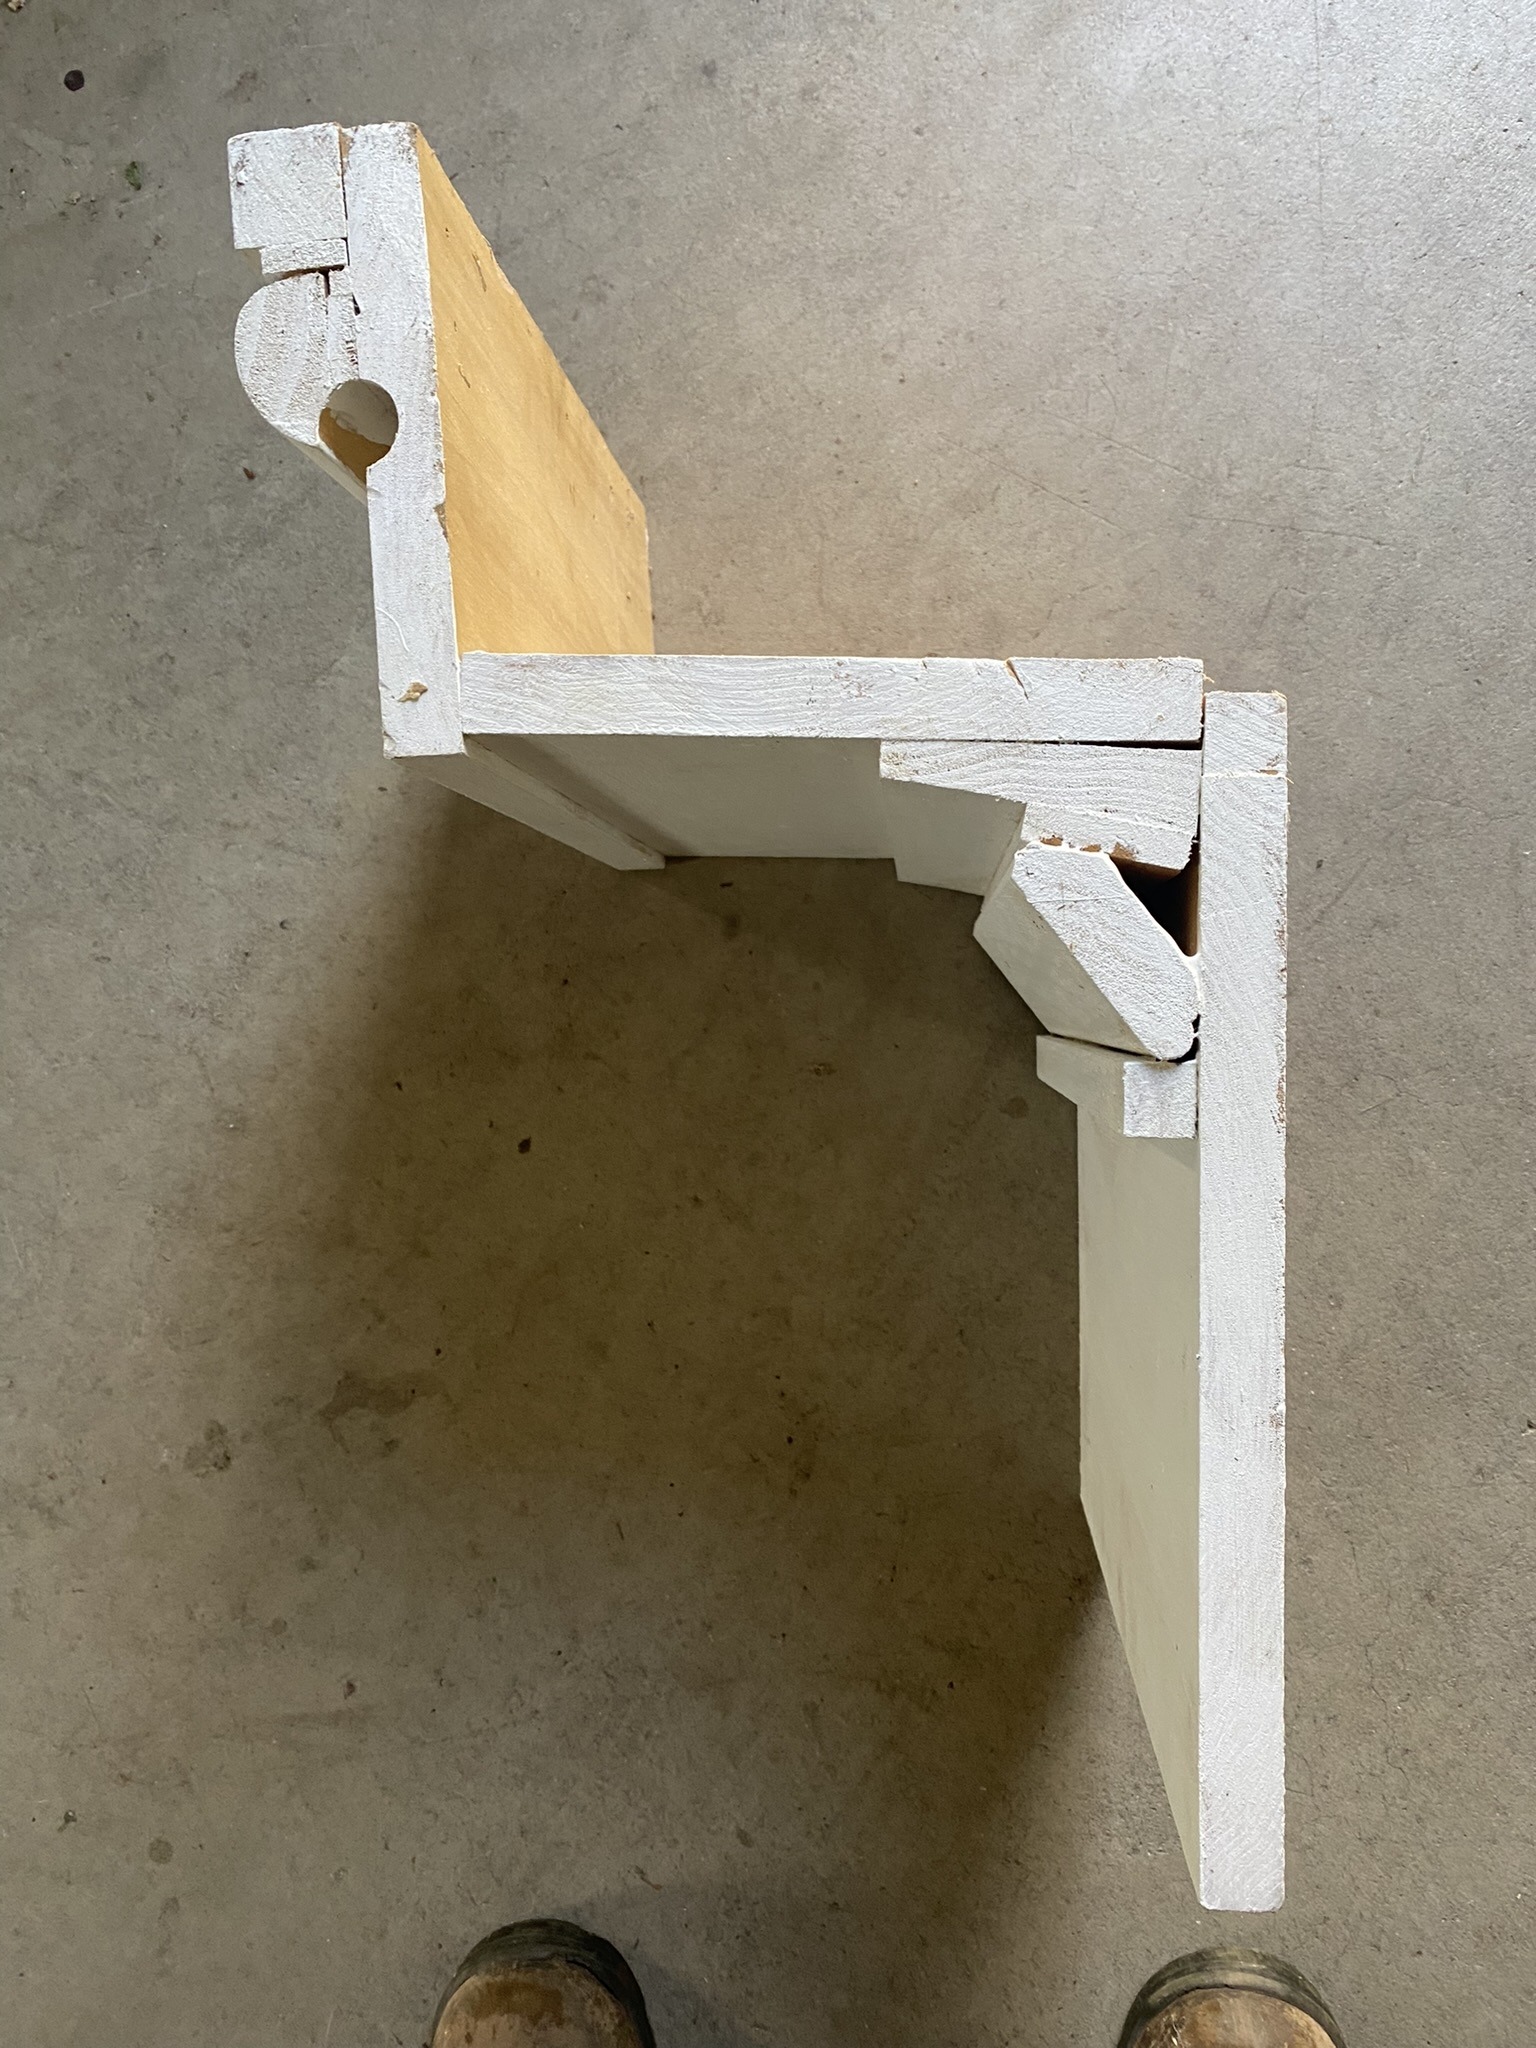
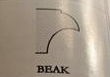
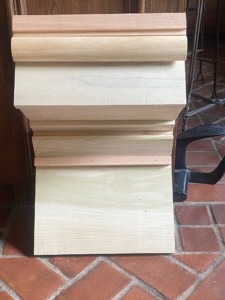
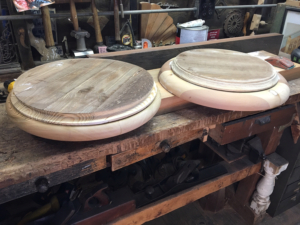
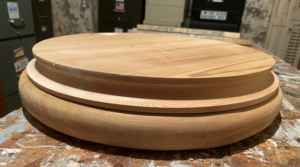
The top molding on the fascia is very unusual. I had never seen it before. In a reprint of an old pattern book, they call it a beak molding as shown below. I duplicated it exactly. Here is a mockup shown from the side that I made:
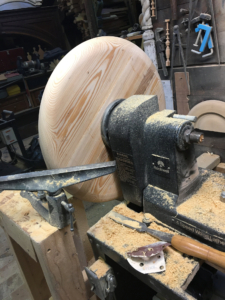
It is 12 total inches tall, 7 inches wide, and 10 inches deep. It is made of 10 separate pieces of wood that I custom-milled. I made it all from rot-resistant would as shown below.
Here is a front view of the mockup. The mockup was made to show the carpenters how to make the new cornice.
The west side of the house had an addition added on so the cornice did not have to be repaired.
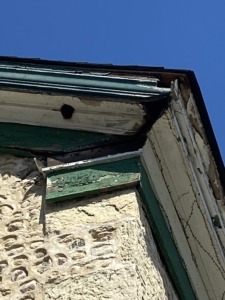
Here are pictures of the cornice on the east side before it was replaced.
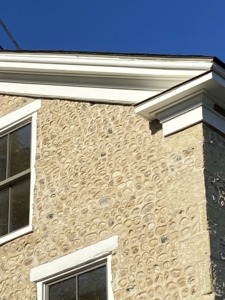
Here are pictures of the cornice after replacement. There was some original cornice left on the north side so I used that as patterns for the new. The cornice on the east side took two carpenters two days to replace and they charged $1400. I supplied the materials at no cost.
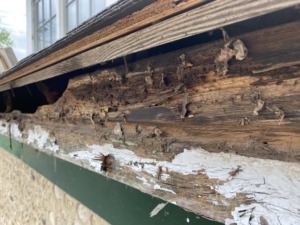
Here is a picture of a deteriorated return on the southeast corner. There was no return left on the southwest corner. They must’ve taken it off when they put on the addition. Both were replaced. Here is a picture of the rotten one. Notice the squirrel holes.
Here are pictures of the new returns on the SE and SW corners and the replaced cornice. It took me weeks to finish.
The last project on the entire house was the north cornice.
Here is a picture of the cornice at the peak of the roof. The past owner had filled in the squirrel holes with tin. Not very attractive.
Here it is with the tin removed showing the damage the squirrels did.
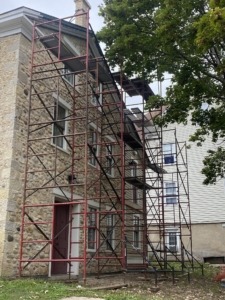
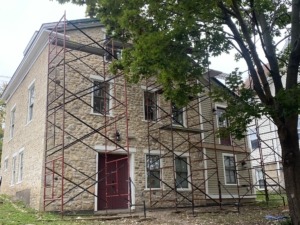
I put up scaffolding to do the north side by myself. Here are the pictures.
On October 26, 2021, the second day of the north cornice project I fell off the scaffolding from 20 feet up. I broke 19 bones including two in my nose, 10 ribs, five vertebrae, my clavicle and my scapula. I had two surgeries and was in intensive care for two weeks. I was in the hospital and then rehab until April 14. I’m lucky that I’m not dead or paralyzed. In rehab, I was enrolled in physical therapy for two hours a day and two times a week. Out of rehab, I saw a physical terrorist two times a week for a year. I was out of commission for eighteen months. A carpenter finished the north side with a lift.
All of my work was done as a volunteer. I donated all of the materials at a cost of over $3000. Except for the fall, it has been a very rewarding project. It is my legacy. Being quarantined in my shop and this air-conditioned house during the Pandemic turned out to be wonderful.
Here is a picture of the north cornice finished and the deck for the elevator.
https://oldhouseporches.com/wp-content/uploads/2020/08/porch11.20resized2.jpg7501000Dan Millerhttp://oldhouseporches.com/wp-content/uploads/2017/01/old-house-porches-dan-miller-logo.jpgDan Miller2020-08-17 22:31:182024-04-29 11:13:40Nancy Kimball Cobblestone at 302 W. Chicago
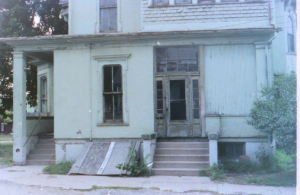
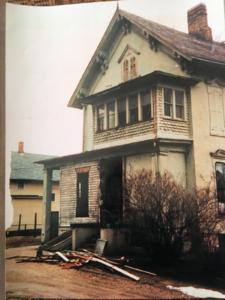
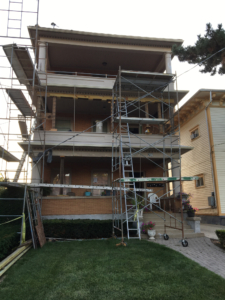
The picture below is how our back porch looked in 1986 when we bought our house. The stucco had been added in the ’20s to modernize the home.
Here it is being torn off. The wall of what was originally a pantry was bumped out to make a bigger apartment kitchen. The sleeping porch had heat in it.
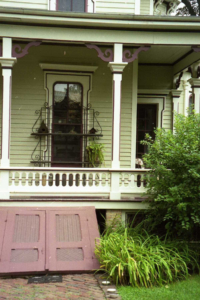
Below is a picture showing the porch after being rebuilt. Marks left on the house dictated the size of the column and the capitol. We knew we had brackets but did not have their design. We chose an actual bracket from an old house.
We attended an event at the Dunham riding club in Wayne whose front porch is shown below.
Pat fell in love with the brackets on their porch and the fact that they are white. We asked if we could trace one for a pattern, and they allowed us to do it. I brought it home and made 14 to replace the brackets we had made several years ago for the back porch. Here is how it looks with the new brackets painted white.
Those 14 red brackets have been sitting on a shelf for a decade.
My sister has a shop in Wisconsin where she sells furniture and some of her creations. We thought we could give her the brackets for her to find a creative use for and sell. My wife gave it a lot of thought and came up with a way to use the brackets as a type of hall tree to be hung on the wall.
My sister liked my wife’s idea, so I will make six more for her to sell. She will paint them. The beadboard in the center is walnut salvaged from an old cabinet 30 years ago so that it might be stained and varnished for a nice contrast or painted the same as the rest of it.
The beadboard in the center can be replaced with a mirror, pictures, or a chalkboard for messages.
Old doorknobs might be used instead of hooks as shown below.
https://oldhouseporches.com/wp-content/uploads/2020/08/hall-tree-resized-1.jpg11201059Dan Millerhttp://oldhouseporches.com/wp-content/uploads/2017/01/old-house-porches-dan-miller-logo.jpgDan Miller2020-08-15 22:53:542020-11-27 22:20:06Jean’s Hall Tree


 The interior stair balustrade is very unusual, fancy and had some missing finials.
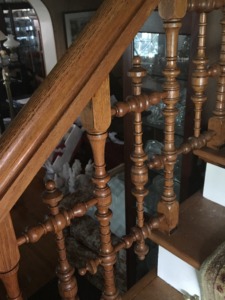


 On seven spindles I cut off the rotten bottoms and made new ones.