Tag Archive for: Home Page

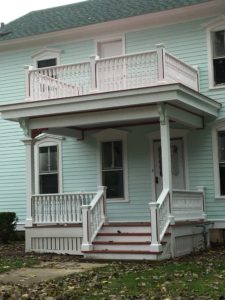
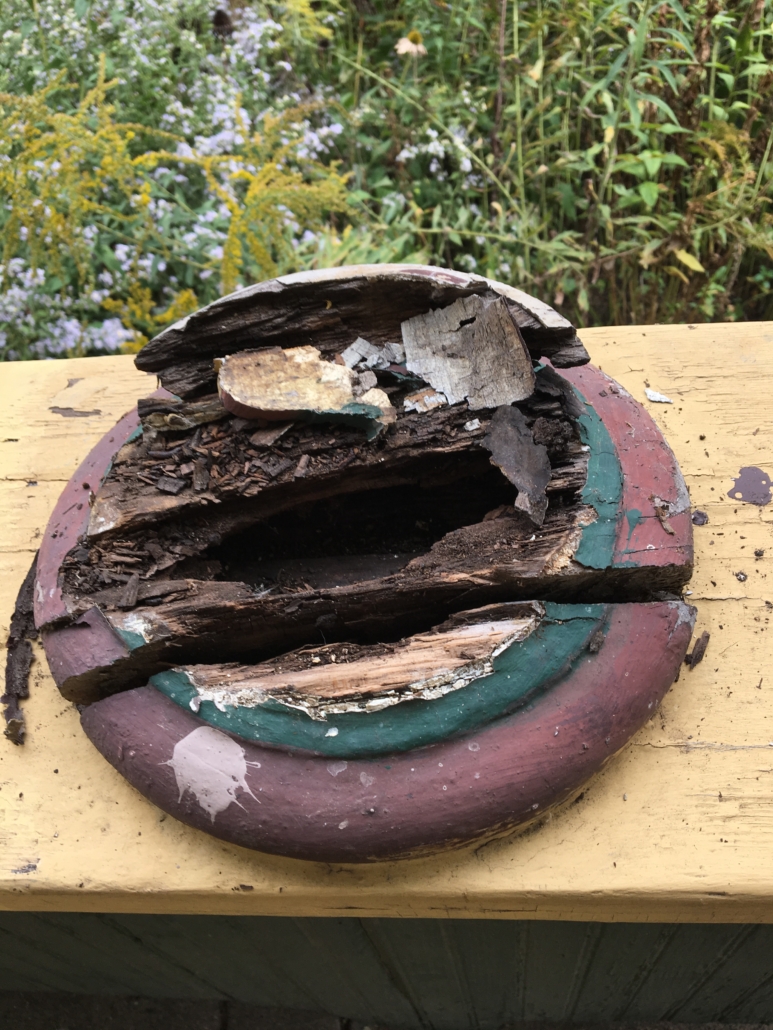
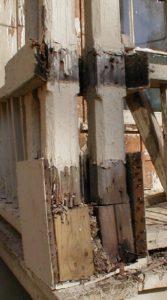
The workmanship on a porch I repaired recently was excellent. The guy obviously had some great woodworking skills. He made one major mistake by using white pine and he did not instruct the homeowner on keeping it caulked and painted. Also, he did not prime any endgrain before installing. A tree is designed to suck water up it so if any water is allowed to touch endgrain it sucks the water in, keeps it there and eventually rots the wood. All wood on a porch that gets weather should be treated lumber. It is very inexpensive and if you take your time going thru the pile you can get relatively clear, dry wood. It is a myth that you have to wait to paint treated lumber. In fact, it needs to be at least primed immediately, if not sooner. If you allow treated lumber to get wet or exposure to the sun it will warp and twist. We have had great luck with a latex primer called Gripper manufactured by Glidden and sold at Home Depot.

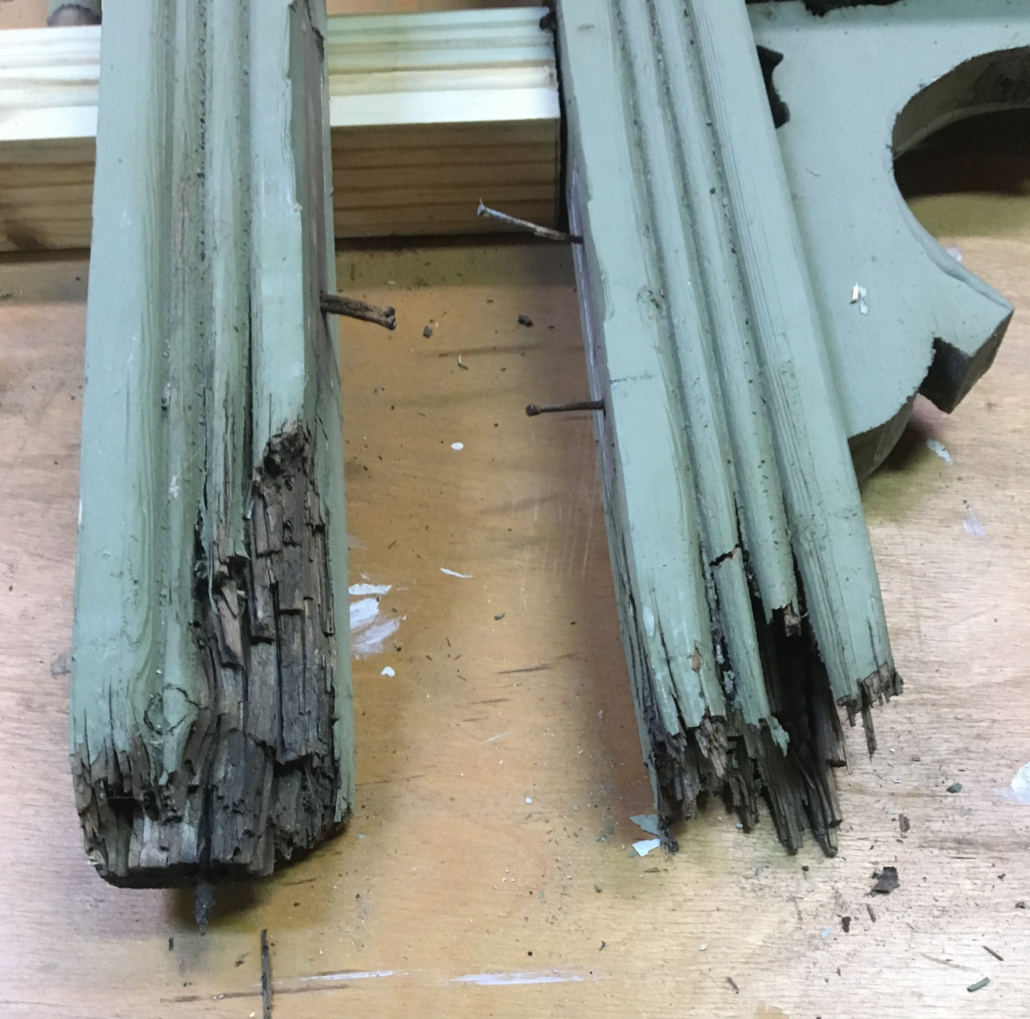
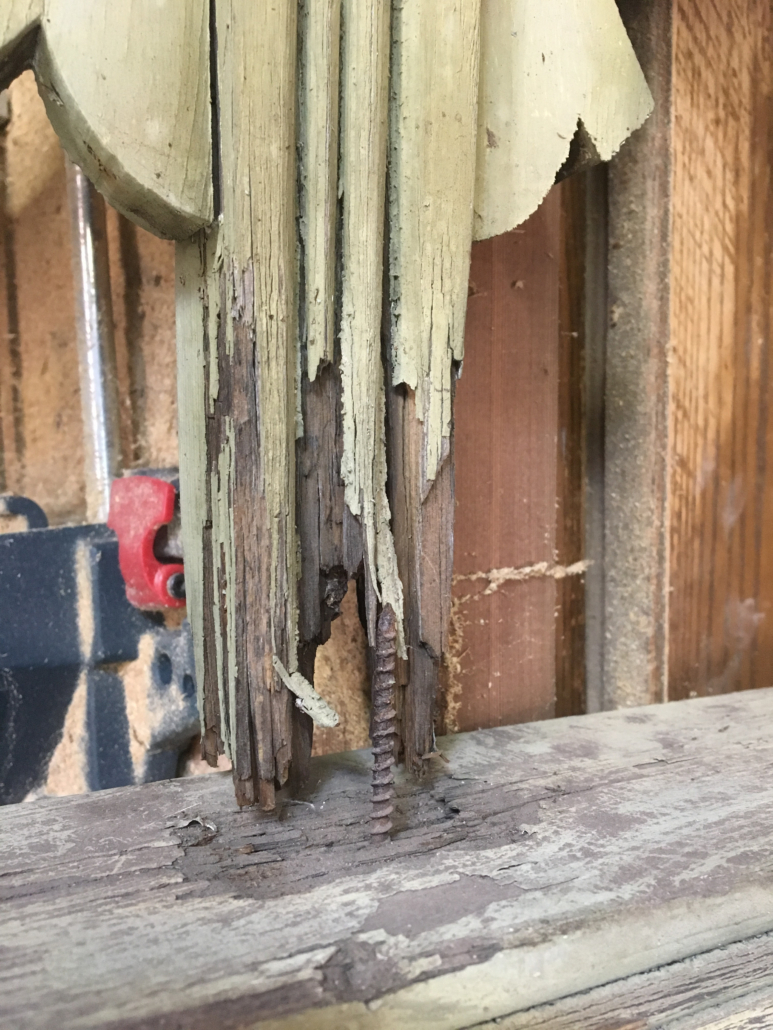
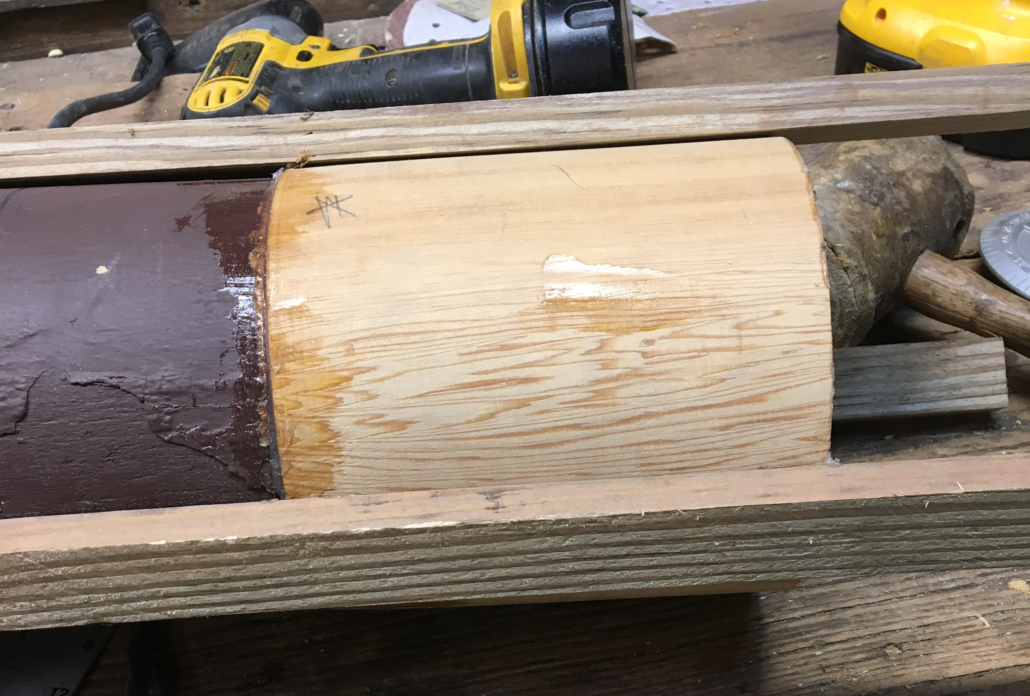
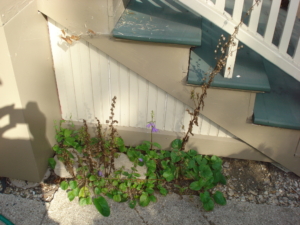
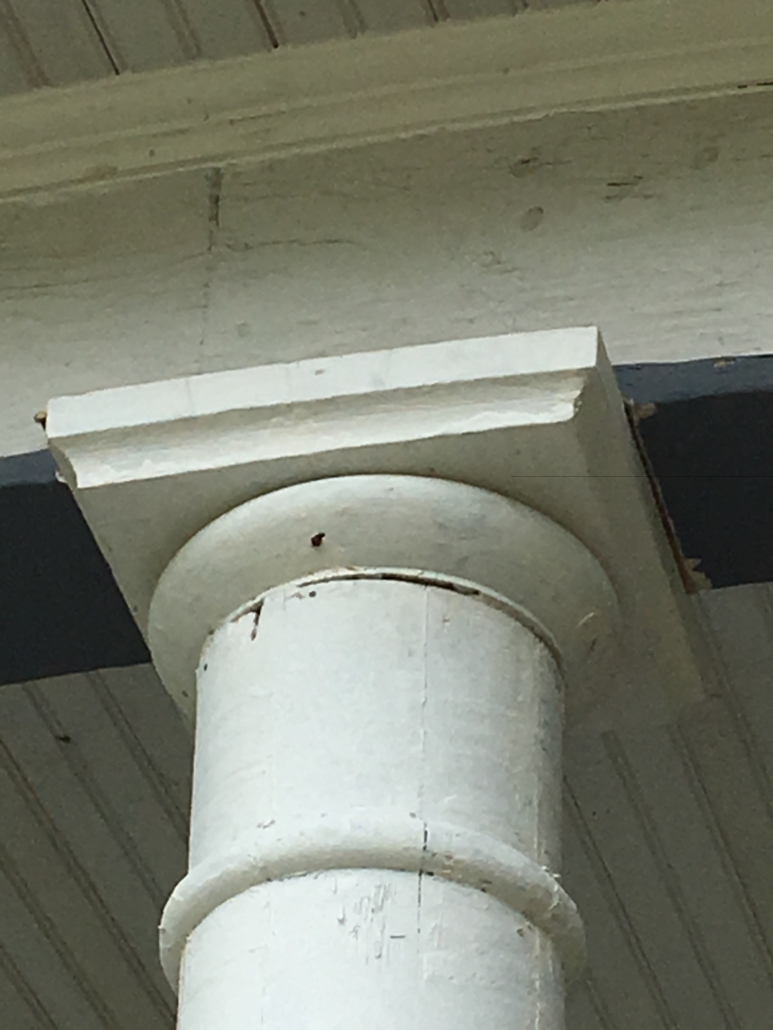
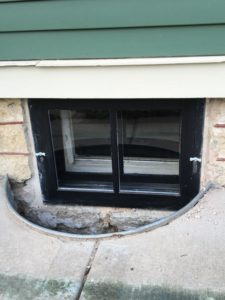
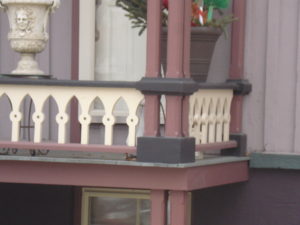
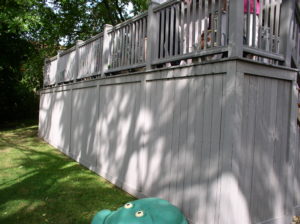
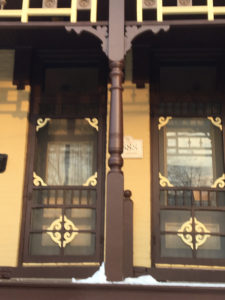
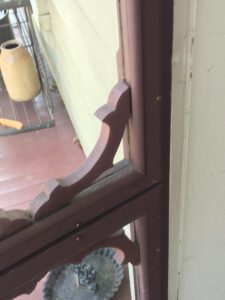
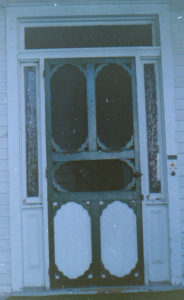
Here is what a white pine baluster looks like on a porch after 5 to 10 years. This shows houses susceptible the end grain is.

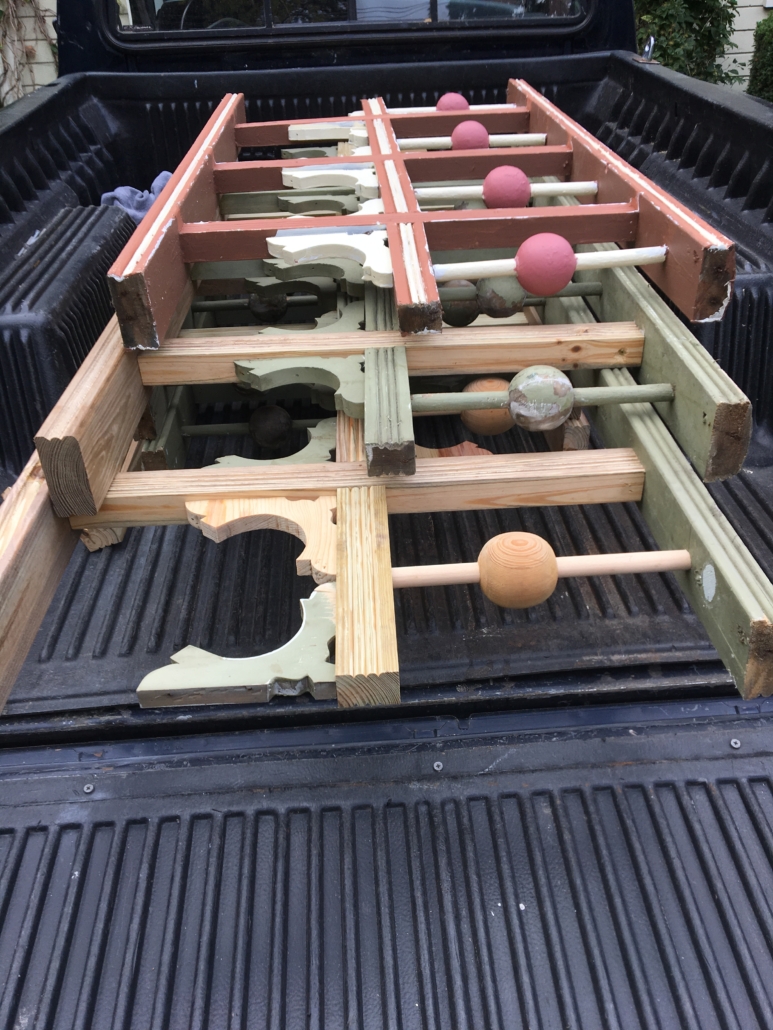
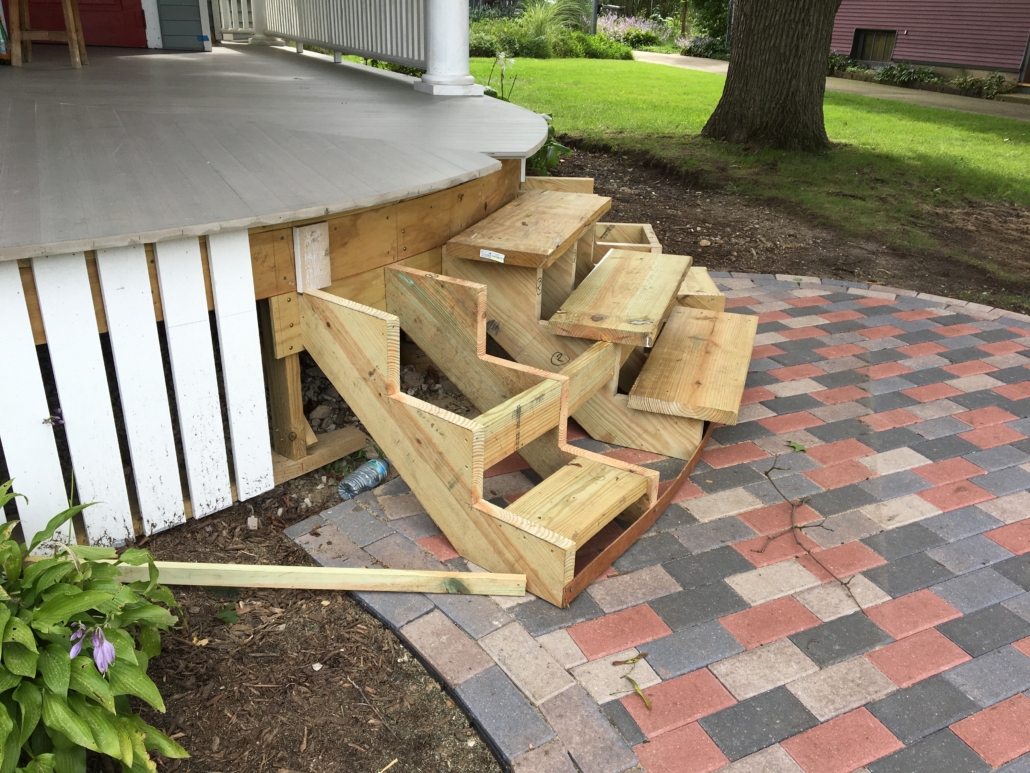
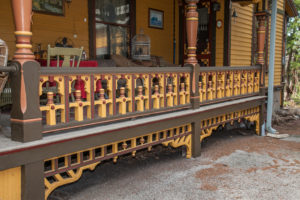
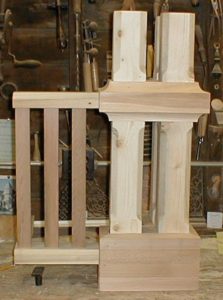
I made new balusters from treated lumber duplicating the beading down the middle exactly.

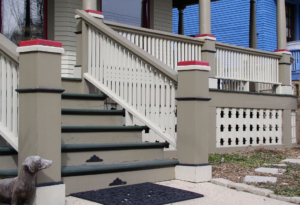
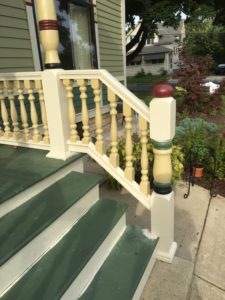
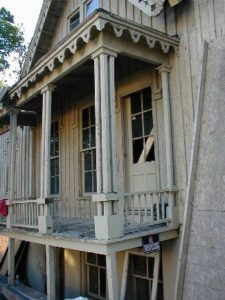
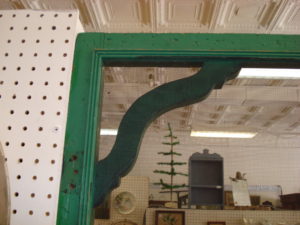
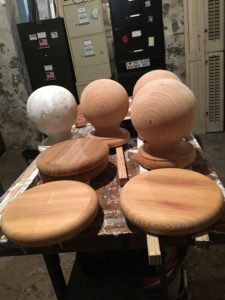
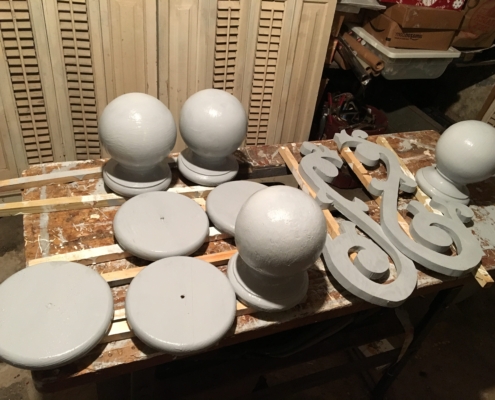
I turned some balls, replaced some brackets, many of the balusters, and most of the top and bottom rails. I assembled the balustrades on the bench to be installed as a unit. Much easier than piece by piece on site.

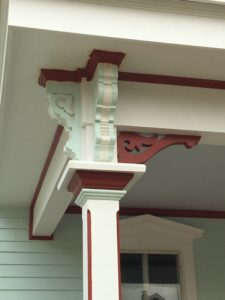
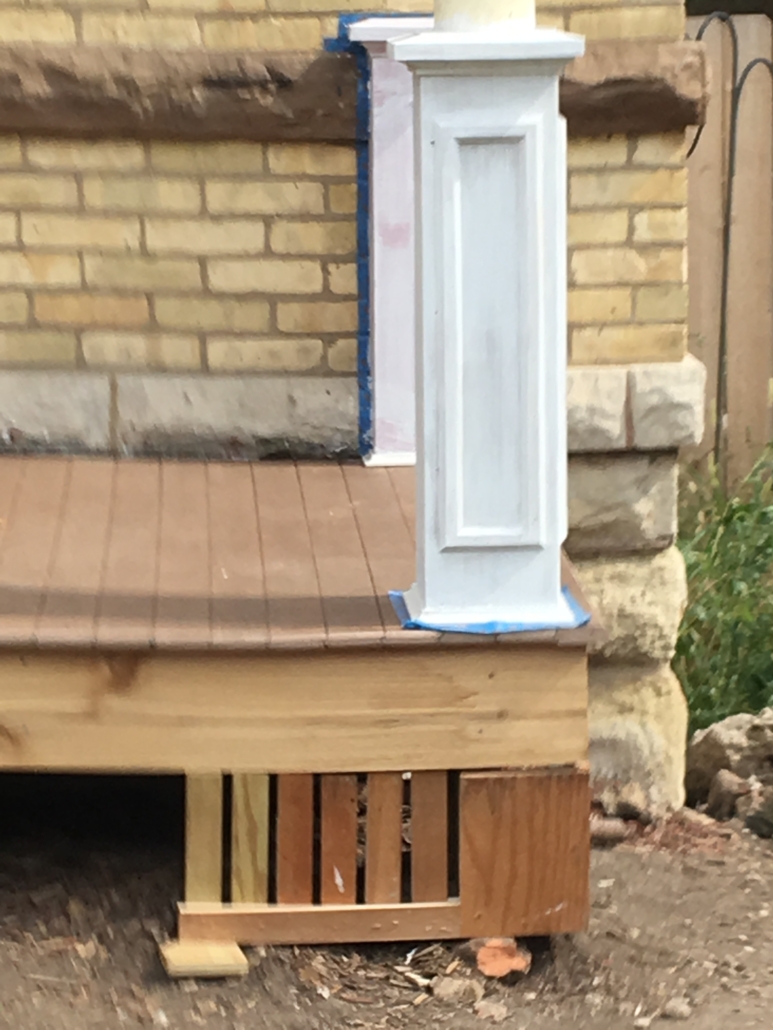
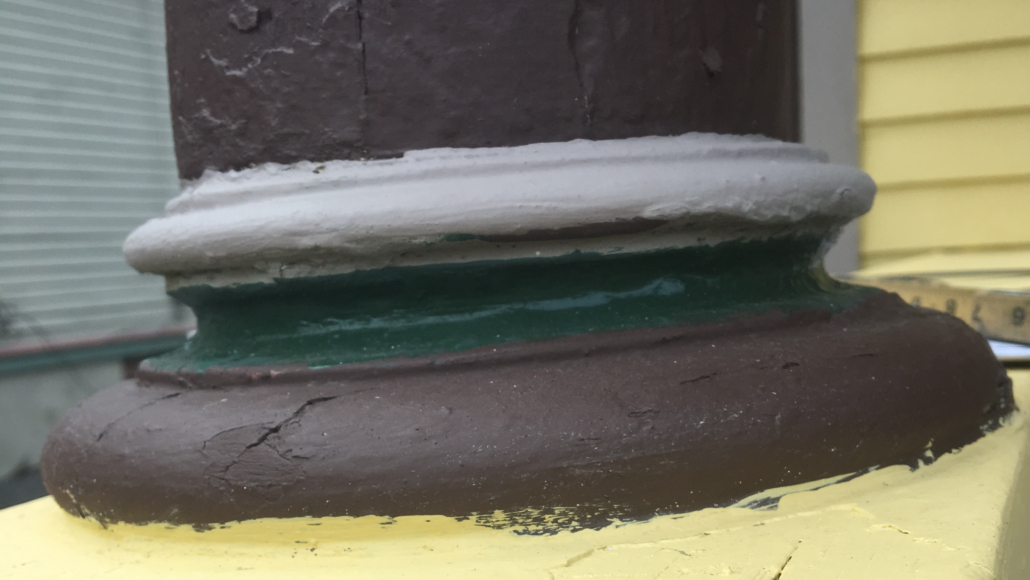
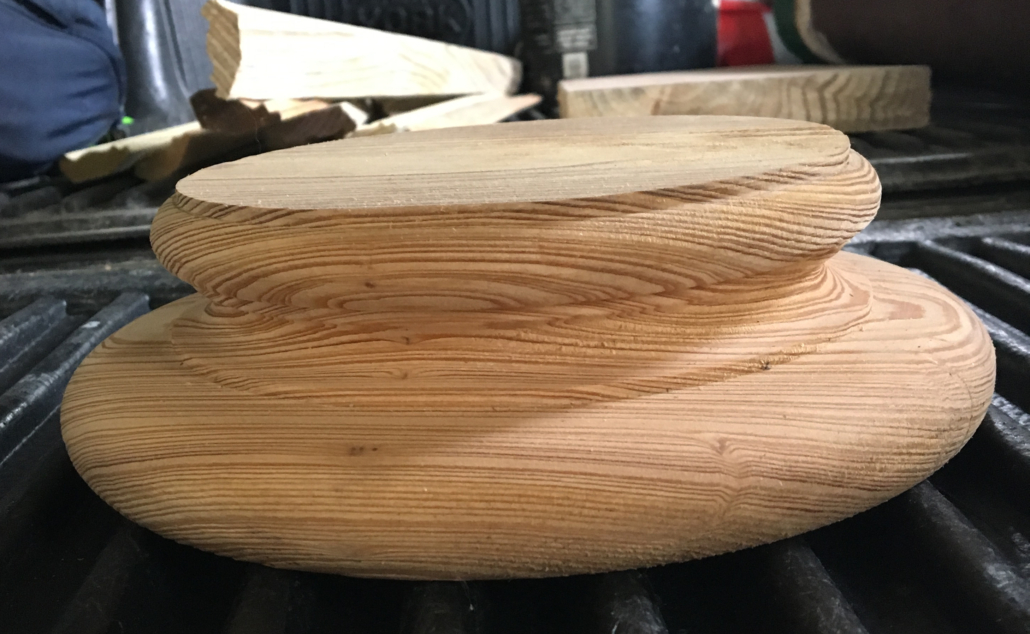
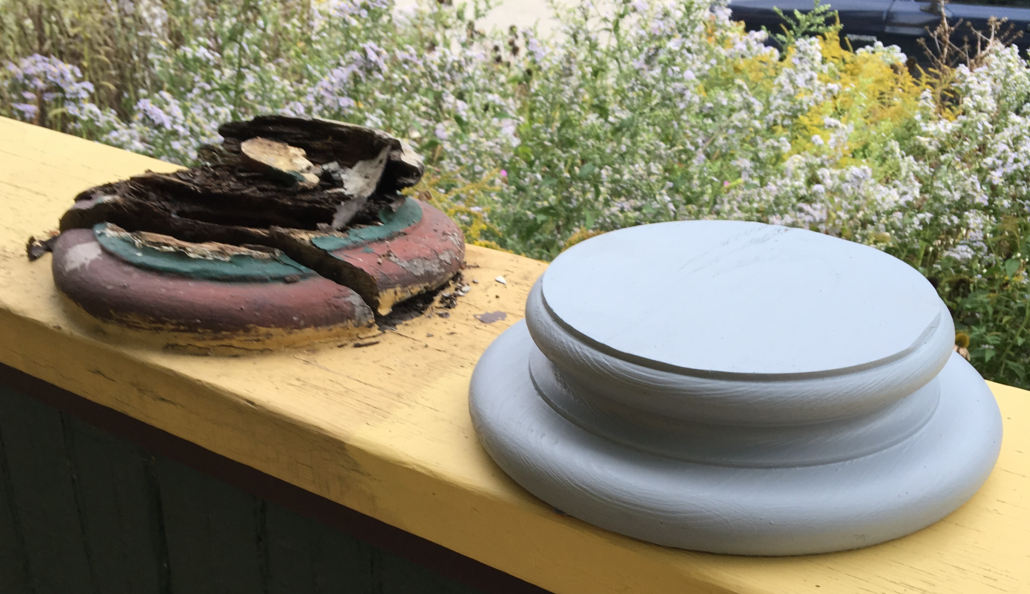
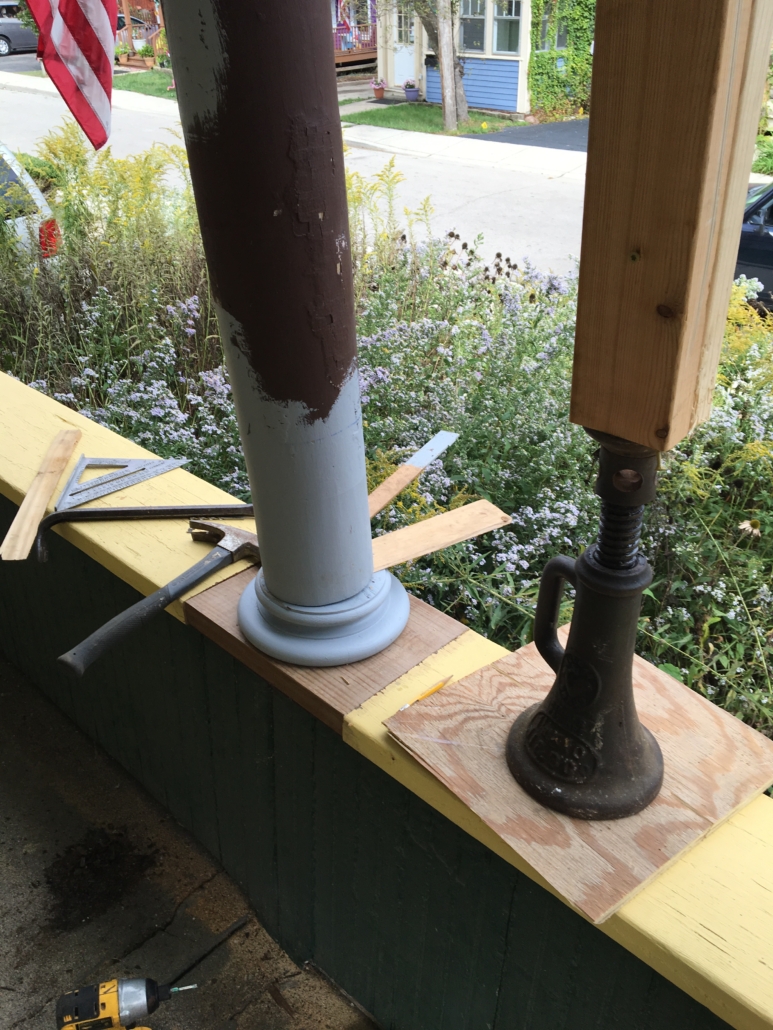
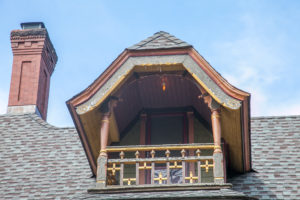
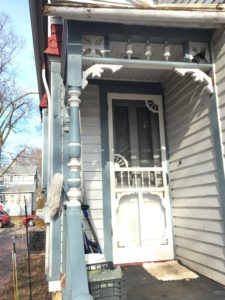
I remade all of the porch post bases including duplicating the panel molding exactly. Everything was made with treated lumber. The new porch decking is Azek. She had the original finial for the newel post but the little cap was missing so I turned that.

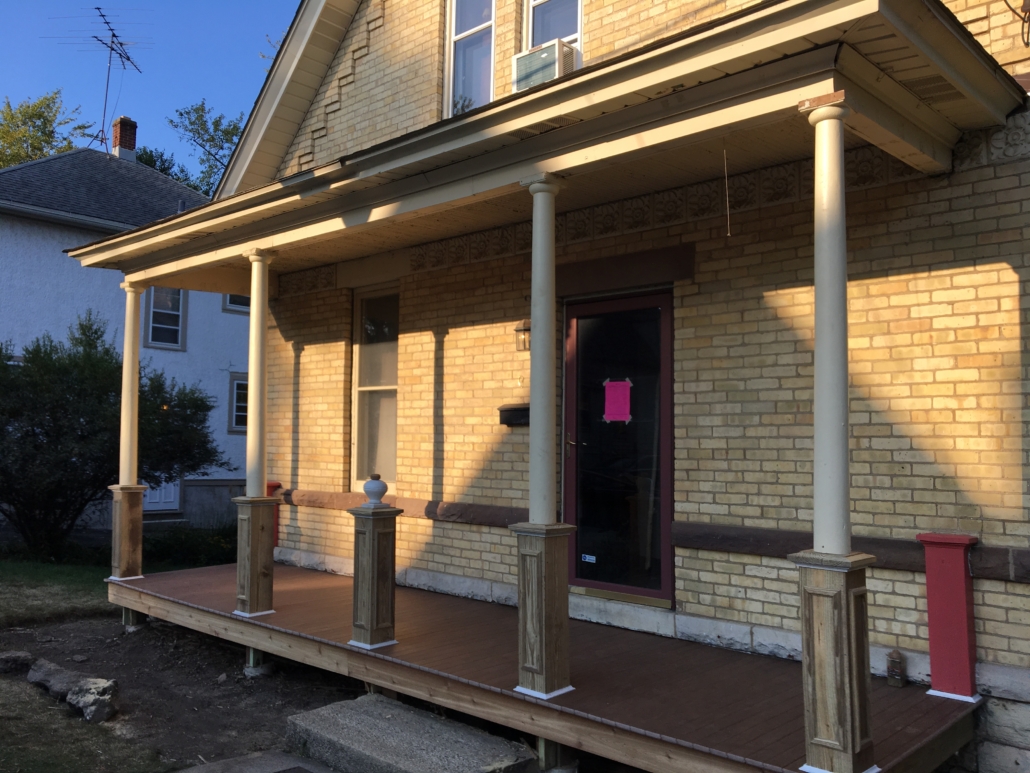
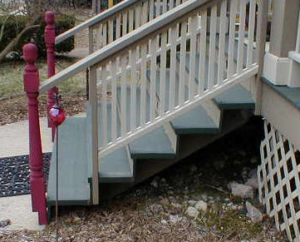
I made mockups for a possible porch apron. It is difficult as it is so low.

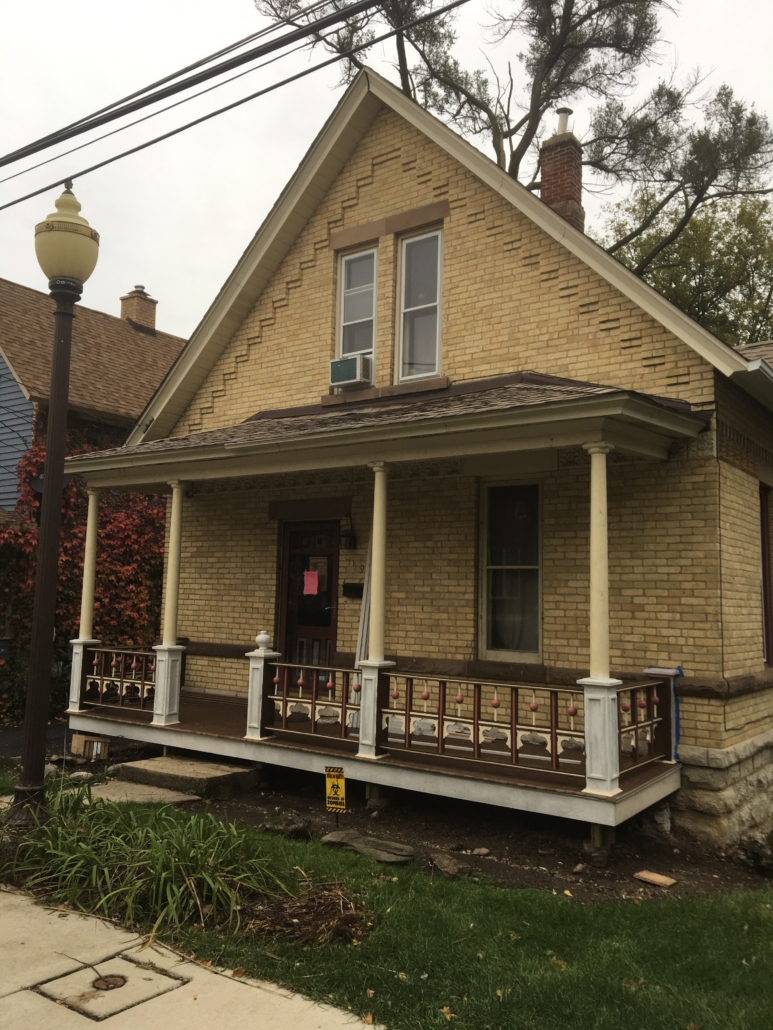
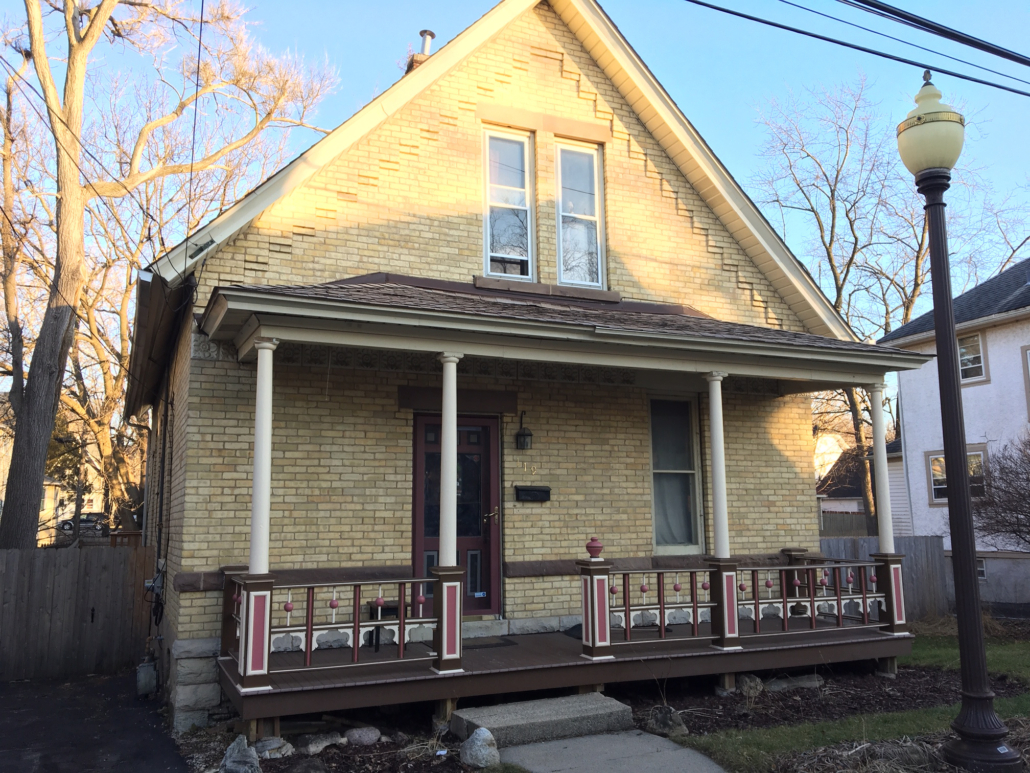
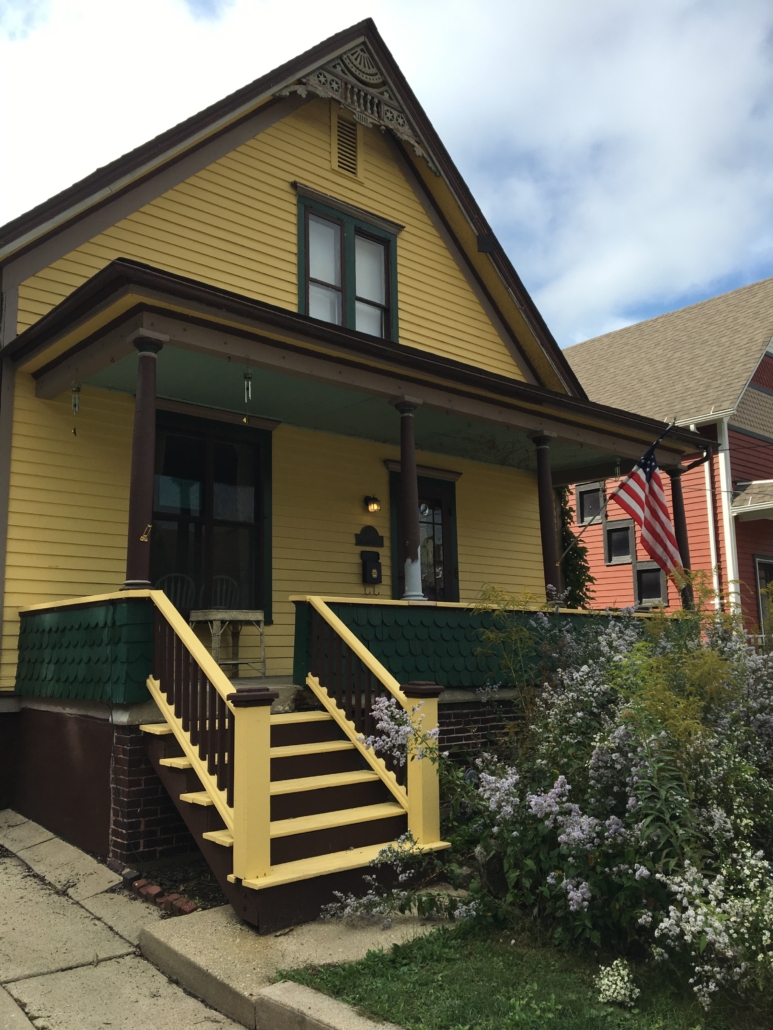
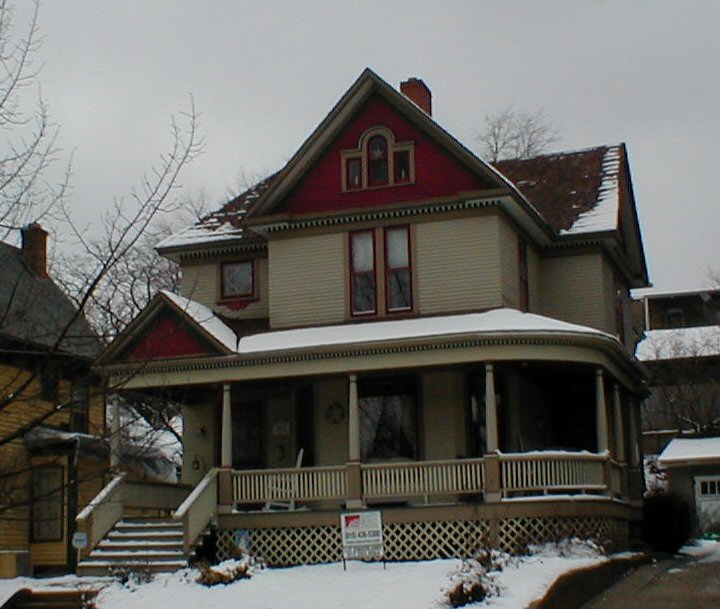
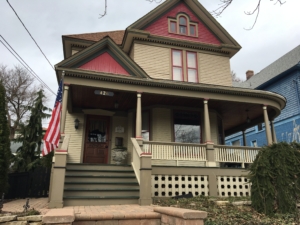
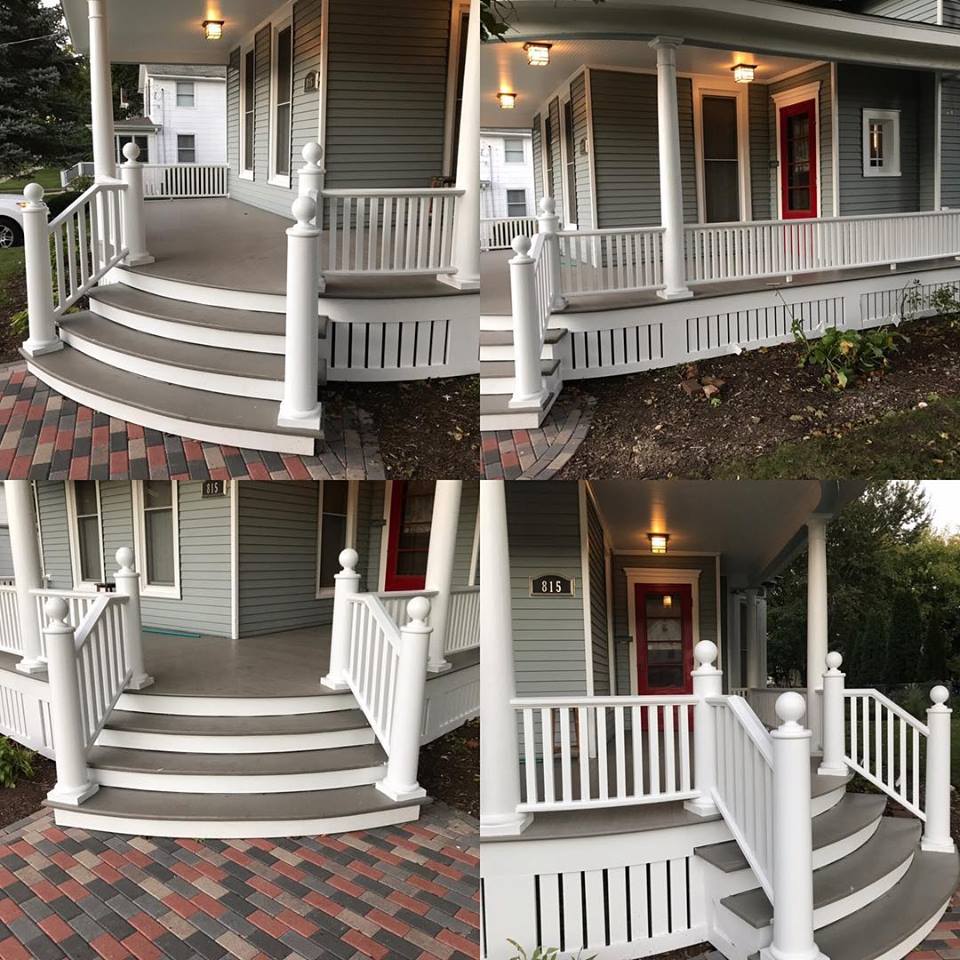
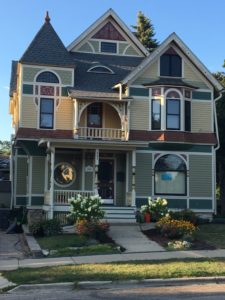
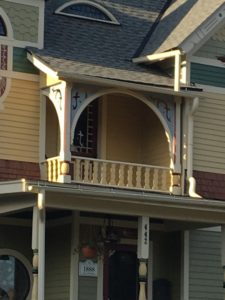
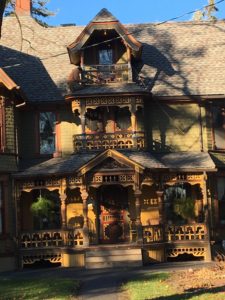
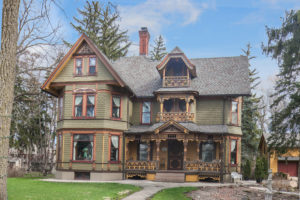
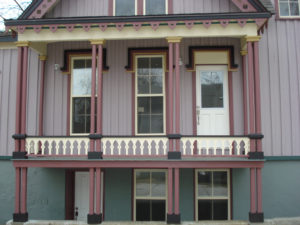
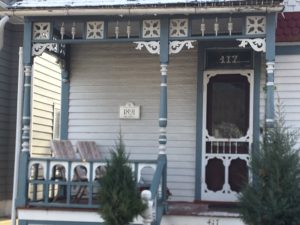
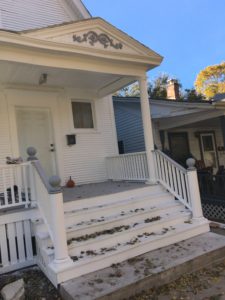
Here is the finished porch. The homeowner is a single woman with a limited income. Periodically the Local Carpenter’s Union does jobs for people in need. I supplied the parts, she supplied the materials and they did all the work at no charge. She painted the balustrades herself laying them out on the kitchen table. She cannot decide on an apron design. Perhaps I will make more mockups for her.

A neighbor called me asking if I could help him replace some porch parts that were rotten. I find the work very satisfying so I dove right in. Here is an original post base that is in good condition.

Here is the rotten one that needed replacing.

Here is the new one that I turned. The wood is old growth cypress salvaged from a water tower taken down in Chicago. Bora Care preservative was applied and both sides were primed. Water was able to reach the endgrain of the old one allowing it to rot. All joints need to be caulked and painted so no water can get in.

Old and new.

The bottom ten inches of the post were rotten. Again, water can never be allowed to get in the end grain of wood. A tree is designed to suck water up it so this post was doing what it was designed to do – suck.

I turned a new bottom of the post and attached it with a large dowel in the center and epoxy. The boards are to keep the new straight with the old.

The porch roof had to be jacked up to accept the repaired post and base. I love my antique house jacks.

Here is the porch with the repaired base and column. It is very satisfying to help this homeowner do it right. Without me he probably would have replaced all the columns with new ones from Menards. If you find yourself needing to replace columns use new fiberglass posts and bases. They are reasonably priced. The wooden ones are white pine and finger jointed. They will not last.

In the late 70’s this house was a run down two unit with terrible asphalt siding.

A young couple bought it because it was was all they could afford. It was in a bad neighborhood with some serious drug dealing going on. A friend bought the house next door and he bailed out of the neighborhood after a year or so because it was so bad. We called the young couple urban pioneers because they came to a rough neighborhood and house with the determination to improve both. We just hoped these pioneers didn’t get burned by the Indians.

They tackled the house without any previous experience but with simple common sense they did everything right. They made the home single-family before it was popular to do so. Today $25,000 grants are given by the city to downsize properties. They took off the substitute siding before it was popular to do so.  Several years later the Gifford Park Association started a substitute siding removal program they called the Great Unveiling, borrowed from Rock Island. They gave the homeowner a $1000 reward to take the siding off.  Using volunteers in an old-fashioned barn raising type of event they take off the  siding. Later the city took up the grants giving a  $5000 reward to anyone taking their siding off. Because of budget constraints the city no longer gives the reward but the Gifford Park Association has gone back to giving $1000.

View Great Unveilings  done by the Gifford Park Association.

Over several years the couple rebuilt the porch and with some help from a professional had it nicely painted.

They fell in love with a bigger and better project house and moved.  They never got to finishing the porch apron, the newels at the bottom of the steps and  the apron on the the side of the steps. The store-bought lattice was added for the apron as a temporary fix. As so many temporary things go it was there for years. A subsequent owner added to the store-bought newels that are too slight and not appropriate for the house.

I was hired by a subsequent owner to build appropriate newels, and a porch apron to match the old picture. Here is an old picture showing the original apron and a little girl that is probably 80 years old today. The owner wanted an apron with triangular cutouts instead of half circles.  Both were done in that era.

I made newels to match the porch post bases. They look much better than the store bought ones they replaced as seen above.

I made a new apron as seen below.  The horizontal boards are PVC so they bent nicely with a just a little kerfing. They also will not rot.  They are a little expensive but well worth it.

I put an apron on the side of the steps using bead board and replaced the 2  x 12 treads with 5/4 x 12 which was the norm in that era.  I also put a little cove molding under the steps which was always done.  Click here for my guidelines on how to make the treads and cove molding.

I was very fortunate to have this project as the owners gave me an absolute freehand on what to do and were willing to spend whatever it took. They knew me and trusted me and knew I would not rip them off.

I can see the porch from our house so it was a very nice improvement to my neighborhood.

Mike Howell with Carpentry with Integrity was asked to rehabilitate the old house porch at 815 N. Spring. Here is an old picture of the house and porch. The Xes in the balustrade were not original to the house. Notice the steps and sidewalk before being renovated.

Here is a more current picture of the porch. Notice the newer balusters that are too tall and too thin.


This shows the steps being rebuilt. Great new sidewalk. Check out the difference with the previous picture. New PVC flooring was used. All wood used has to be treated. Stair treads need to be painted on both sides before installation to reduce the warping. The paint is to be porch floor enamel, never white exterior primer.

All Posts


I made new column bases and tops to replace the rotten ones. The wood is old growth cypress recycled from an old water tower taken down in Chicago. Everything was coated with Bora Care preservative.

This is an original post top before it was replaced.

Here is the finished porch.

What a nice improvement

In 1981 after many remuddlings over the years the house looked like this.

A friend bought it and slowly, over several years started to bring it back.

Here is how it looked after the aluminum siding and enclosed porch were taken off. Notice there are no arches on the second story porch.

It was sold in 2003 for $196,000 and was used as a halfway house for alcoholics and drug abusers.  The owner lost his federal funding so it was closed and foreclosed upon. Another friend bought it in 2012 for $91,800. It was his second rehabbing project in the Historic District so he had a lot of experience.  He went gangbusters and put a new kitchen in it, a new porch with spindles and had it painted.  A professional paint consultant chose the colors for him.  Here is how it looks today except there is now a balustrade on the porch steps which I helped install:

The owner had an old picture showing arches in the second story porch that were missing.


I made arches and frames for the arches for the porch.

Here is a picture of the arches I installed:


I also made a window for the basement that had been boarded up for decades.

The home was on the Elgin Historic Housewalk in 2016.  If you would like to see the booklet page to get some history on the house, click here.

It sold in 2018 for $232,000.  Click here if you would like to see the listing and interior pictures.


The owners of the Wing mansion in Elgin ran across an old picture of their front porch showing details that were no longer there.  It is the half cross in the middle of the balustrade with the ball on top.   
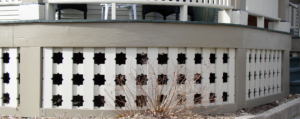
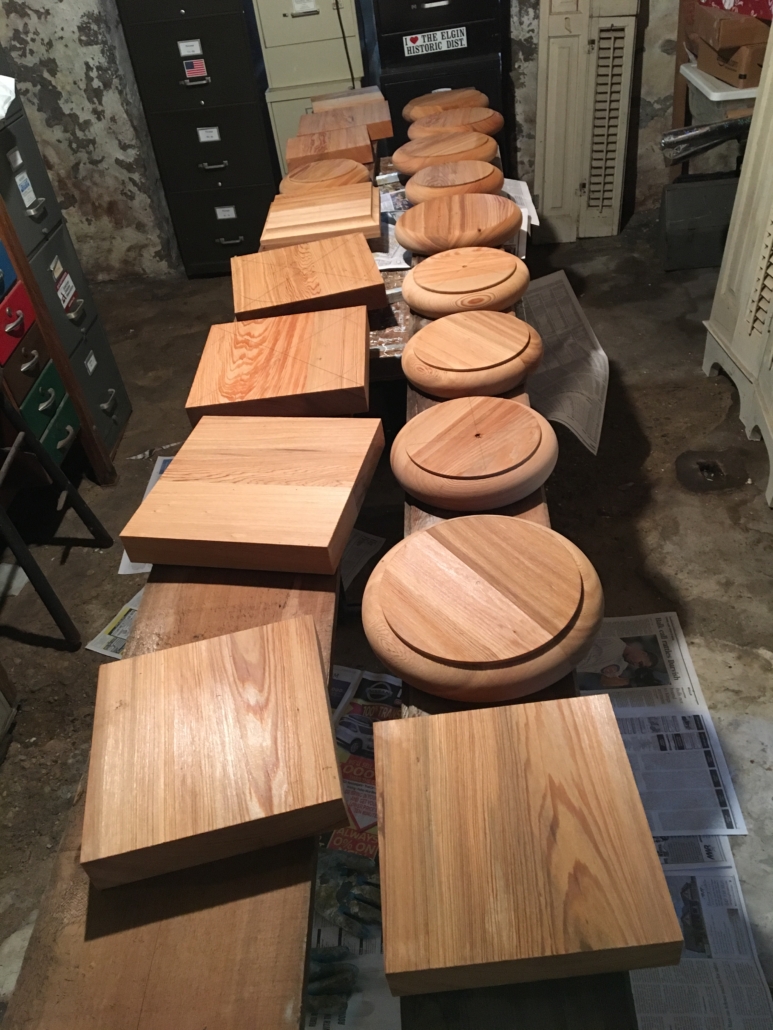
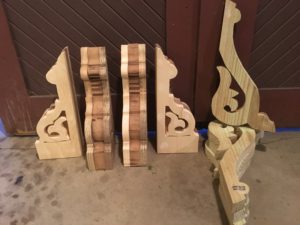
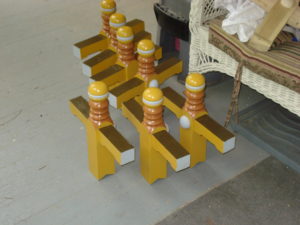
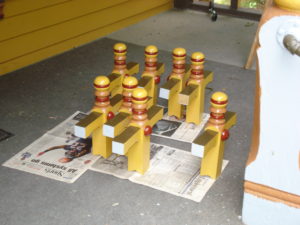
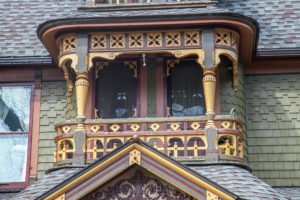
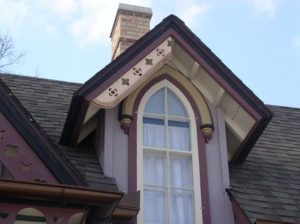
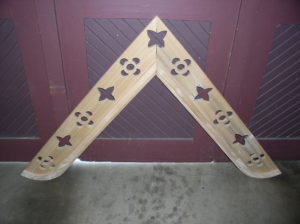
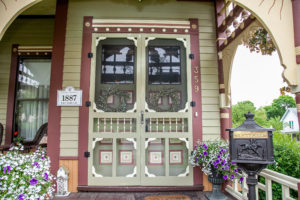
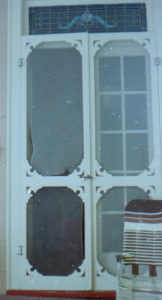
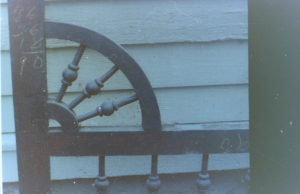
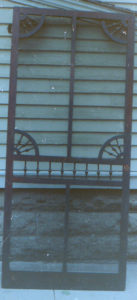
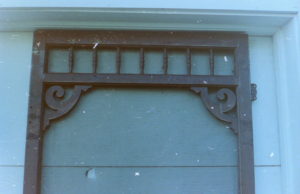
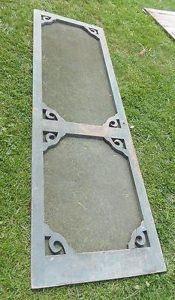
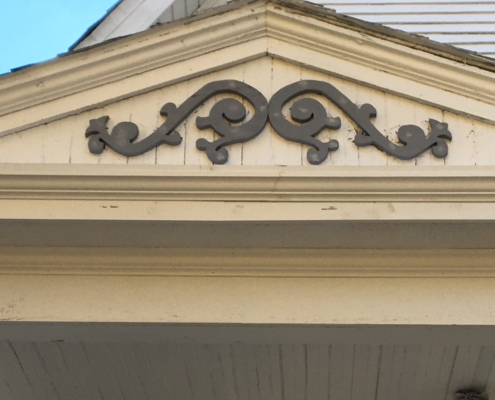
For some reason someone in the past took them all out.  The owners commissioned me to make new ones. Here they are ready to be delivered.  The cross pieces have a stop chamfer on them.  The plastic bag is full of half spheres to be applied,  Each vertical piece was cut with a V groove in the bottom to fit onto the bottom rail. The rail has a  beveled top to shed water.

The owner and his wife painted them before installation.

Here they are installed on the front porch:

Here are more on the back porch.

I made smaller ones for the second story porch.  I also made the little squares with a square hole in the center in the balustrade to match an old picture.

Here is the third sorry porch.

Here is the whole house:


373 Park had been a sad, unmaintained, multi-unit for all the years I have lived in the neighborhood.  A flipper bought it and with grants totaling over $100,000 from the city did a good job of bringing it back to a nice single family home.  It is now owned by a great couple with kids that love the home.  They have taken an active role in the neighborhood and our local school.

When a building and its apartments are not nice it attracts desperate people.    To break the cycle of nasty renters, you have to make the property very nice.  Here it is in 1981  before rehab:

Here it is 2008 when rehabbing was just starting

Here it is today.  A colorful paint job makes all the difference in the world.

Th side porch had rotten posts and a very plain, rotting balustrade.

Before reconstruction.

The posts were taken down and I brought them into my shop.  I cut the bottom 18 inches off and replaced them.  The wrap from the rail hid the joint. A large dowel up the center with a lot of epoxy keeps them aligned.

Here is a mock-up of a balustrade that I proposed:

Here is another mock up that I proposed that was chosen and I made. Notice how the wrap on the post will cover the cut mark. I replicated the wrap on the post exactly from an old piece that was left on the house.

Here is the finished porch.

We knew the verge board on the dormer was missing because we had an old picture.  I made a mock up and installed it as shown below to get approval from the Preservation Specialist.

She had me alter it slightly and I made new ones.

Here they are installed.  Very satisfying to put them back.


This house has a great Gothic front door

The skirting on the back deck was not done appropriately.  I was hired by the owners to alter it adding corner boards, a bottom frame and vertical members under each post so it appears that the posts are supported.  Very satisfying work. All of the wood is composite decking.  It cuts the same as wood, just smells differently.  I’m  probaly ging to get lung cancer from the fumes.  :  )

Here is the front porch balustrade and apron which I did not have a part in.

We bought our first old house in 1975 only because that was all we could afford. I calculated what I could afford and it was $30,000.  This one cost $29,500.  With 10% down my monthly payment was $250. At the time it was tough to make the payment as a teacher I was only making$9000 a year.   It had an ugly storm door on the front that hid the fancy inner door.

We started looking into options.  I had seen pictures of fancy Victorian Screen doors so we decided to go with that.  I was an amateur woodworker so I wanted to make my own.  We also saw marks for a missing frieze at the top of the porch.  Looking for a replacement for that started my forty year love and study of old house porches.

I wanted the door to be something that was authentic so whenever I saw a house with one on it I stopped and asked if I could trace and measure the details. After the people realized that I was not crazy they allowed me to do it. What would you do if a big ugly guy knocked on your door and asked to trace your details?  I actually made some friends by doing it and one woman, after realizing what an old house nut I am actually invited me in for a complete tour.  I found a real bracket that I used as a pattern for more  and store bought spindles that would serve me well.  I made my first Victorian Screen door even making mortise and tenon joints like the old timers did.  They had huge machines to quickly and easily do it.  Making them by hand as an amateur woodworker was not so much fun.   I made a couple more like that then switched to making joints with large dowels.  With a doweling jig it is much quicker.  Most doors after the turn of the century were made with dowels instead of a mortise and tenon joint.  Here is my first Victorian screen door and the frieze I made using a design I found on a house nearby. Marks for the spindles and middle pieces were left on our house.


Here is the seocnd door I made for our back porch. My doors have interchangeable storms and screens.  The local glass place made them with aluminum frames.  I put a rabbet on the inside of the door to accommodate them.


Here is the frieze and balustrade I made for the back porch to match the front:


Here are two I made for a neighbor.

The owner installed them himself.  The door frames were not square so the doors required some planing which is very common.  He did not want to do it so he took the door frames completely off and reinstalled them square so the doors fit perfectly without planing.

Here is anther one I made for a neighbor.

Below is another I made for a neighbor.  This bracket pattern was taken from a door form a nearby house.  The people had it in their garage and I convinced them to put it back up.

Here is the door I  made for the back porch of our current house.

I made frames from wood for the interchangeable storms and screens. the frames and the doors have matching rabbets.

In the 70’s I became a Victorian Screen door nut. I wanted to be a missionary to spread the word about Victorian Screen doors.  I took all of my authentic patterns and directions for making a screen doors including correct proportions and printed them  in booklet form.


In the 70’s the Old House Journal let subscribers place ads in their magazine at no cost.  I put an ad for my Victorian Screen door plan book in the magazine and sold over 500 of them nationwide at $5 each.  Felt great. At the time there were not companies making them.  There are several today but they are expensive and most do not look very authentic.  I have now placed my plan book on line free to anyone that would like it. It has full size patterns for real brackets.  Click here to see it.

A friend and neighbor had a great old picture of his house which originally had Victorian screen doors.  He used a pattern from my booklet to make them.  What a wonderful addition to our neighborhood.


Another friend and neighbor made these doors for his house.

A friend added store bought brackets to create a Victorian Screen door.


Here are more pictures of Victorian screen doors. The first on on the left is from Cape May, New Jersey. We visited there on our honeymoon in 1976.


If you make one for your house I would love to see a picture.  Send it to Dan Miller at [email protected]


128 College was covered with aluminum siding.

The Gifford Park Association has a program they call the Great Unveiling.  The name and program was borrowed, with their permission, from Rock Island, IL. It is an old fashioned barn-raising event where volunteers take off the substitute siding.

When the Gifford Park Association started the program they offered free removal of the siding and a reward of $1000 for participating.  After a few years the City of Elgin took over the program and started giving a $5000 grant for taking off siding.  Many were done.  Because of recent struggles with the budget the city stopped the program.  GPA brought back the $1000 reward on this project.

Here the owner is awarded the $1000 grant.


Click here if you would like to read the Courier article about the unveiling.

The aluminum siders had covered over three windows and the fish scale siding.  Here is the gable window that was uncovered.  Luckily the sash was left in the attic.

The window to the right of the door and another around the corner were also uncovered.  It is unbelievable to me why they would cover up the windows on the house and drywall over the openings  inside.  The investor that bought the property plans to uncover the window on the inside.  Here the balustrade, apron and newels are being replaced.


The aluminum siders also chopped off the gable ornament on the porch.  It had never been painted over so a wonderful shadow was left to make a pattern for a new one.


I offered to make a new gable ornament for the owner at no cost to him as a way of saying thank you for unveiling the property.

Normally I would trace the pattern on a large piece of paper.  It is difficult to get an accurate pattern.  I have also used this method:

I took an electronic picture of half of the ornament as the two are the same.  Care has to be taken to take the picture straight on so it is not deformed.  The picture I used was not cut off on the left as this one is.  I printed the picture on an 8 1/2 X 11 piece of paper.

Using my printed picture I took it  to a print shop to have it blown up to the proper dimension.  I measured the picture I printed.  It is 10 1/16 long.  The actual mark on the house is 20 1/2 inches.

Actual dimension  divided by the picture dimension = percentage to be blown up.

I cut the printed picture into three parts to be blwon up labeling them so I am sure how they go back together.

To change 1/16 into decimal divide 1 by 16 to get .01265

20.5 divided by 10.0625 = 2.037 which rounded off  is 2.04 which is 204 %  so the picture has to be blown up by 204 percent.  It can be done on a home printer or take it to a print shop.  I took the three pieces of paper to a print shop and had each one blown up by 204%.  I then taped the new ones back together and cut them out for my full size pattern.

I always trace my paper patterns onto plywood so I have a permanent pattern that can be preserved and to make it easier to trace onto the final wood.  Here are the appliques I made:

Here are the appliques installed.

I also agreed to make newel caps to replace the three that were missing.  There was one left on the house that I used as a pattern. It is the white one in the picture.    I used cypress wood which has great rot resistance and coated them with preservative and primed them on all sides so they should last a long time.


Here is the front of the house primed with the balustrade, newels and appliques installed.  The owner ran out of good weather so the painting was not finished.  It is just primed.  Stay tuned for the final colors.


352 Prairie has been an eyesore and problem property in our 
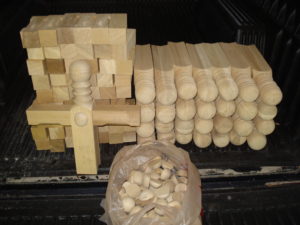
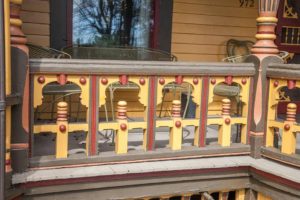
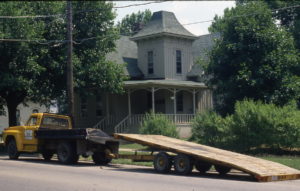
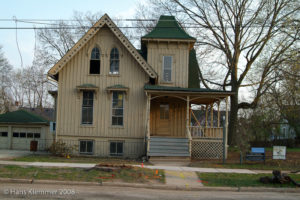
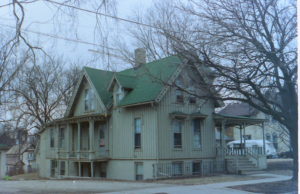
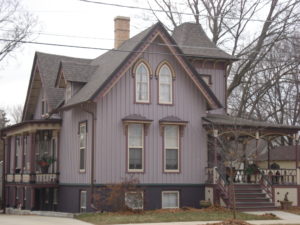
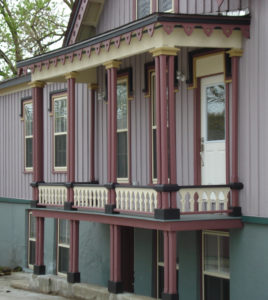
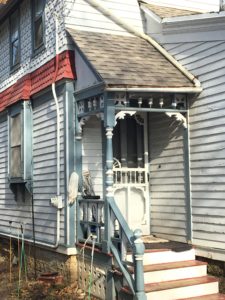
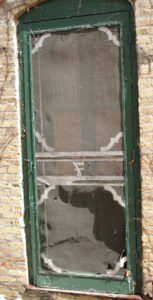
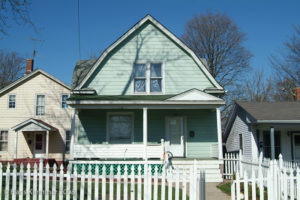
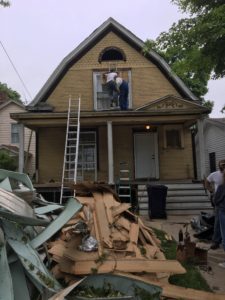
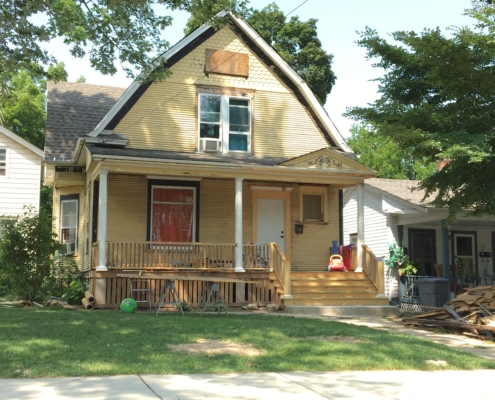
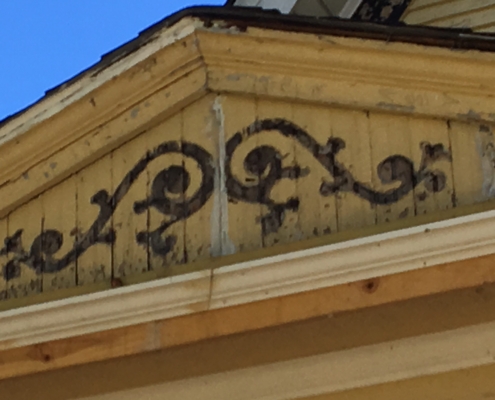
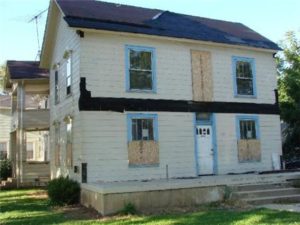
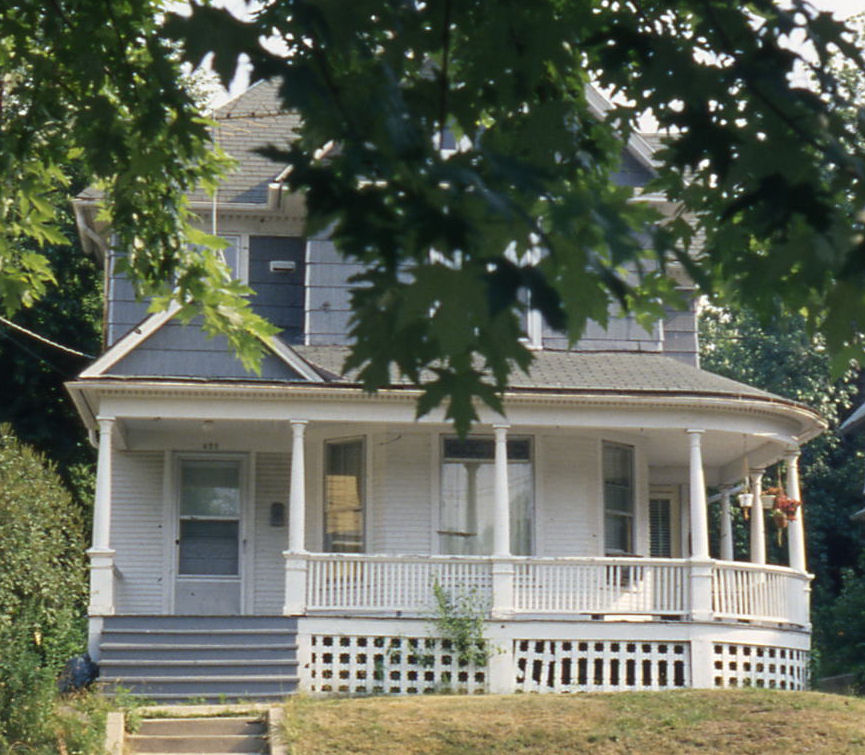
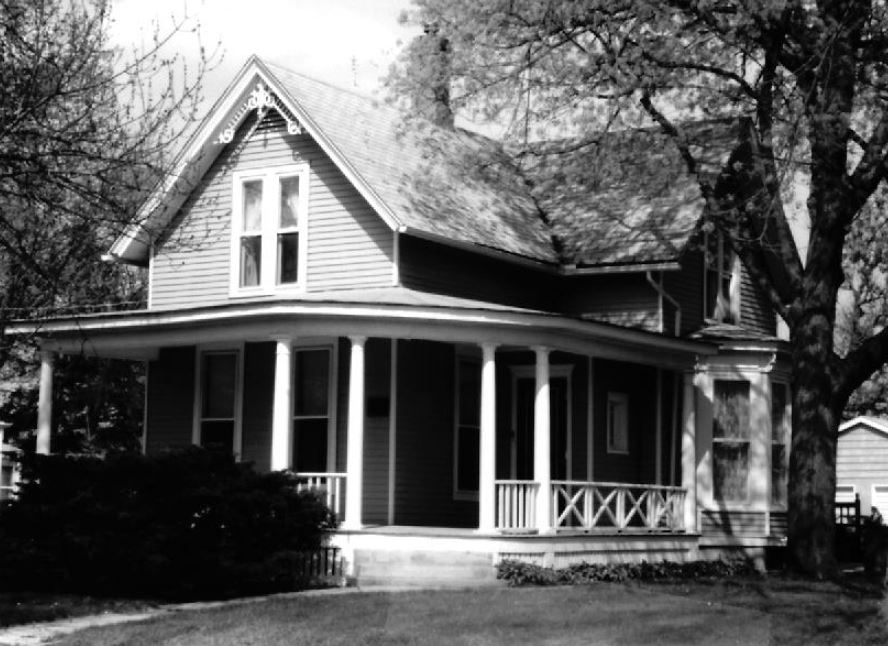
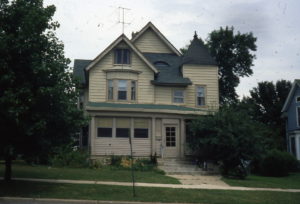
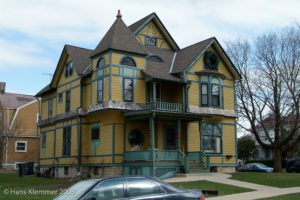
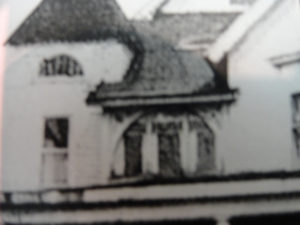
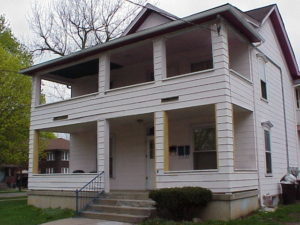
neighborhood for a long time.  It looked bad as seen at right and had a lot of police calls.  A flipper bought it and applied for downsizing and architectural rehabilitation grants from the city. He was set to get over $100,000 in grants to rehab the building. He gutted the interior, and tore off the aluminum siding and inappropriate porches. He  then realized he was in over his head and stopped work.  Soon after he got foreclosed upon. It sat as an empty eyesore for a few years. Another investor recently purchased the property and plans to live in half and rent the other. It has historically had two addresses one on Prairie and one on Chapel.


Here it is with the siding and porches off of the front.


The west side porches are shown on the left before they were taken off.


Here is the west side with new porches, new siding
and fresh paint.


Here are the brackets and corbels I made for the new west side porch.

Here is a close up view of the brackets and corbels installed.

Here is the finished porch.

Keep posted for the front porch to be remade.